Live vitals for Kamino, the mini PC everything here runs on. The real-time monitor streams the last 60 seconds of CPU, memory, network, power and temperature while you're here; toggle it off any time to let the box rest.
System
Kamino · …
live
Hostname…
IP Address…
Uptime…
Disk…
Processes…
Network (total)…
Active Users…
CPU Power…
Real-time monitor
Last 60 seconds · sampled every second
The live monitor is paused so the box isn't streaming stats to nobody.
CPU —
Memory—
Network—
● in● out
CPU Power—
Temperature—
dockerd memory—
Memory by container
Live per-container usage · streamed only while the monitor is on
idle
Turn on the live monitor above to stream per-container memory over the Docker socket. It stops the moment you turn it off or leave.
Over 5,000 hours in CAD and 3,000 on the printer have made design for manufacturing second nature: real tolerances, real failure modes, and fast iteration. These are functional prints I designed to solve a specific problem.
print · lithophaneBuilt
Lithophane Lamp →
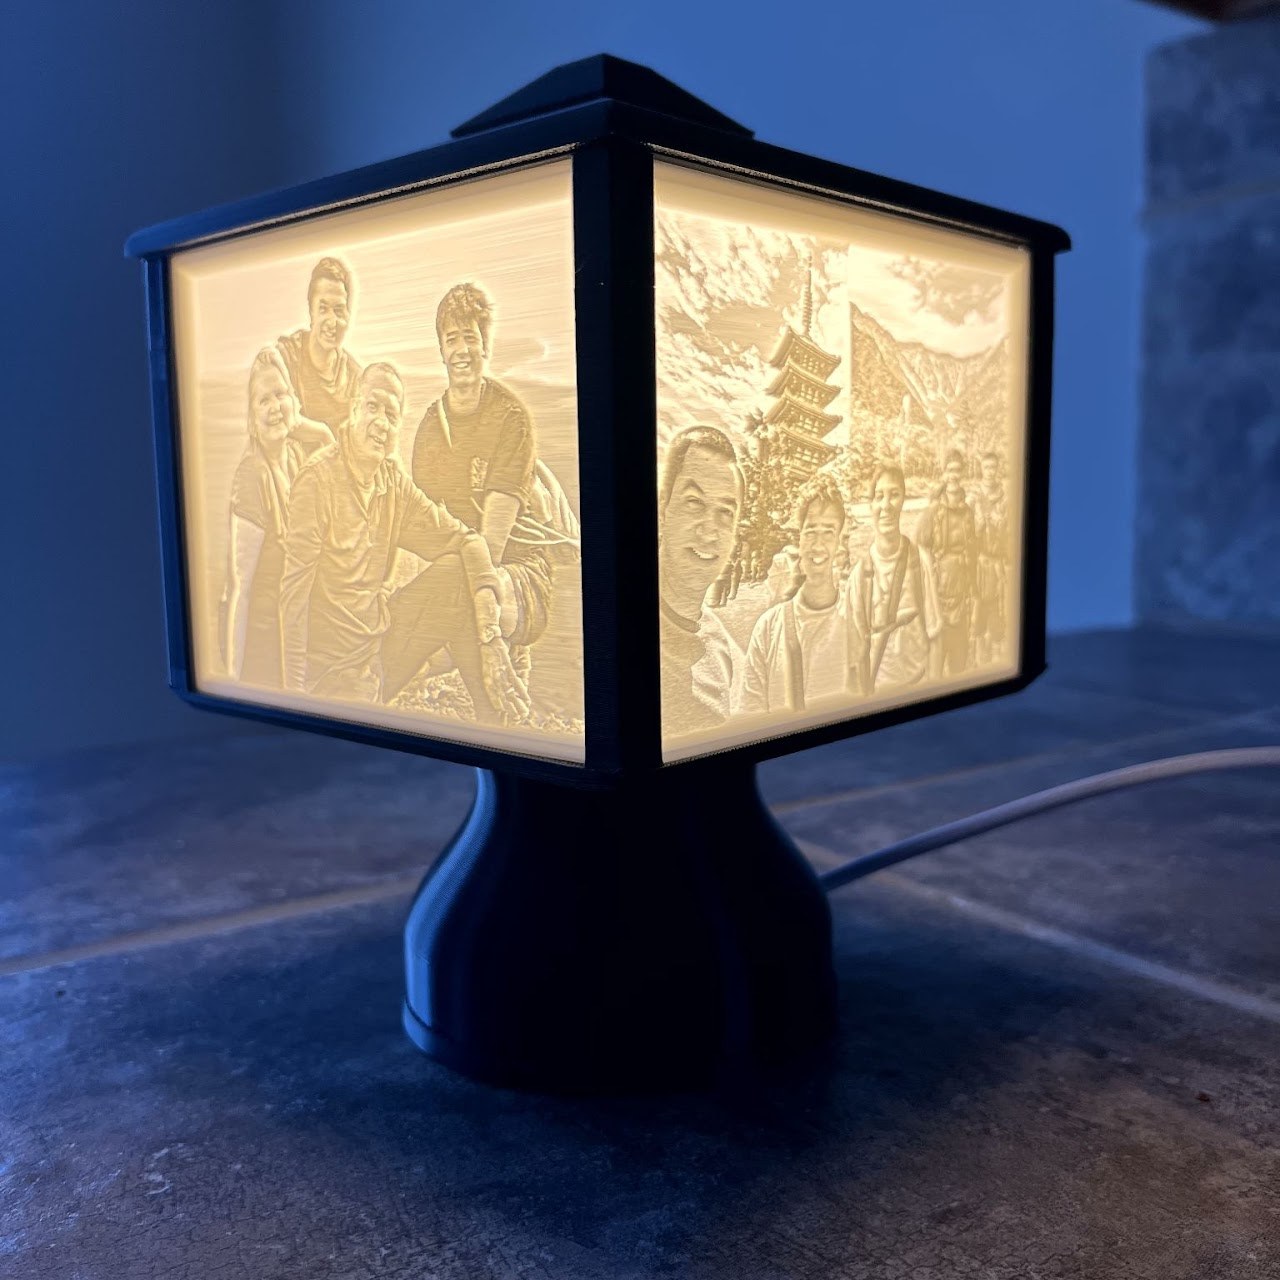
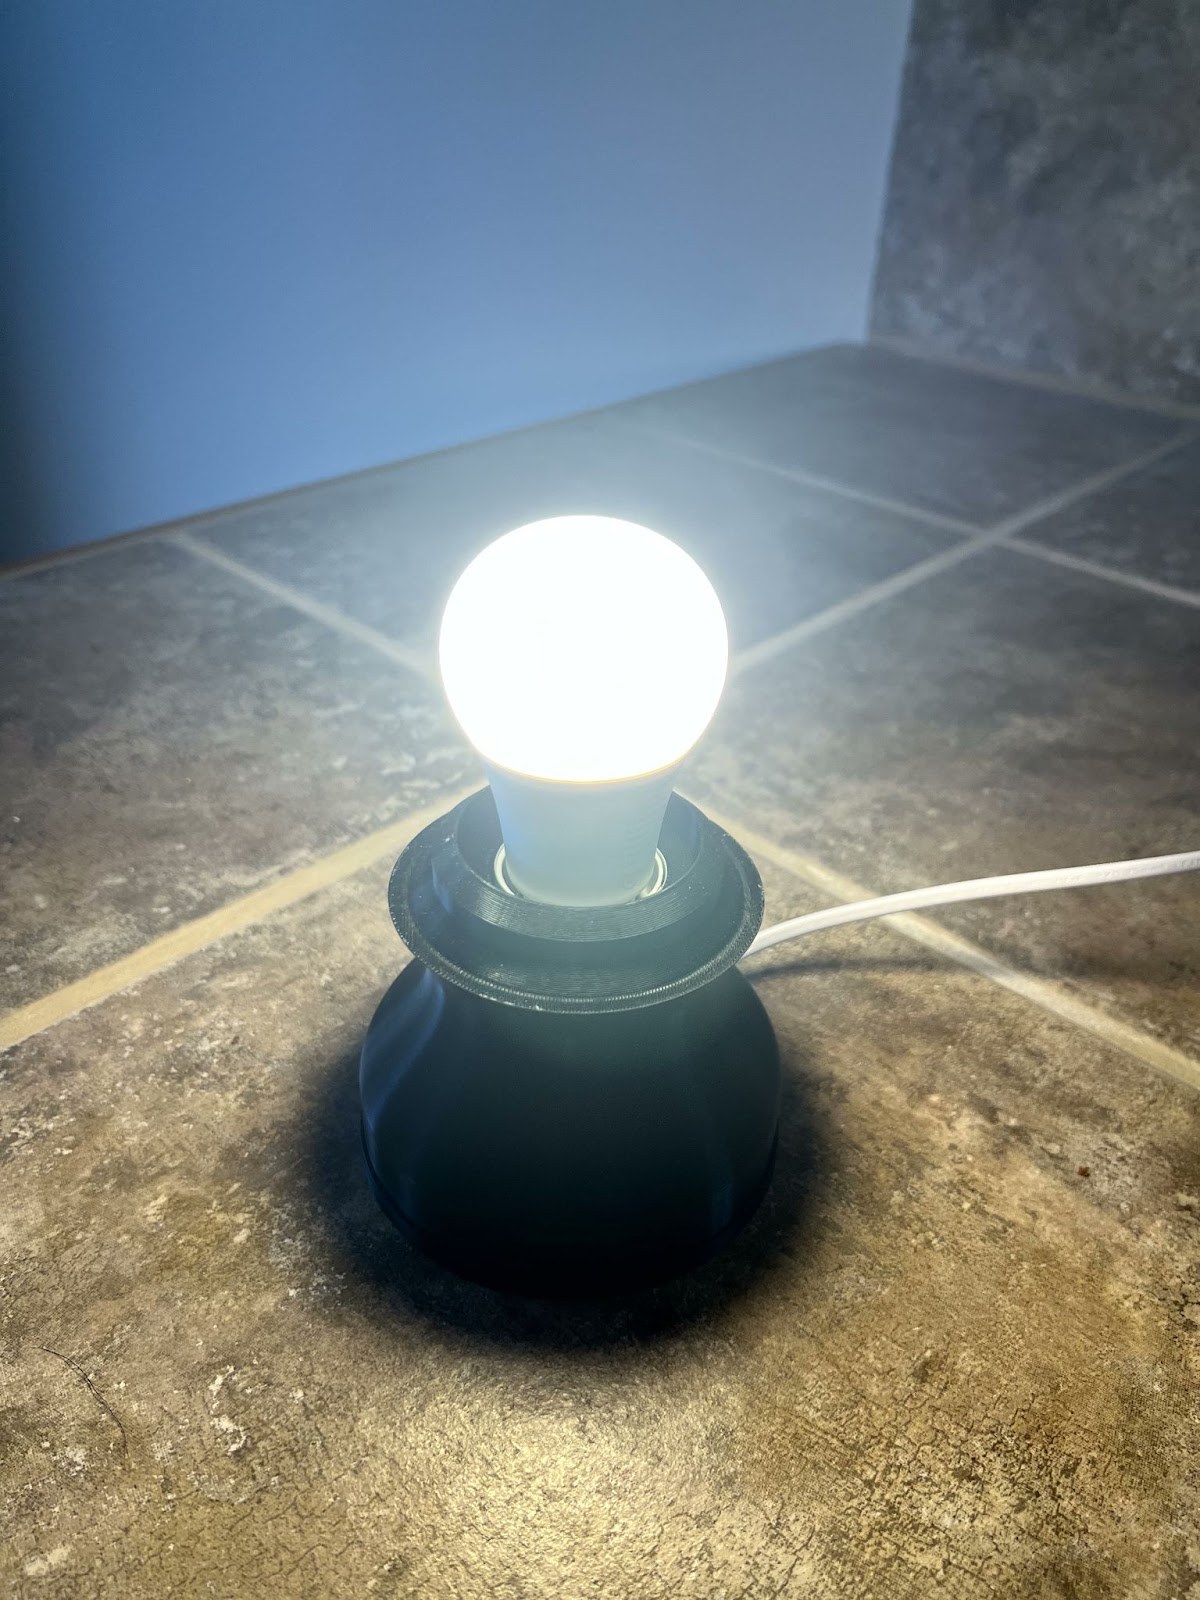
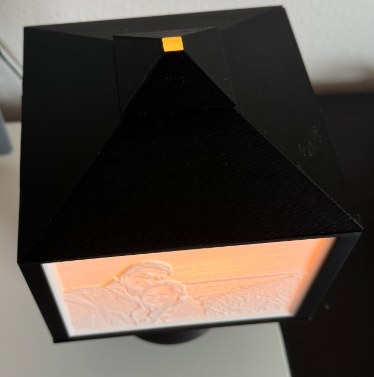
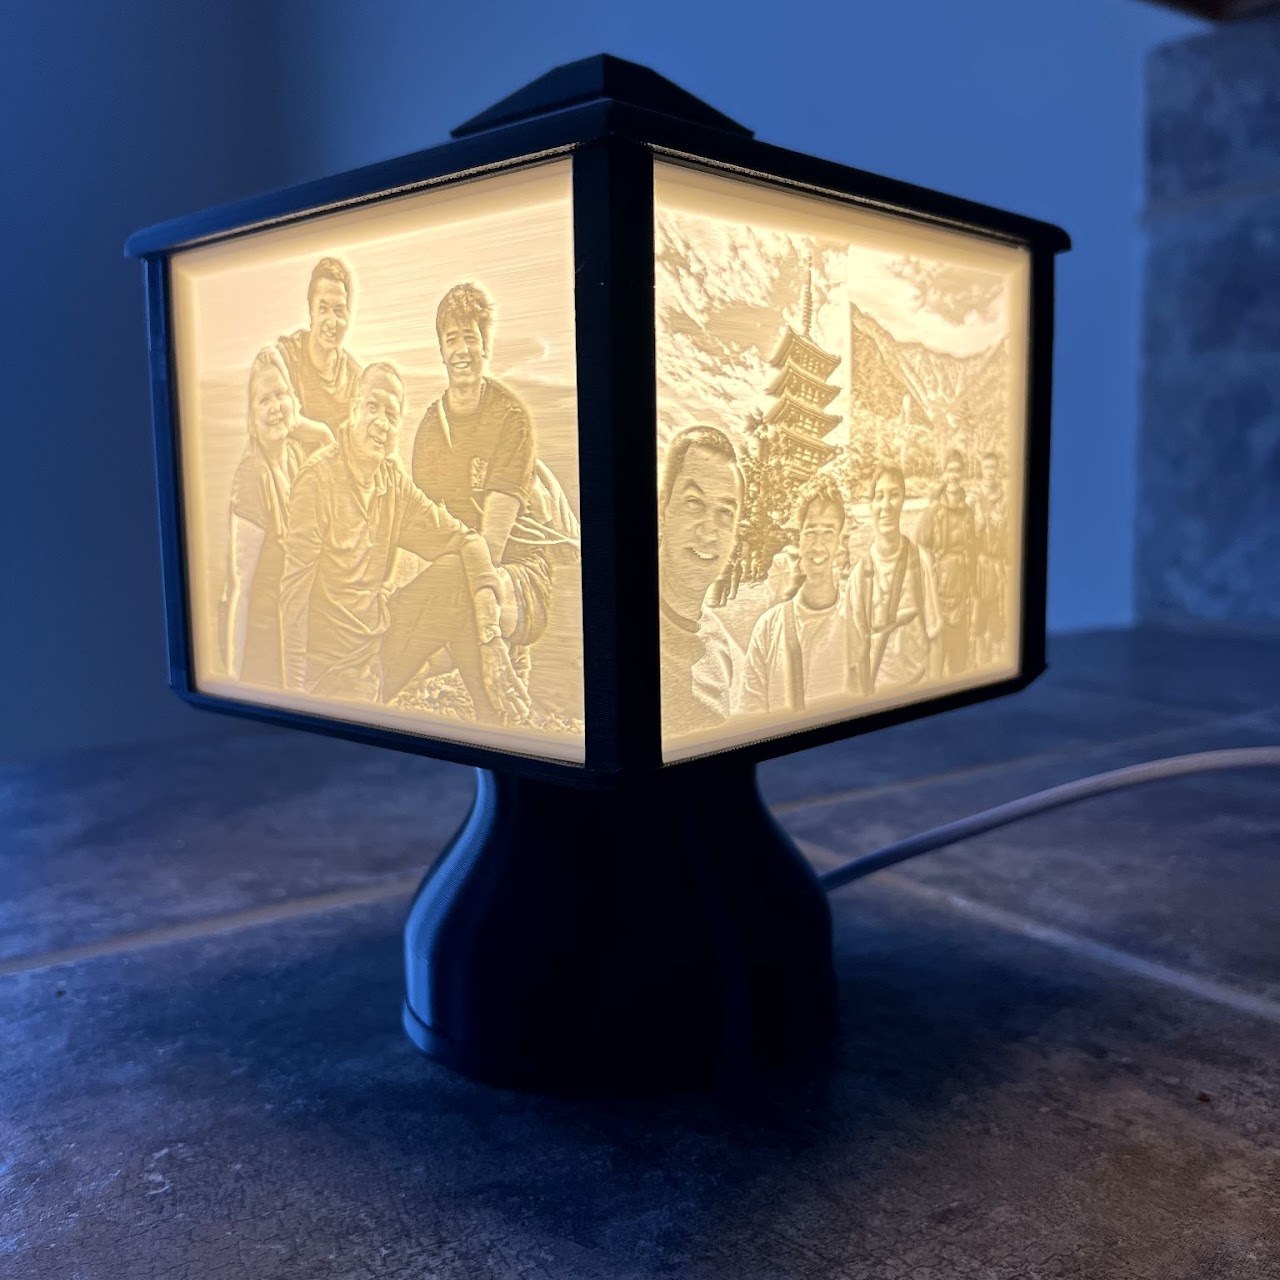
A gift-ready lamp built around a standard E26 bulb in a 3D-printed black PLA housing, with swappable lithophane panels that turn photos into backlit images. The panel holder rotates independently of the base, so you can change images without tangling the cord. The housing wraps an off-the-shelf brass lamp base and vents out the top, so the PLA holds a 100W incandescent bulb for over 24 hours without deforming. Printed as gifts for friends and family, so it has real-world use behind it.
3D PrintLithophane
print · cupholdersBuilt
Jetta Cupholders →
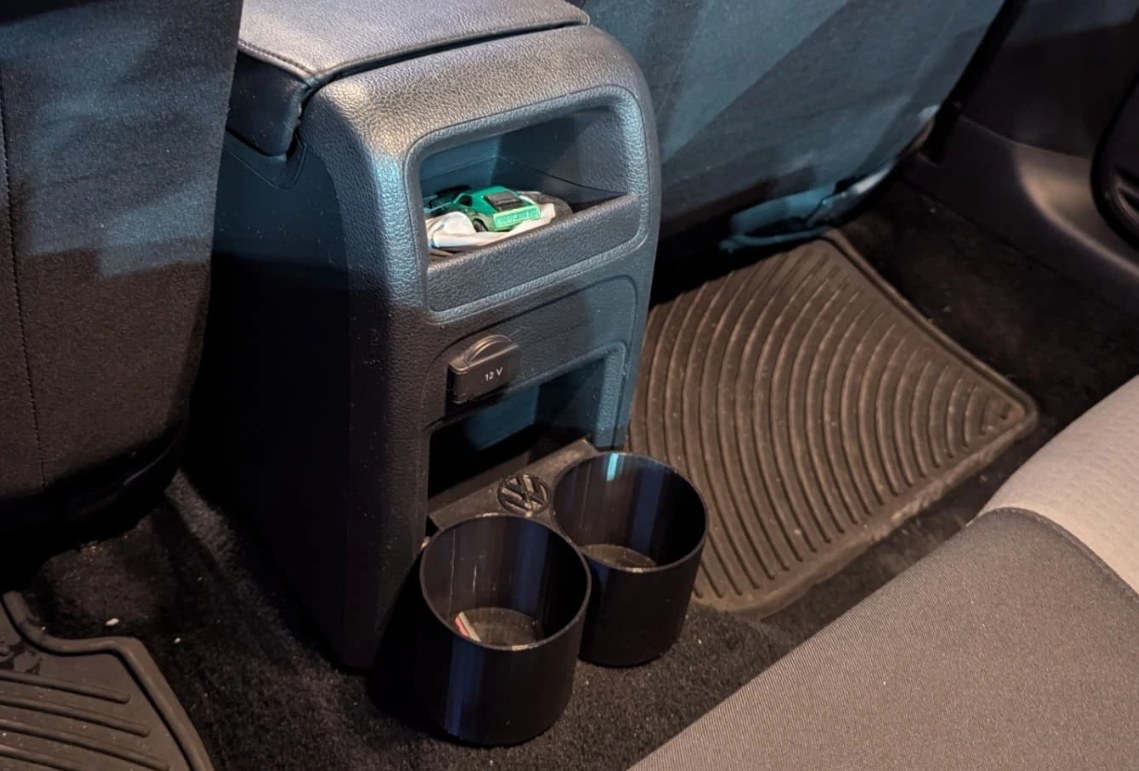
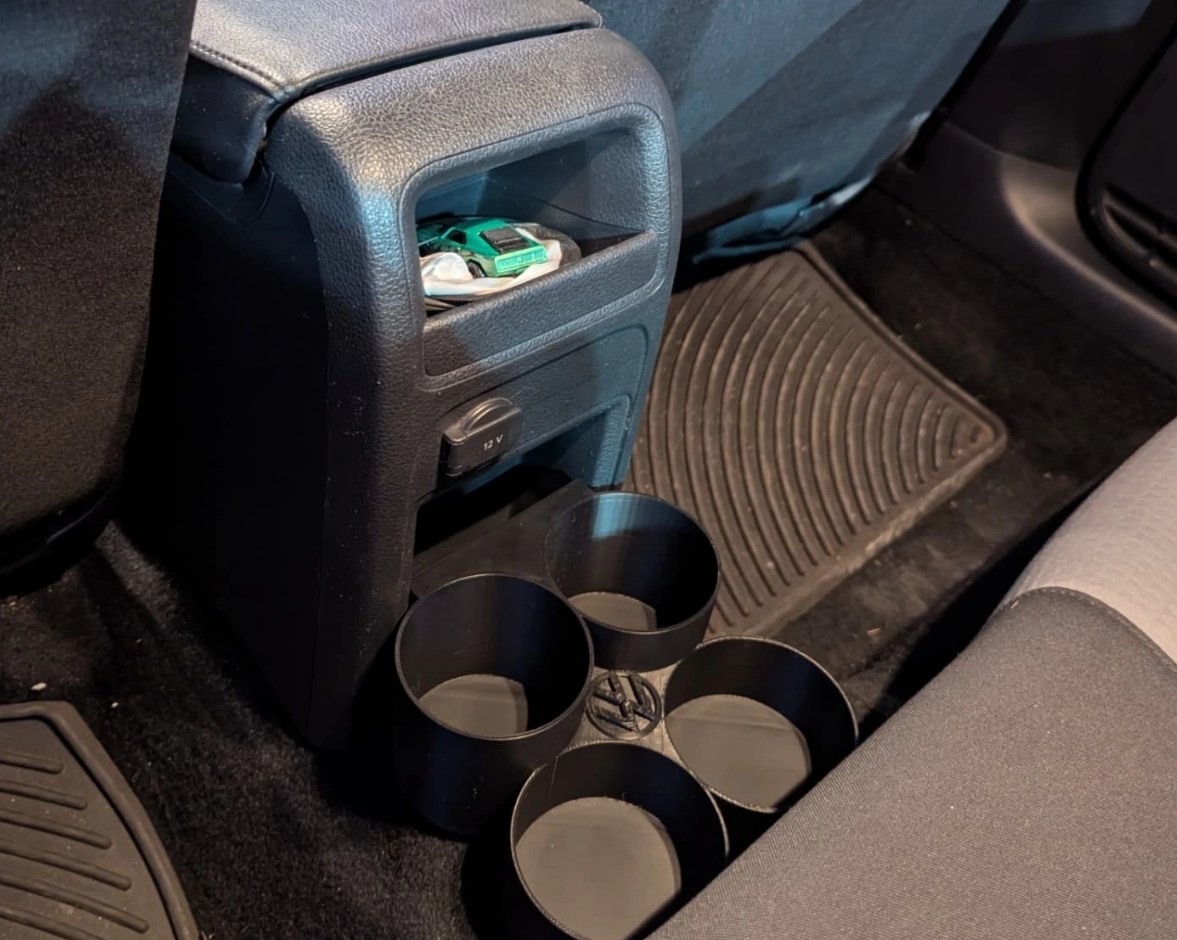
Custom rear-seat cupholders for a 2017 VW Jetta that shipped without them. They clip onto the existing storage cubby and transfer load to the floor tunnel, so there is no permanent change to the car. Prototyped in PLA, then reprinted in PETG after the first version softened from heat, and iterated up to a four-cup layout.
3D PrintPETG
print · tp-holderBuilt
Toilet Paper Holder →
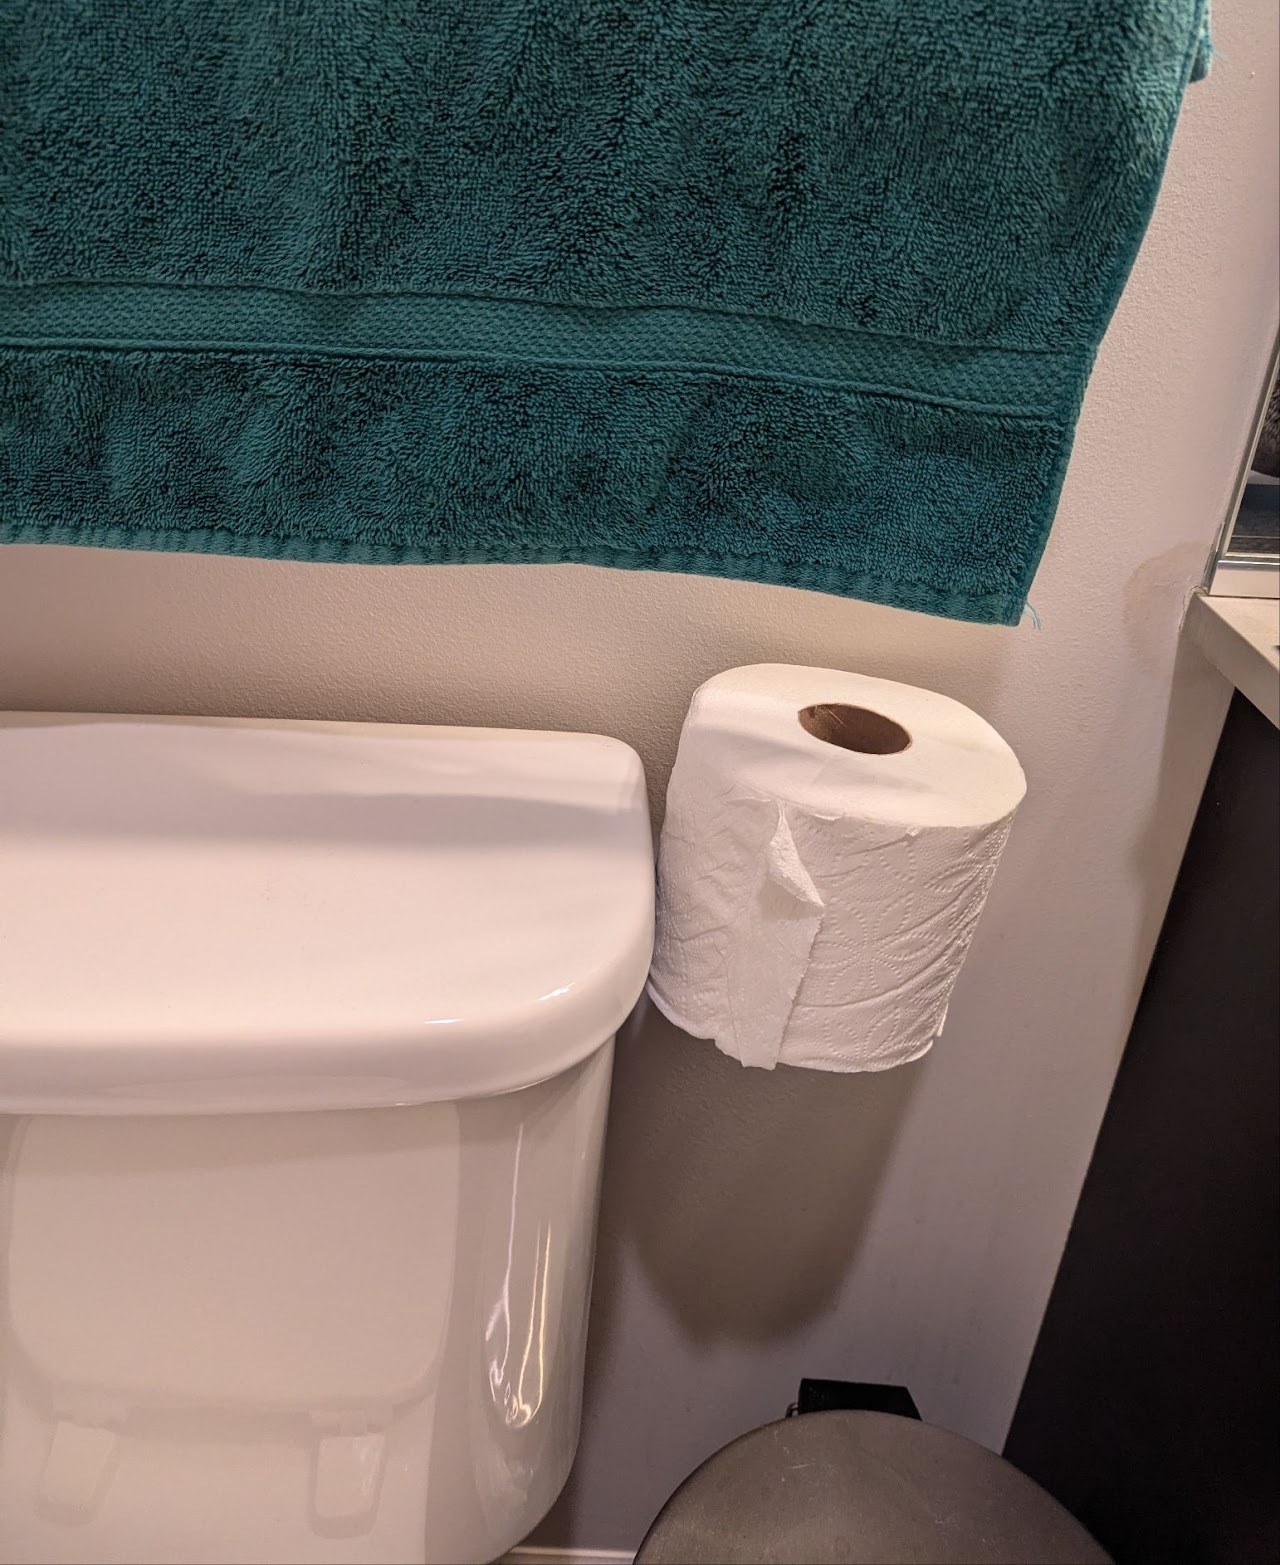
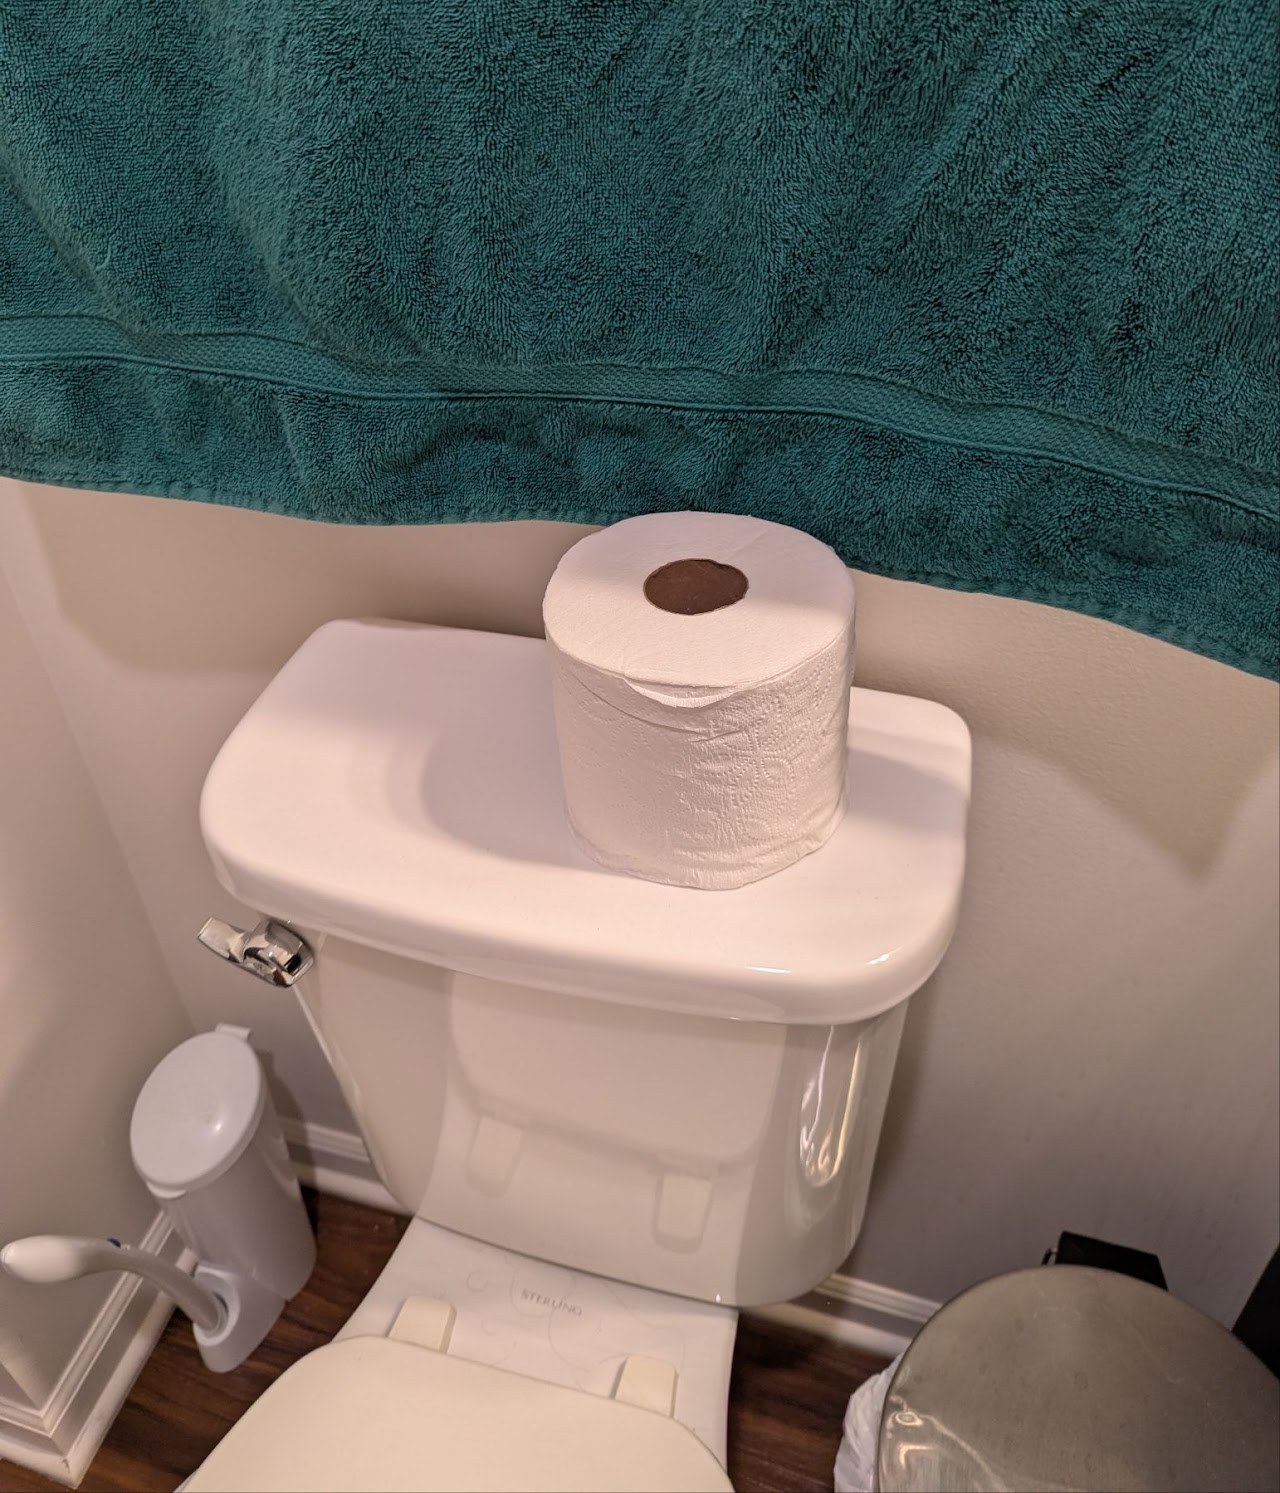
A side-mounted holder that clips to the toilet tank and moves the spare roll off to the side, solving a real clearance problem: a low towel rack that blocked storing a roll on the tank. Designed around fixed bathroom hardware with no modifications, keeping both towel clearance and trash-can access. Modeled in Fusion 360 in about 15 minutes and printed in PLA on a Bambu Lab A1.
3D PrintFusion 360
Gallery of Other Prints
Smaller everyday prints: quick repairs, workspace fixes, and a couple just for fun. Tap any print to enlarge.
Hands-on electronics: wiring, power, and enclosures for things I actually use.
elec · offroad-lightsBuilt
Off-Road Lights →
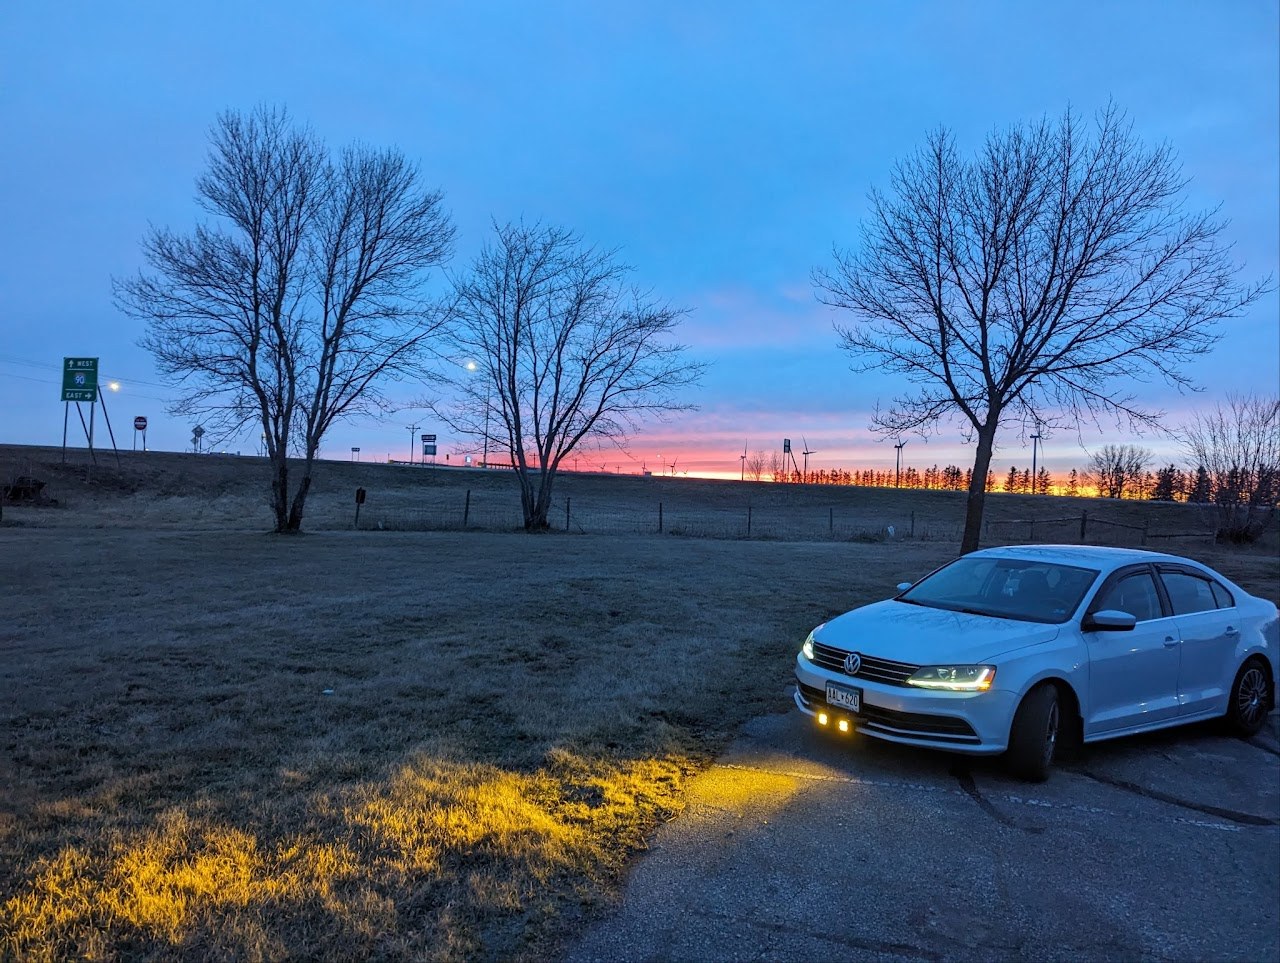
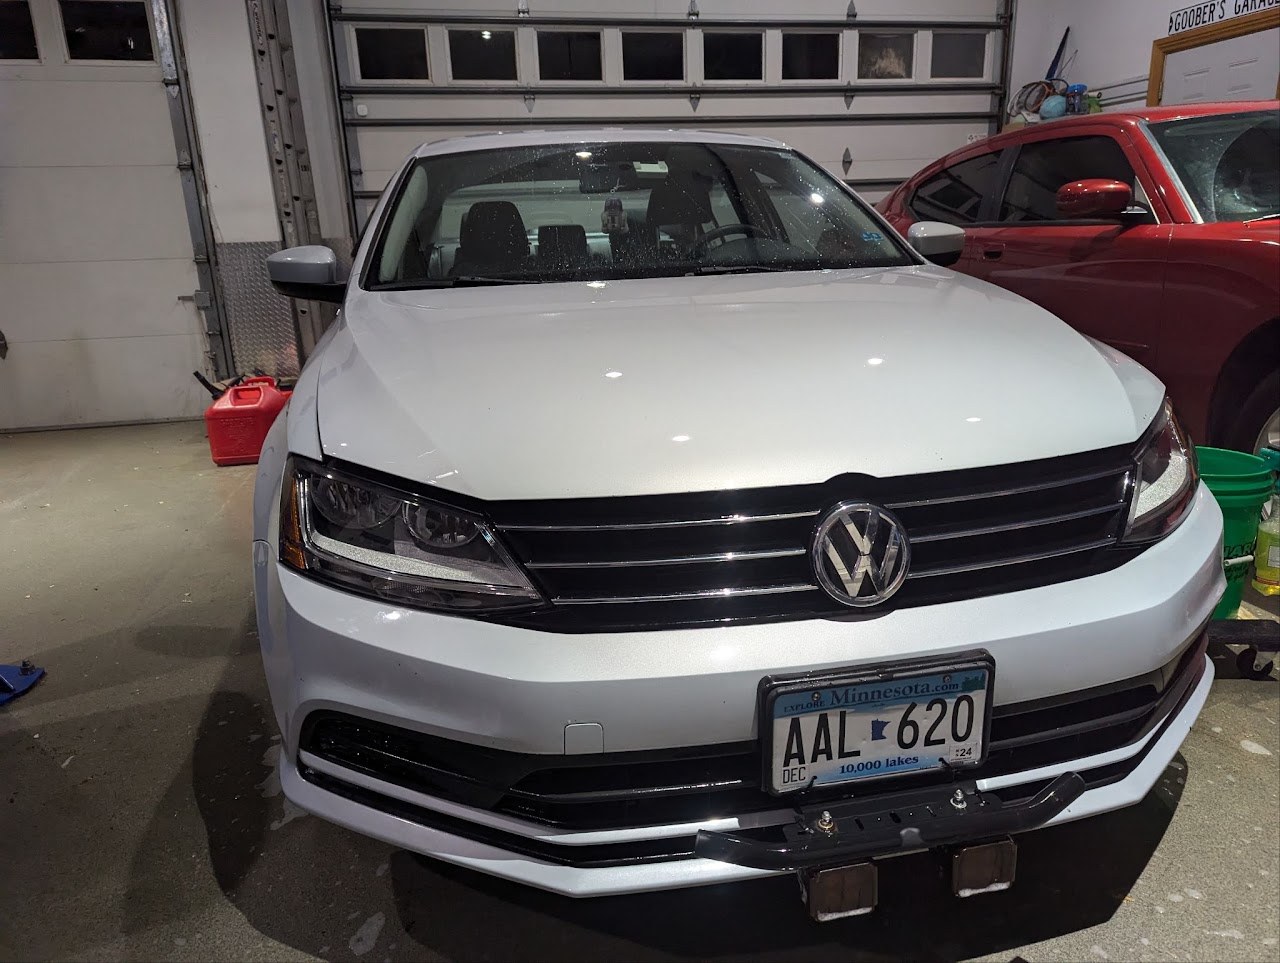
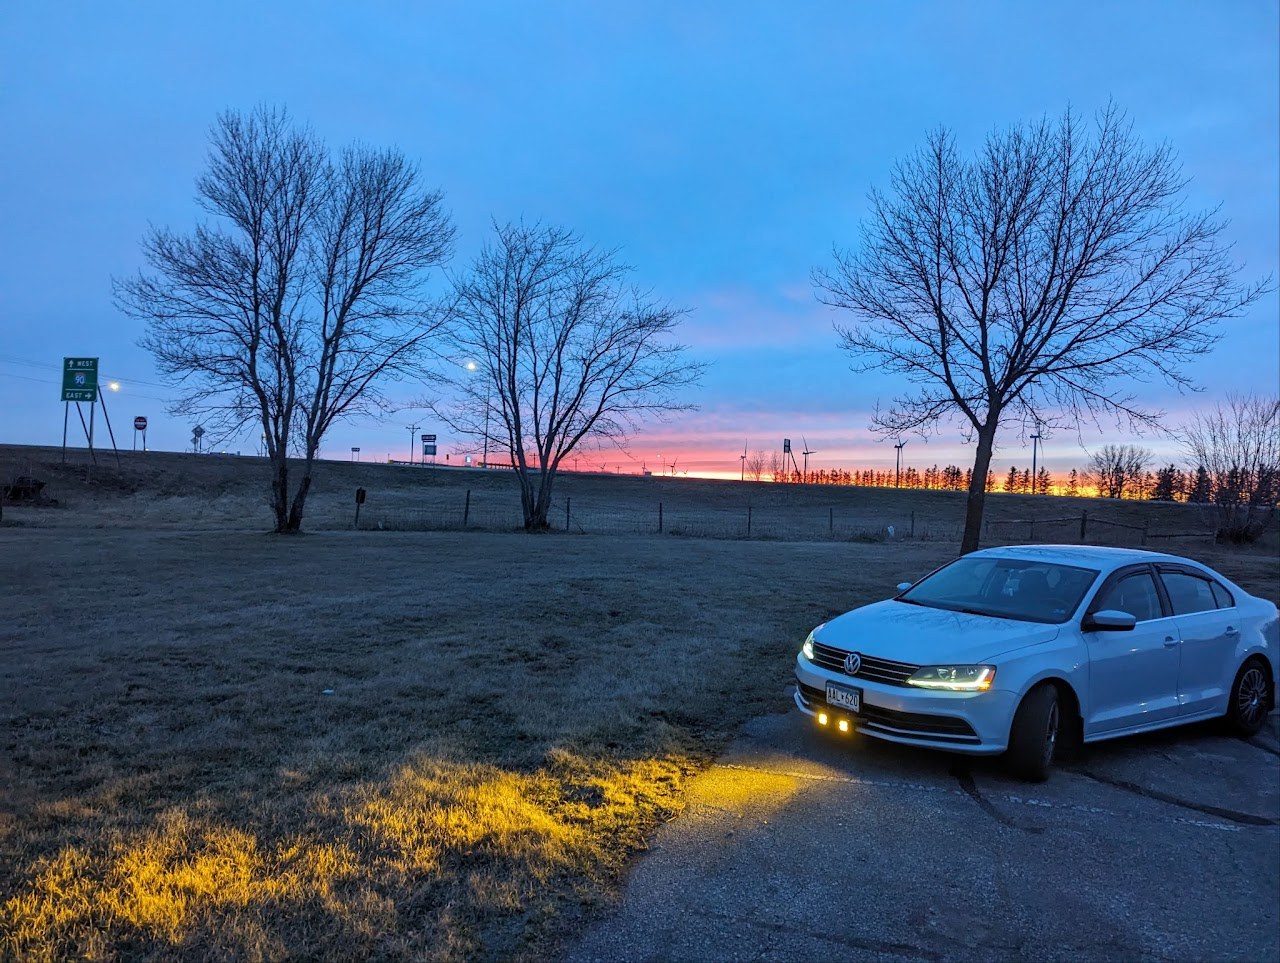
Auxiliary spot lights added to a 2017 VW Jetta for long-range visibility on dark rural backroads. Mounted on a license-plate bracket with no drilling and full reversibility, wired to a fused relay straight off the 12V battery with two control paths: a factory-style fog-light switch and an independent toggle. Amber lens covers warm the beam for snow and fog, and it has run over 60,000 miles across nearly three years and multiple Minnesota winters.
Wiring12V
elec · bt-speakerBuilt
Bluetooth Speaker →
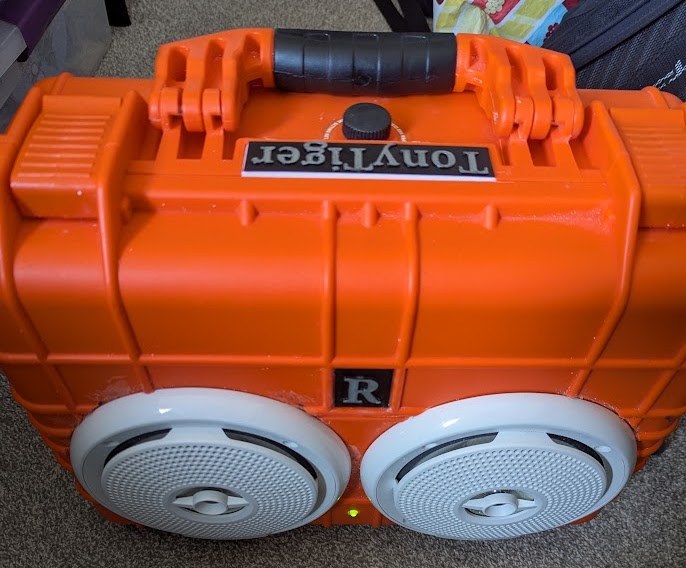
A battery-powered, waterproof Bluetooth speaker for lakes, campsites, and canoes, built to float if it goes overboard. Dual marine speakers and a 100W-per-channel Class-D amp run off a DeWalt 20V battery, with a buck converter feeding a 5V USB charging port, external media and tone controls, and silicone-sealed penetrations in a gasketed case. An open-top 3D-printed amp mount dropped the amplifier temperature from 65°C to 50°C.
Game servers I run on Kamino. Two Assetto Corsa race servers, each managed from a web panel that edits its config and redeploys on demand, plus a Minecraft panel where anyone can spin up one of three worlds, Java or Bedrock. All live now.
A bit about me, and the design system that ties this site to my resume, portfolio, and everything else I make.
I am an engineer who likes to stay close to the product: how it is built, how it is used, how it fails, and how it gets better.
By day I bring up embedded hardware at CNH and build the automated C++ and Python tests that validate it. On my own time I design, print, code, and wire my own projects, many of which run on the home server behind this site.
I studied Virtual Product Integration along with Web Programming and Design at Purdue, which is a roundabout way of saying I got comfortable moving between CAD, code, and circuits. Off the clock you will find me skiing, canoeing, tinkering with my car, or running the 3D printer.
RoleSystems Engineer, CNHBasedChicago areaFocusHardware and software integration, test automation
// the system behind this site
Everything I make shares one look, so my resume, portfolio, and this site read as one set. Here is the system.
01 · Positioning
Engineer who works where hardware meets software, and builds the tests that prove it holds up.
Tagline: Where design meets real-world performance.
02 · Palette
Electric Violet#6C4CE0
Violet Ink#332B7A
Violet Light#8E79F0
Ink#111318
Steel#3E4A53
Paper#F7F8F9
One accent, used sparingly. Ink for text. Never two accents competing.
03 · Type
Rohan S Agarwal
SYSTEMS ENGINEER · MECHANICAL · SOFTWARE · EMBEDDED · TESTED
Inter across everything: name, headings, and body. Clean, legible, and free, so the resume, the portfolio, and this site all render identically.
JetBrains Mono handles the terminal flavor and small labels.
04 · The Mark
The RSA cube.
An isometric cube with one letter on each visible face, R, S, and A, so all three read as equal. It nods to the CAD and 3D-printing side of what I do, and it is the mark everywhere: the favicon, the app icon, and an embossed print.
05 · Voice
Lead with impact and numbers, not job-description language.
Short sentences. Real verbs. No corporate filler.
Range is intentional: comfortable across mechanical, software, embedded, and electrical.
Quiet confidence. Let the specifics do the bragging.
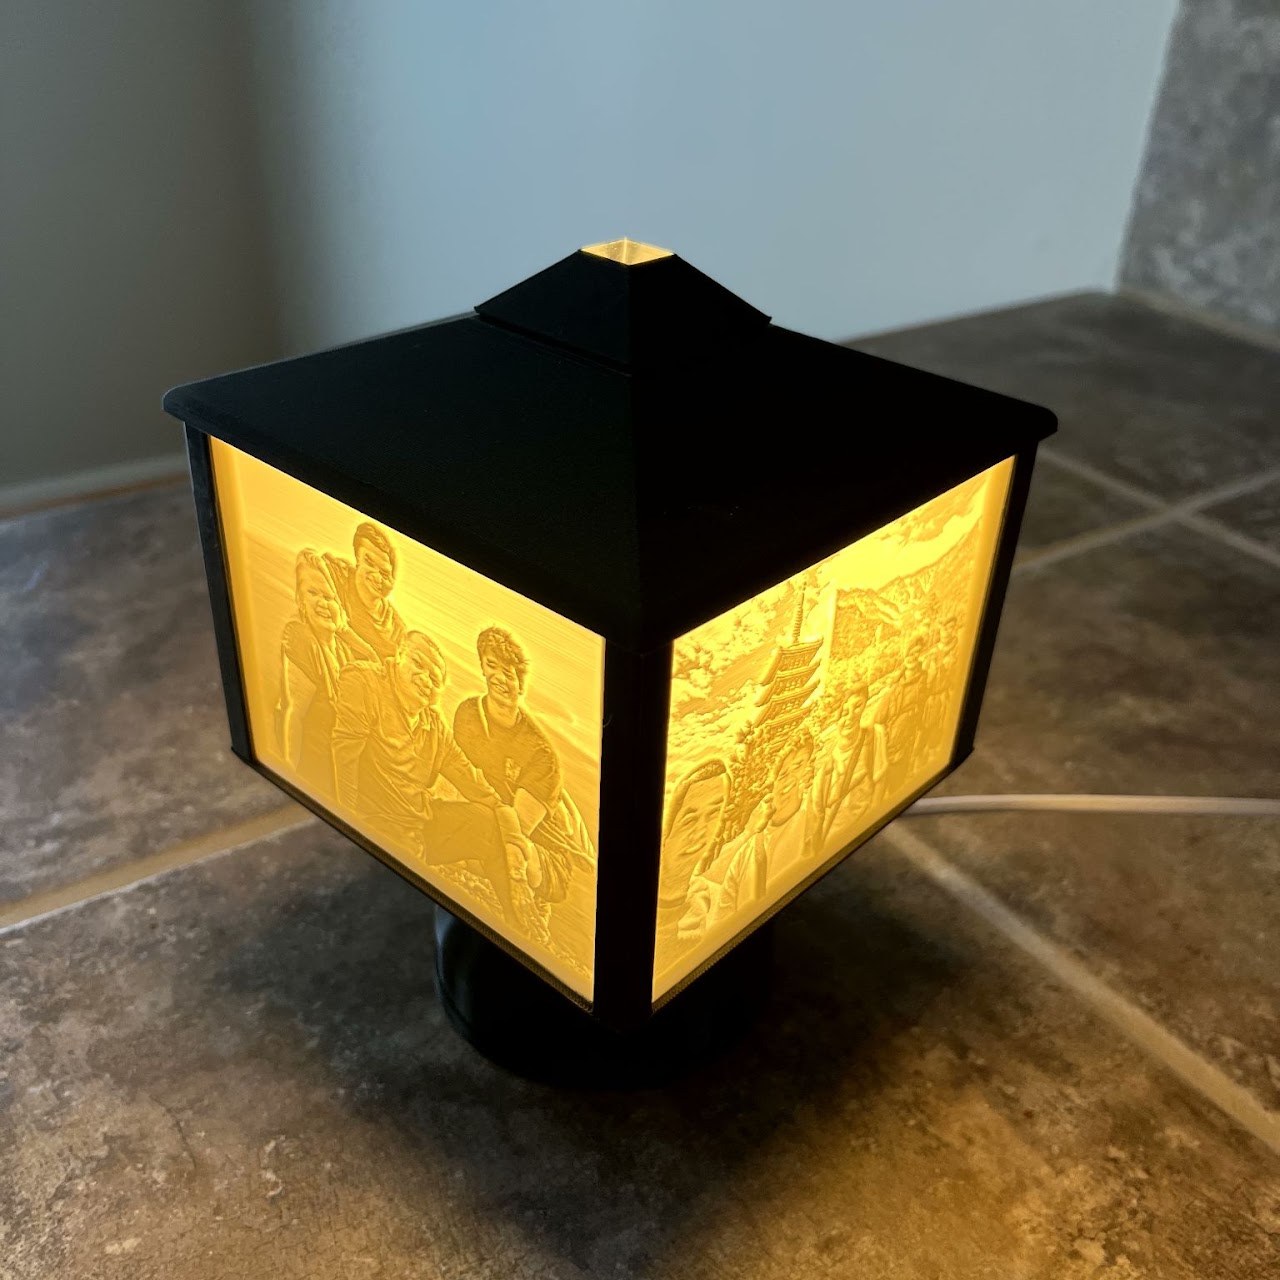
These lamps were designed as fully functional, gift-ready products that combine custom 3D-printed components with off-the-shelf lighting hardware. Each lamp uses a standard E26 light bulb housed inside a 3D printed enclosure, with removable lithophane panels that transform photographs into illuminated images.
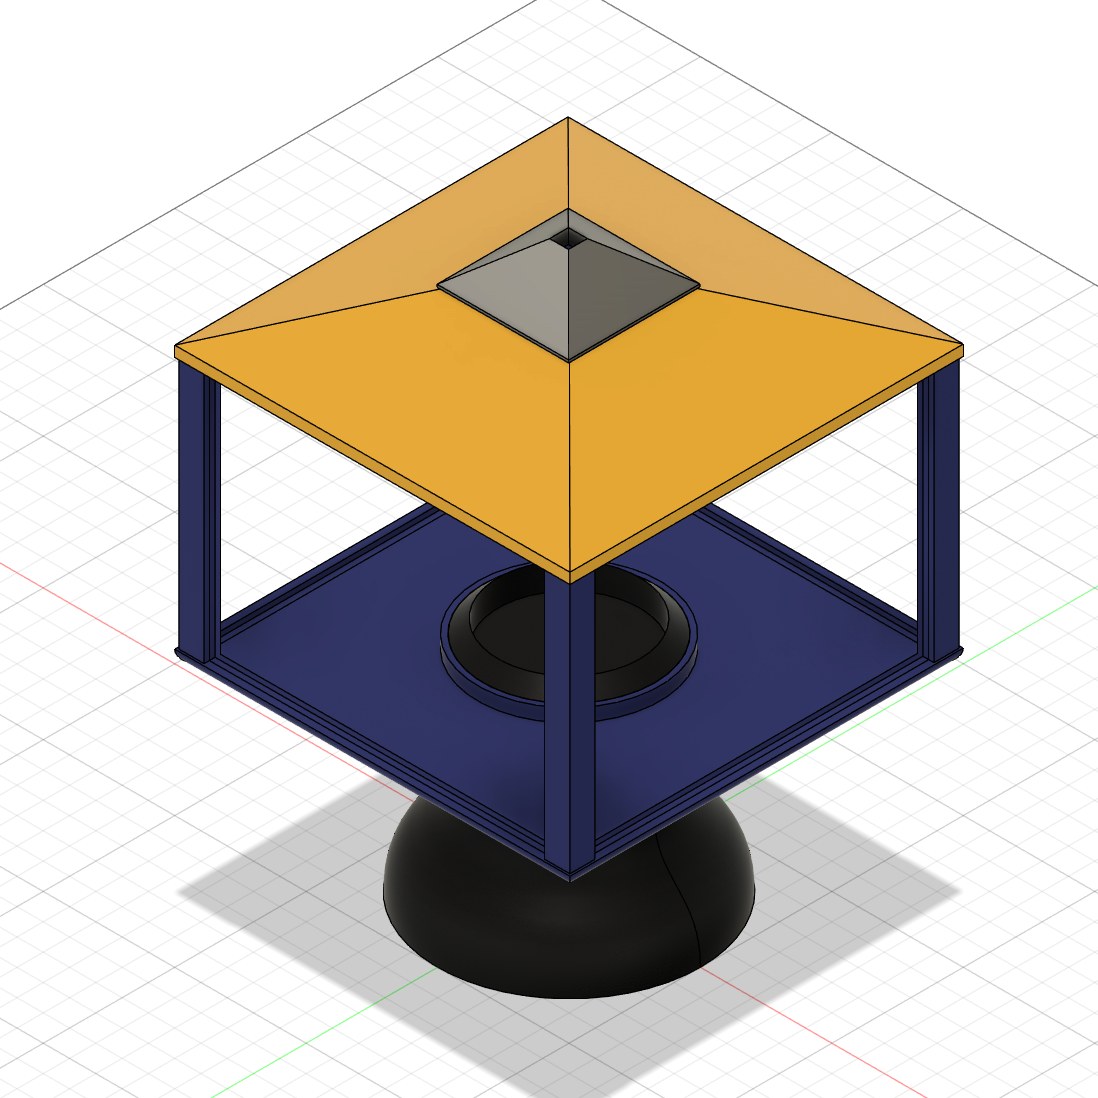
Different colors were used in the digital assembly to make the parts easier to distinguish.The housing was all 3D printed in black PLA to contrast the lithophanes.
Ensure safe clearances, heat dissipation, proper fit, and ease of assembly
Design for repeatable 3D printing and gifting
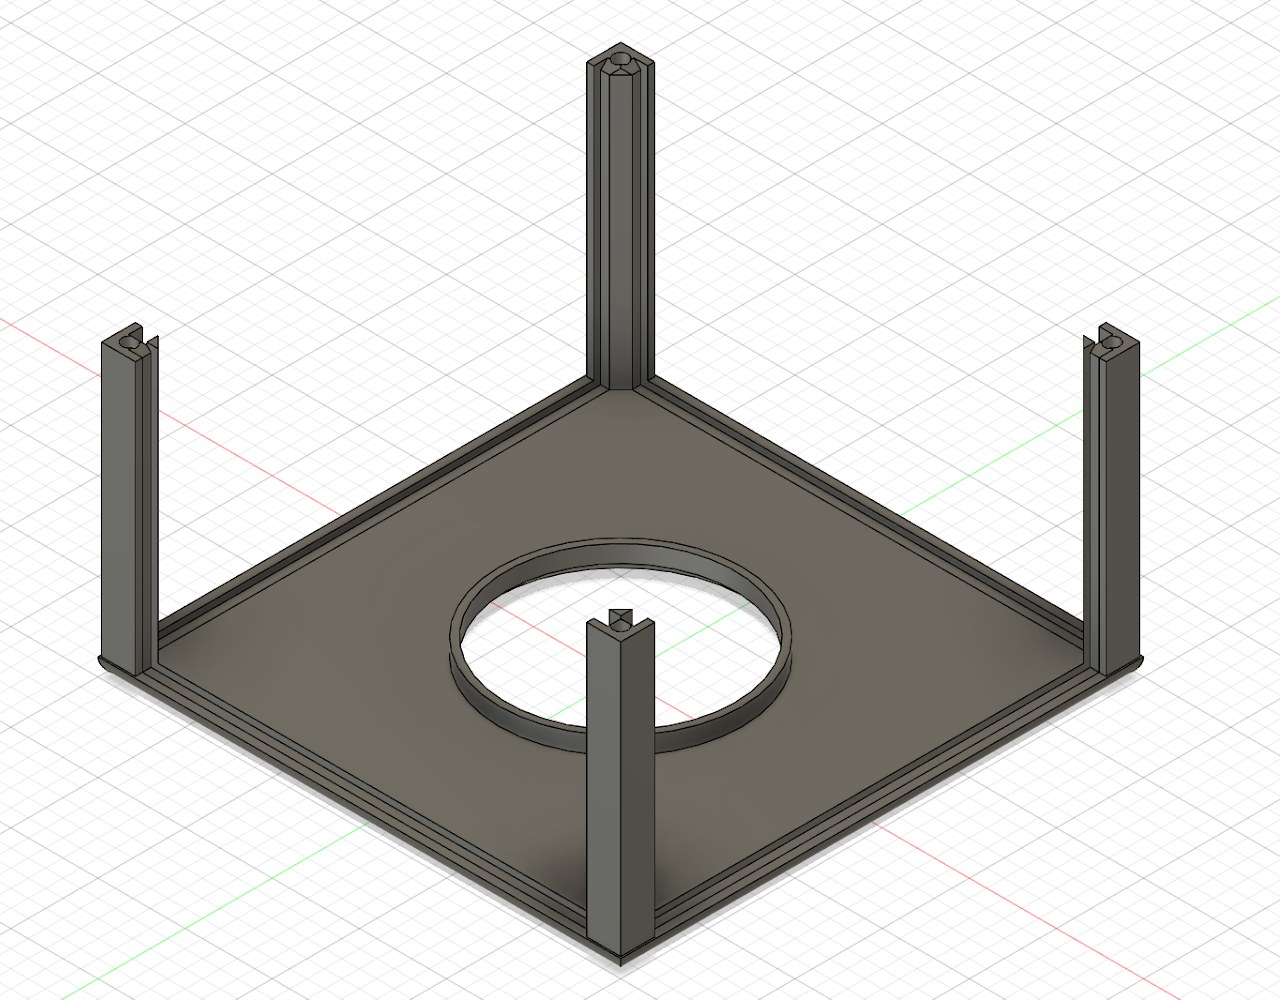
Allow the lithophane holder to rotate independently of the base, so the user can view different lithophanes without turning the base and tangling the cord
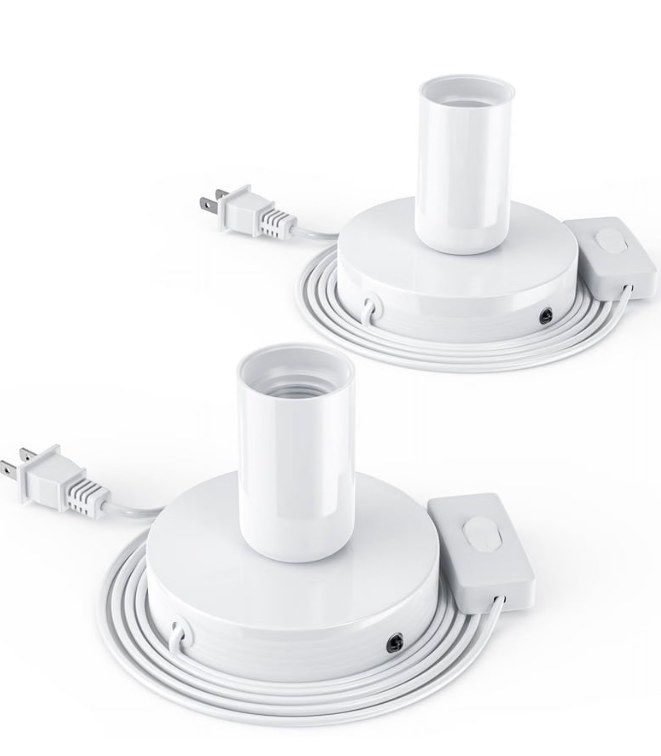
Off-the-shelf E26 bases usedFull 3D printed baseA hole in the top allows for excess heat to vent outside of the lithophane.
Mechanical Design
Special attention was paid to tolerances and part interfaces so that printed components would fit reliably with commercially available lighting hardware without modification.
The standard E26 base also makes the bulb easy to replace if it burns out, or to swap for a Wi-Fi-controllable bulb.
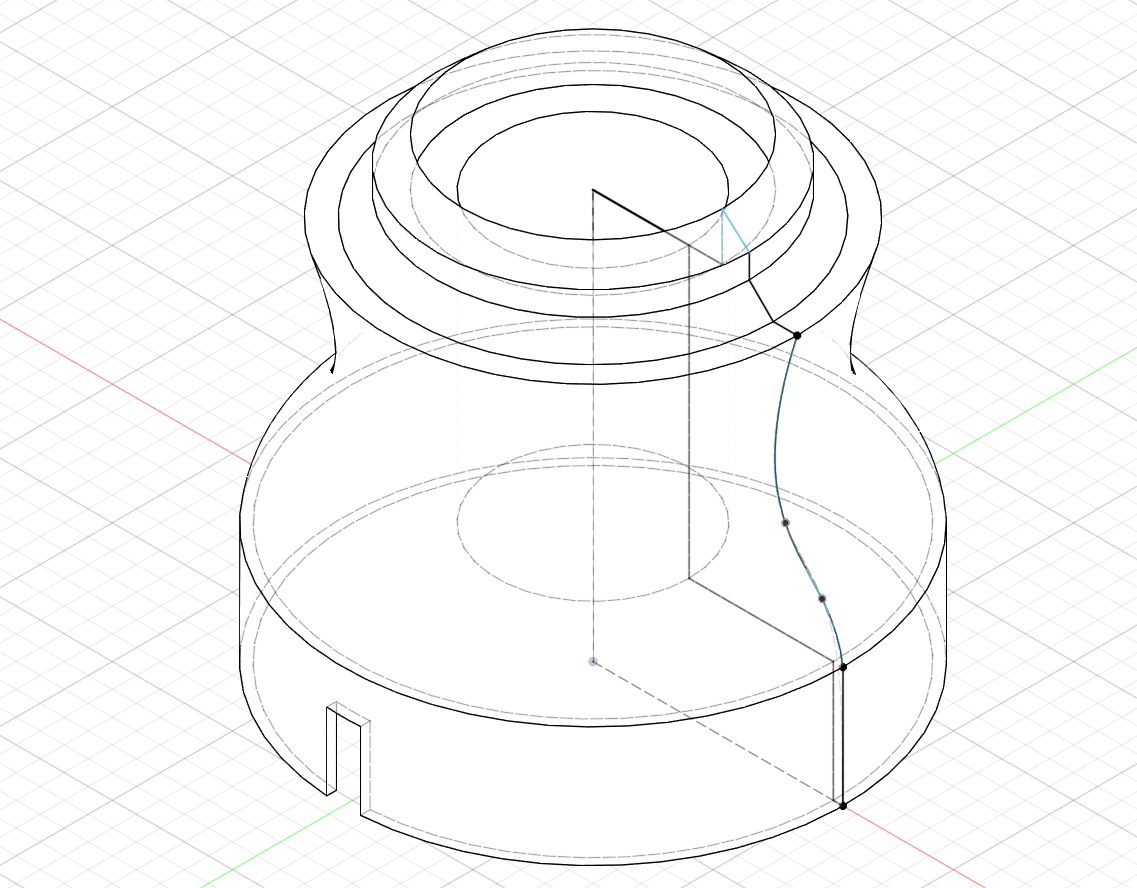
Wireframe of base sketch/revolve. This shows the hole in the middle for the E26 base, as well as the slot in the base to run the power cord out of.Base slide holder of the lithophane. The circle shape in the middle allows the lithophane slides to rotate, without having to rotate the base as well.
Manufacturing & Materials
All structural components were 3D printed in PLA. The bulb threads into an off-the-shelf brass lamp base, so the printed housing wraps that base rather than sitting against the bulb itself, and a vent in the top lets hot air escape. With that arrangement, the PLA was validated against a 100W incandescent bulb for over 24 hours without deforming.
Lithophanes were generated from photographs and printed to achieve consistent light transmission and image clarity when illuminated.
Print orientation, wall thickness, and part layout were selected to balance strength, surface quality, and print time. Where possible, multiple components were designed to be printed together on a single build plate, improving manufacturing efficiency and reducing total production time.
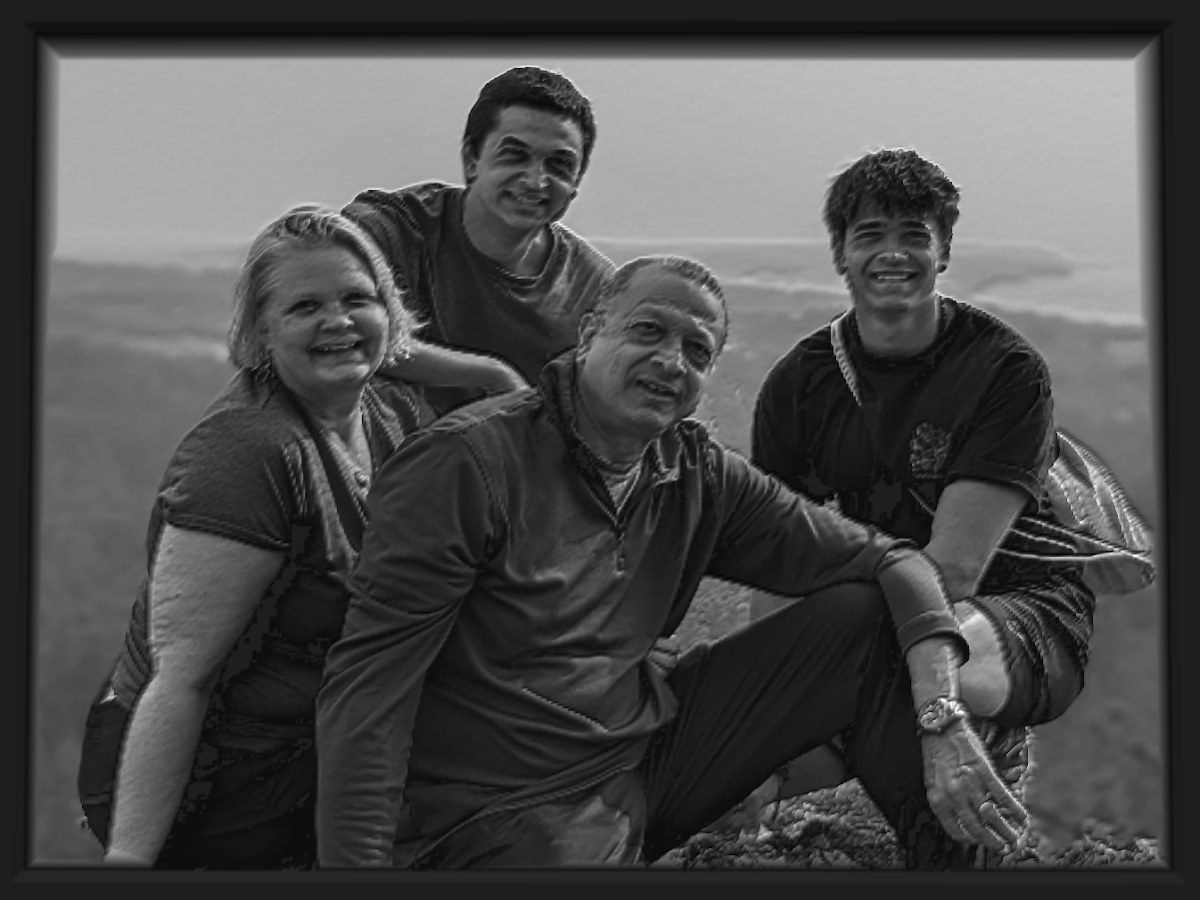
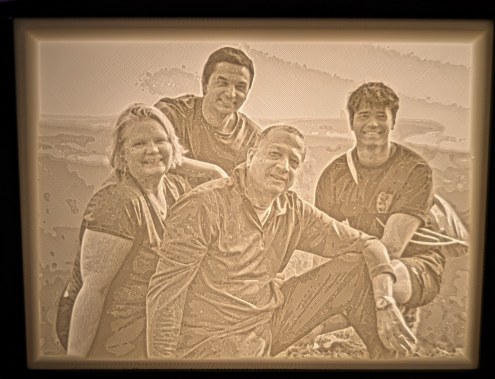
Original imageLithophane generated
I used itslitho.com to convert existing images into lithophane STL files for printing.
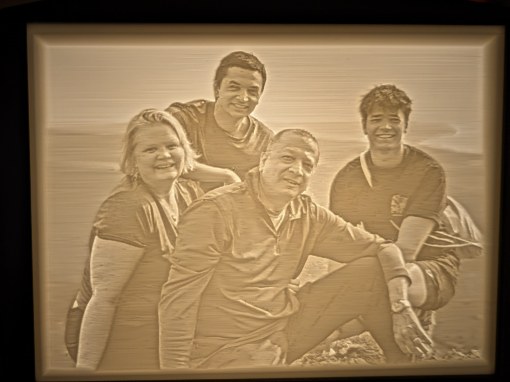
Test slide was printed laying flat on the build plateTest slide printed in the vertical orientation
From these test prints, it was determined that all slides going forward would be printed in the vertical orientation for optimal quality.
Outcome
The final design resulted in a functional, repeatable lamp that can be customized with different images while using the same core hardware and 3D printed components. These lamps have been produced as gifts for friends and family, validating the design through real-world use and handling.
Lithophane lamp in my brother's house.Lithophane lamp in my grandpa's apartment.
Future Improvements
LED-Based Light Source: A future revision could replace the E26 bulb with an internal LED strip or module, allowing for more uniform light distribution, reduced heat, and a slimmer overall housing design.
Motorized Panel Rotation: Another potential enhancement would be a small internal motor to automatically rotate the lithophane panel assembly. The current design allows manual slide rotation, but a motorized system could enable continuous image rotation or timed transitions.
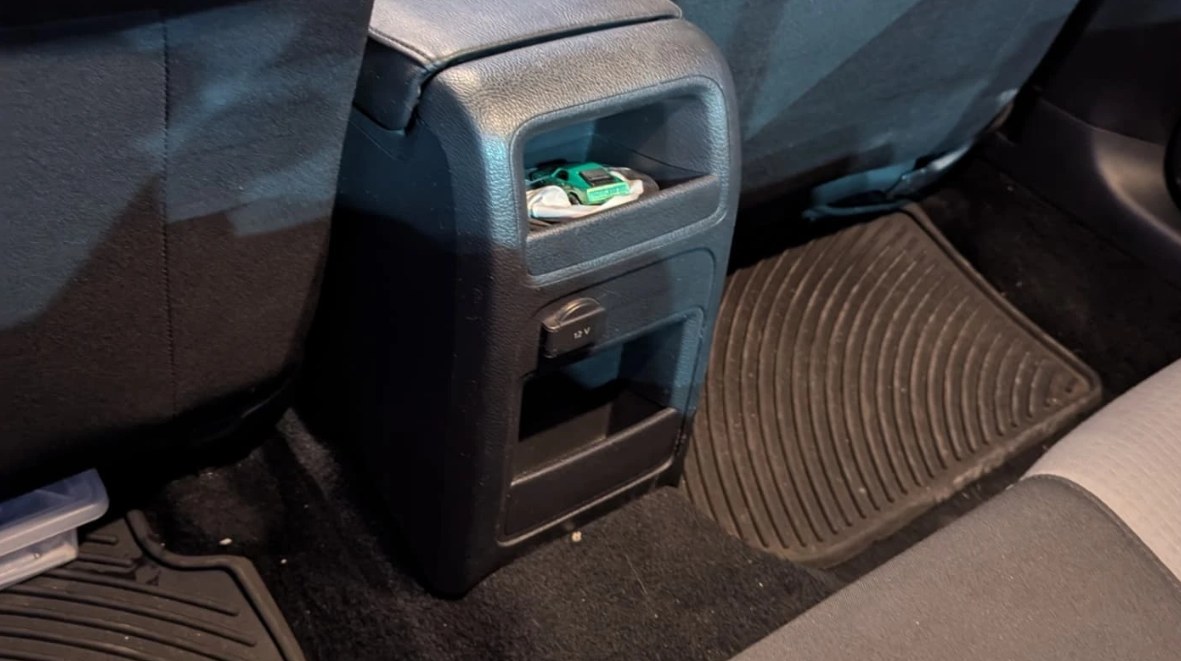
This project involved designing a custom 3D-printed cupholder solution for the rear seat of a 2017 VW Jetta that shipped without factory-installed rear cupholders. The design integrates with existing interior features and requires no permanent modification to the vehicle.
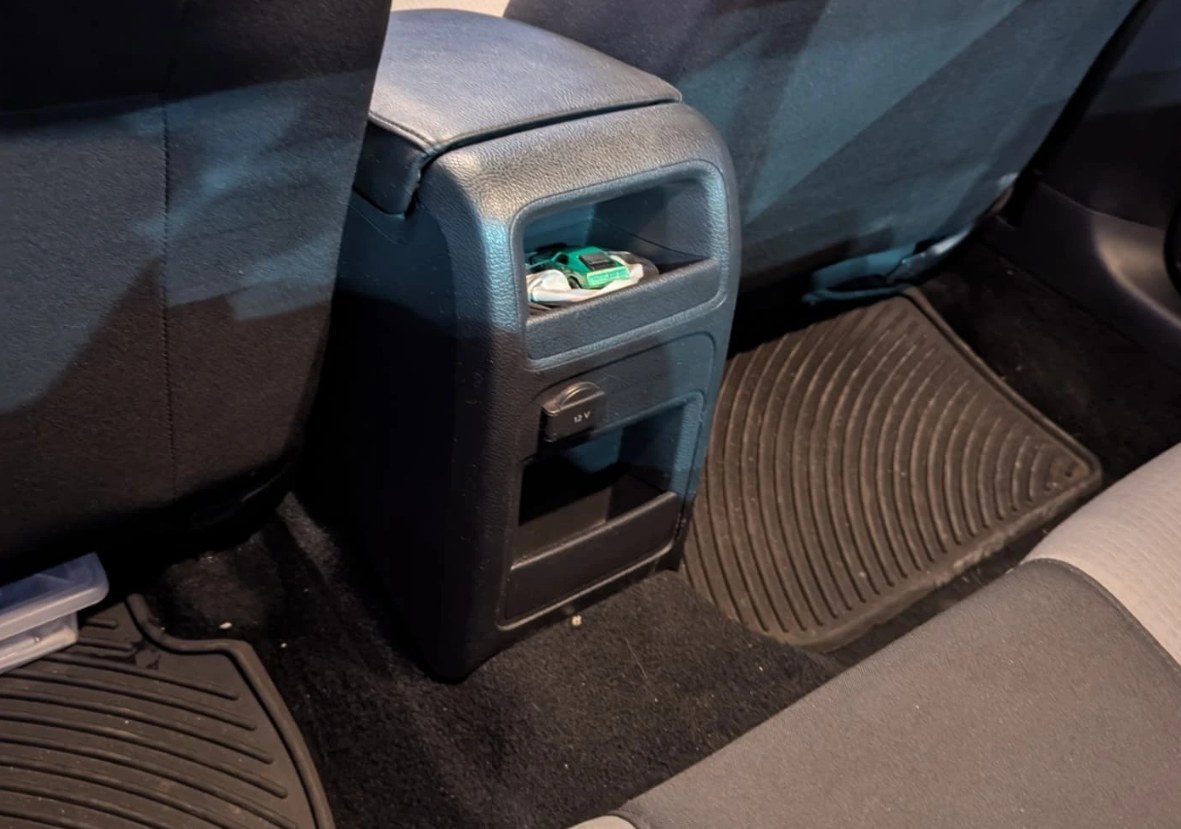
Original back seat of the 2017 Volkswagen Jetta
Design Approach
The cupholders clip onto the existing rear storage cubby and transfer load to the floor tunnel, using multiple contact points to improve stability. The geometry was designed to fit within the tight constraints of the rear seating area while maintaining passenger comfort and ease of use.
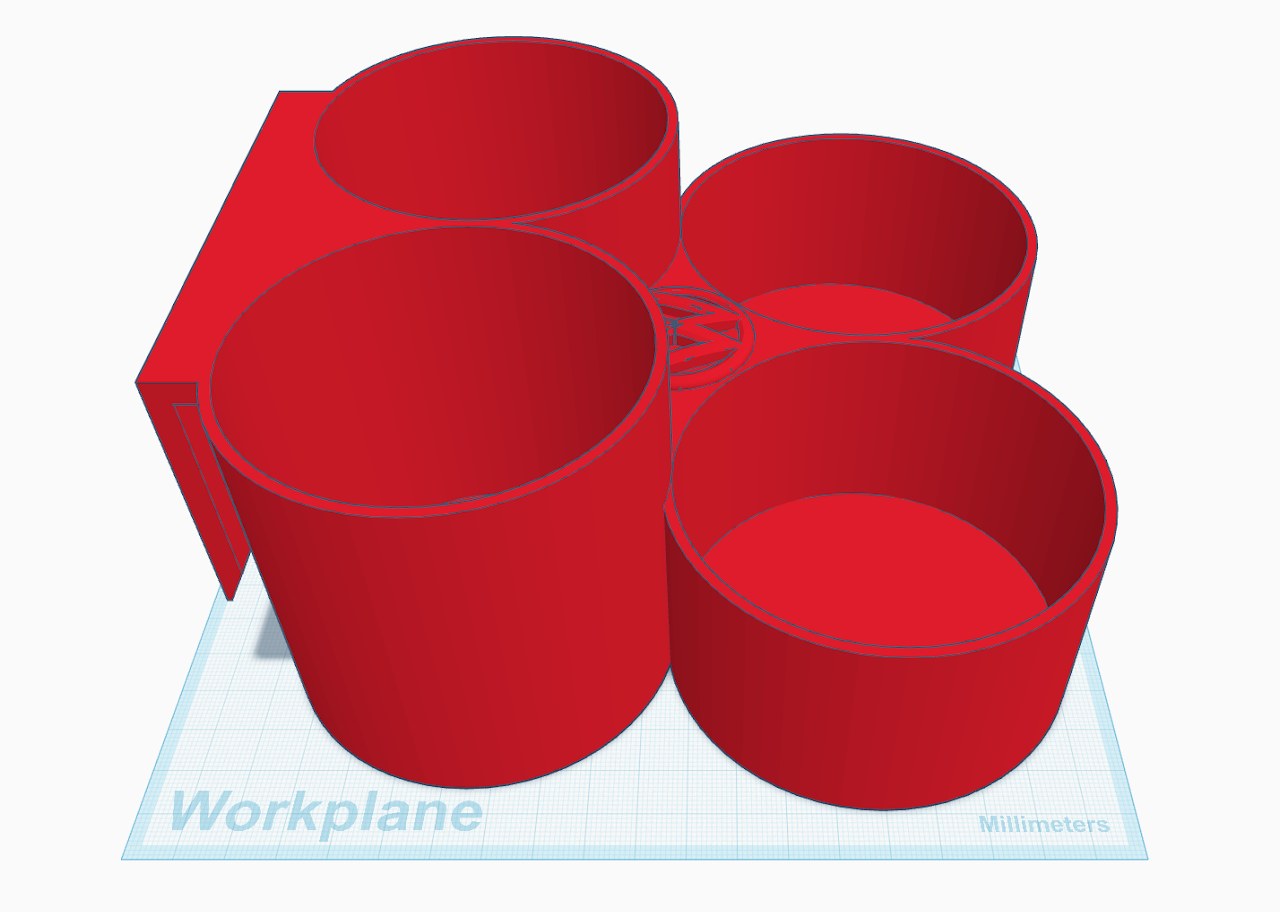
I chose Tinkercad for this project due to its simplicity and accessibility, as I didn’t have Fusion 360 at the time. While Tinkercad is not ideal for complex mechanical designs, it provided all the modeling functions I needed to quickly prototype and iterate this small, functional component.
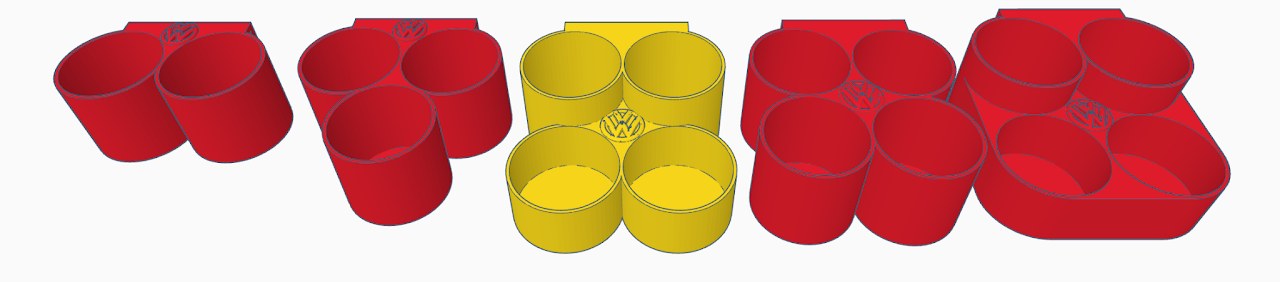
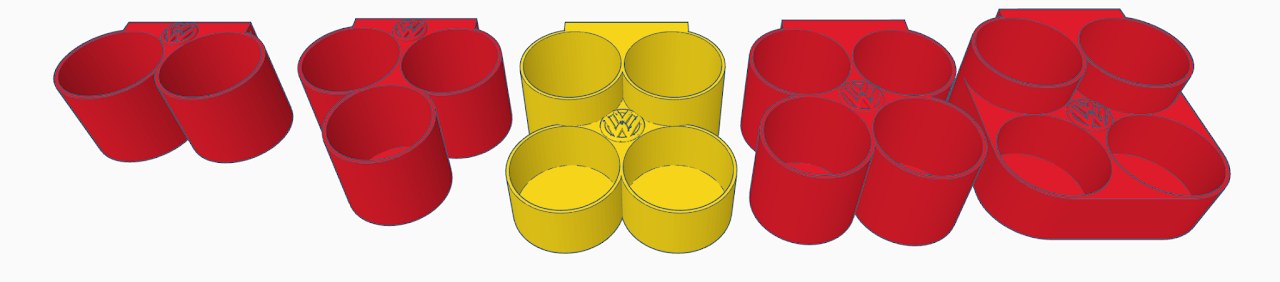
Final Tinkercad model for the cupholders
Manufacturing
The cupholder assembly was 3D printed, with part geometry and print orientation selected to balance strength, durability, and print time.
An initial 2-cup prototype was printed in PLA, but the material deformed from heat, so the final 4-cup design was printed in PETG for improved thermal resistance.
The jump to 4 cupholders came from user feedback, giving passengers more storage. The design was iterated to ensure reliable fit and retention when installed and removed.
The final design provides a stable, removable rear-seat cupholder solution that integrates cleanly with the vehicle interior and has been validated through regular real-world use. Multiple variations were created:
Configurations for 2, 3, or 4 cups at full height, with the final design (yellow) using 2 cups at full height and 2 cups at half-height to balance capacity and passenger room.
A more square-shaped version designed to fit neatly in the car, offering a cleaner aesthetic compared to the original 4-lobed layout.
Future Improvements
Increased Cup Spacing: A future revision could increase the spacing between cupholders to better accommodate larger bottles or cups. In the current design, spacing was intentionally limited to avoid reducing rear-seat foot room, prioritizing passenger comfort over maximum cup size.
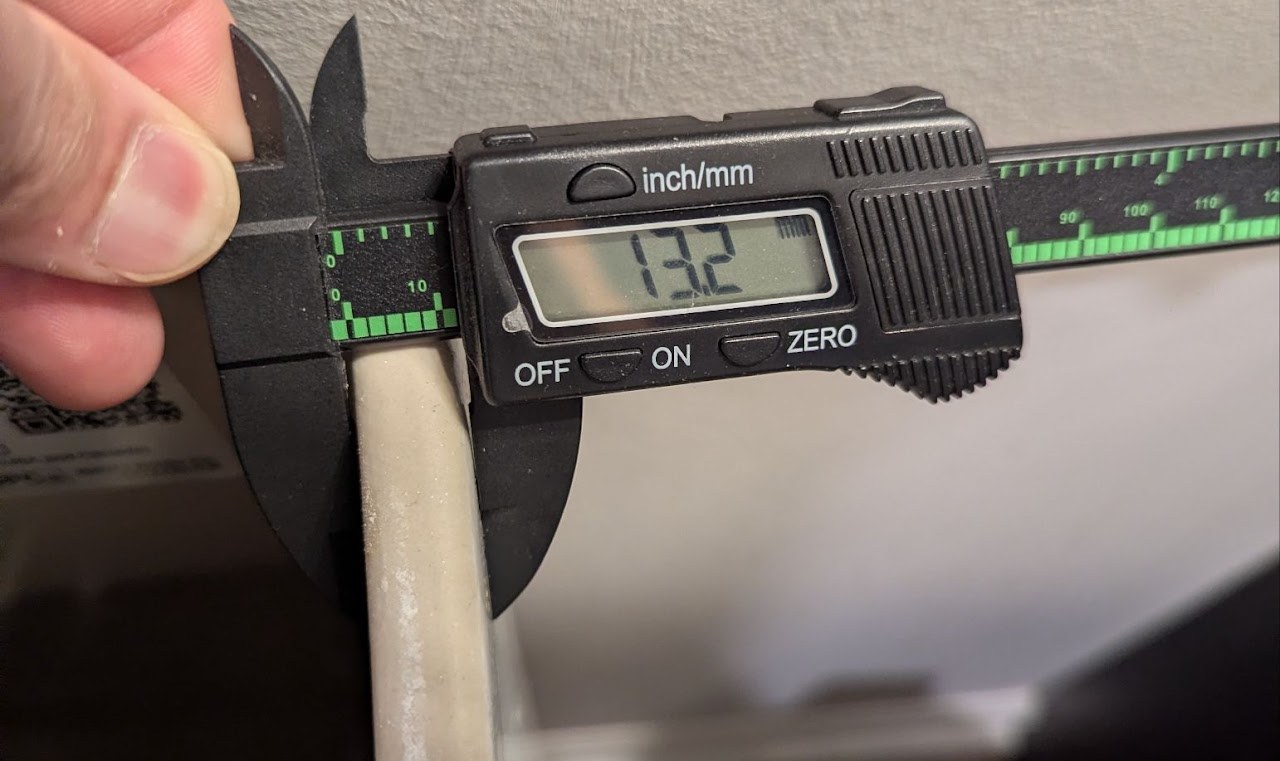
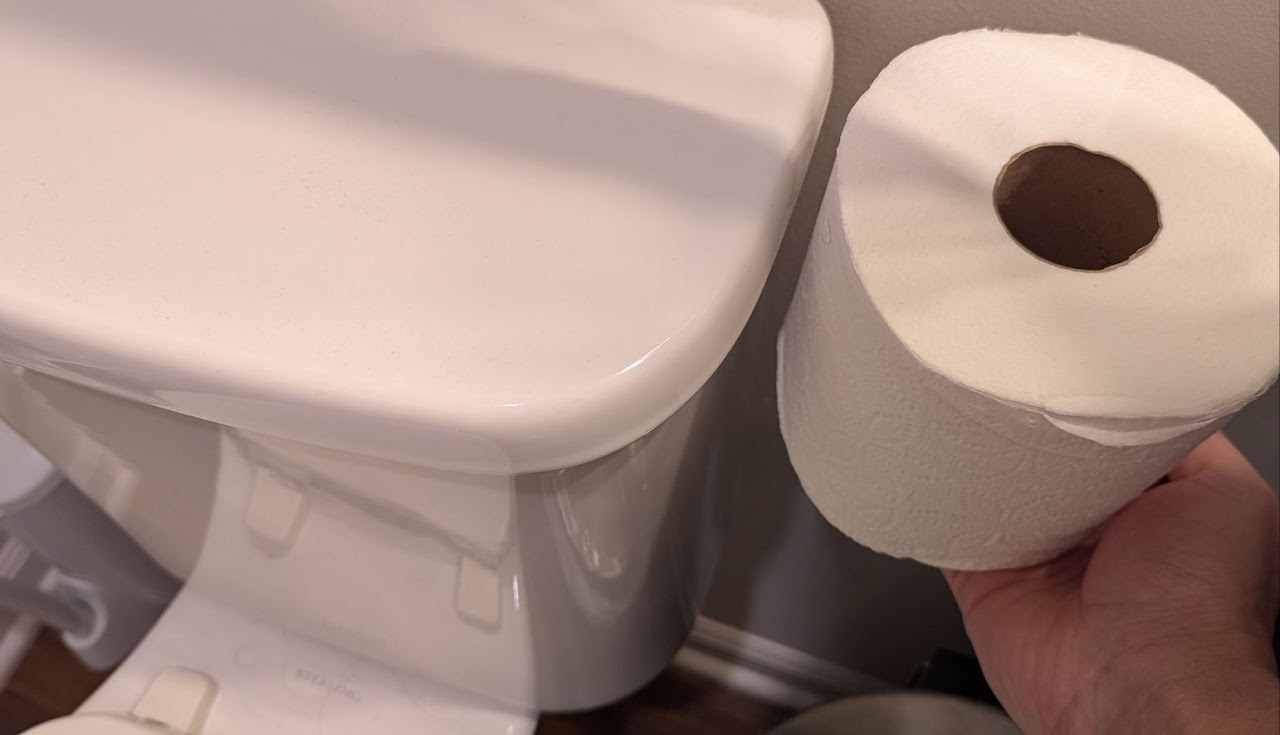
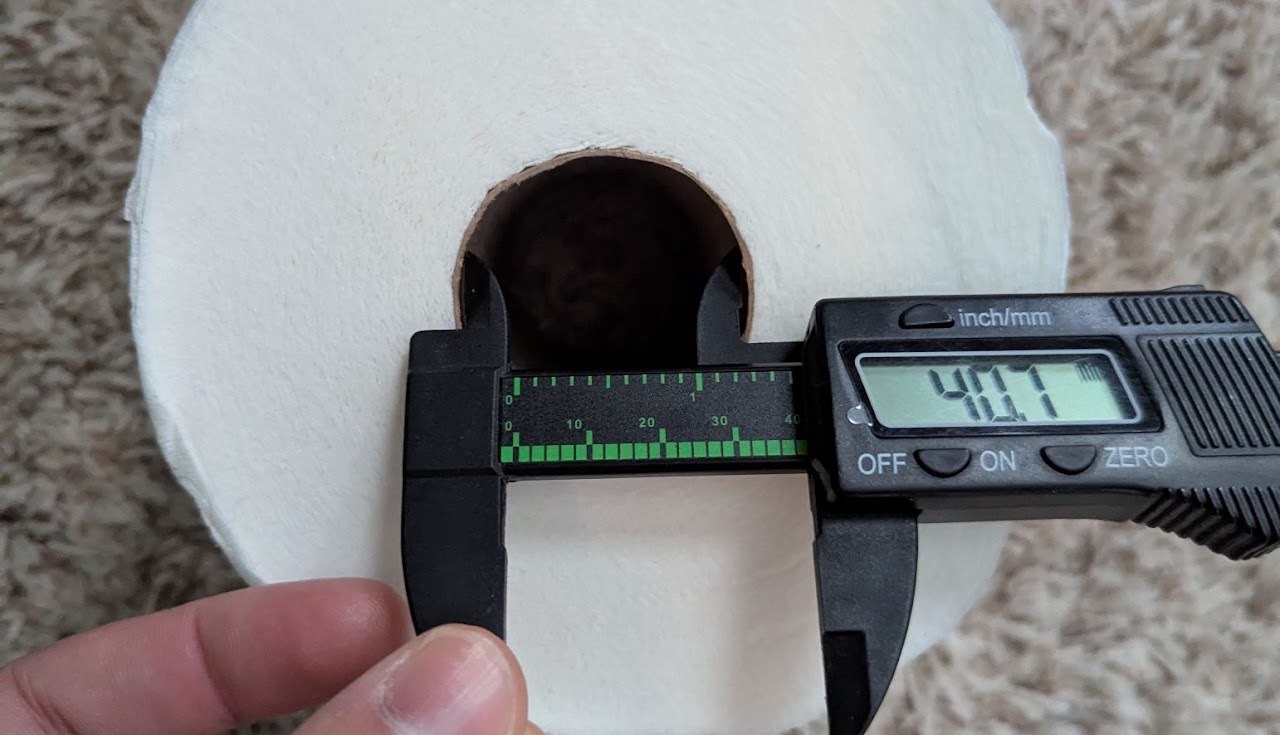
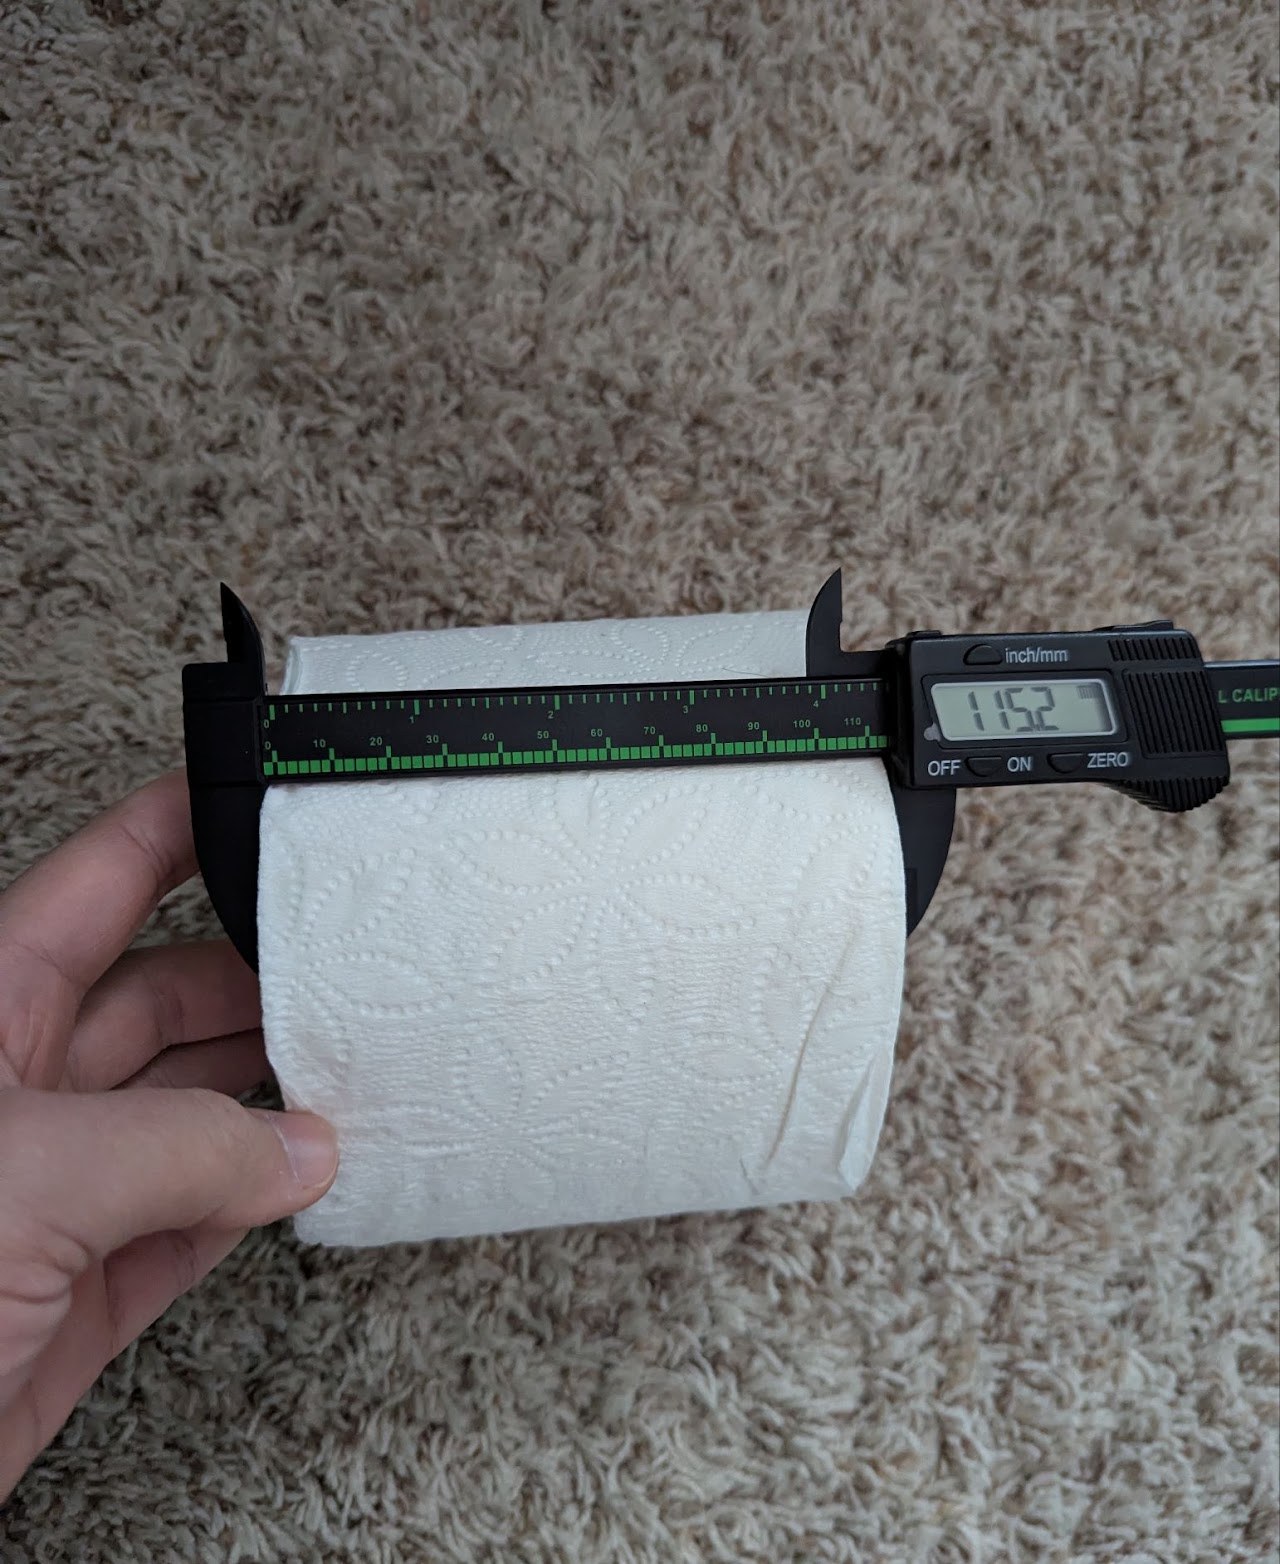
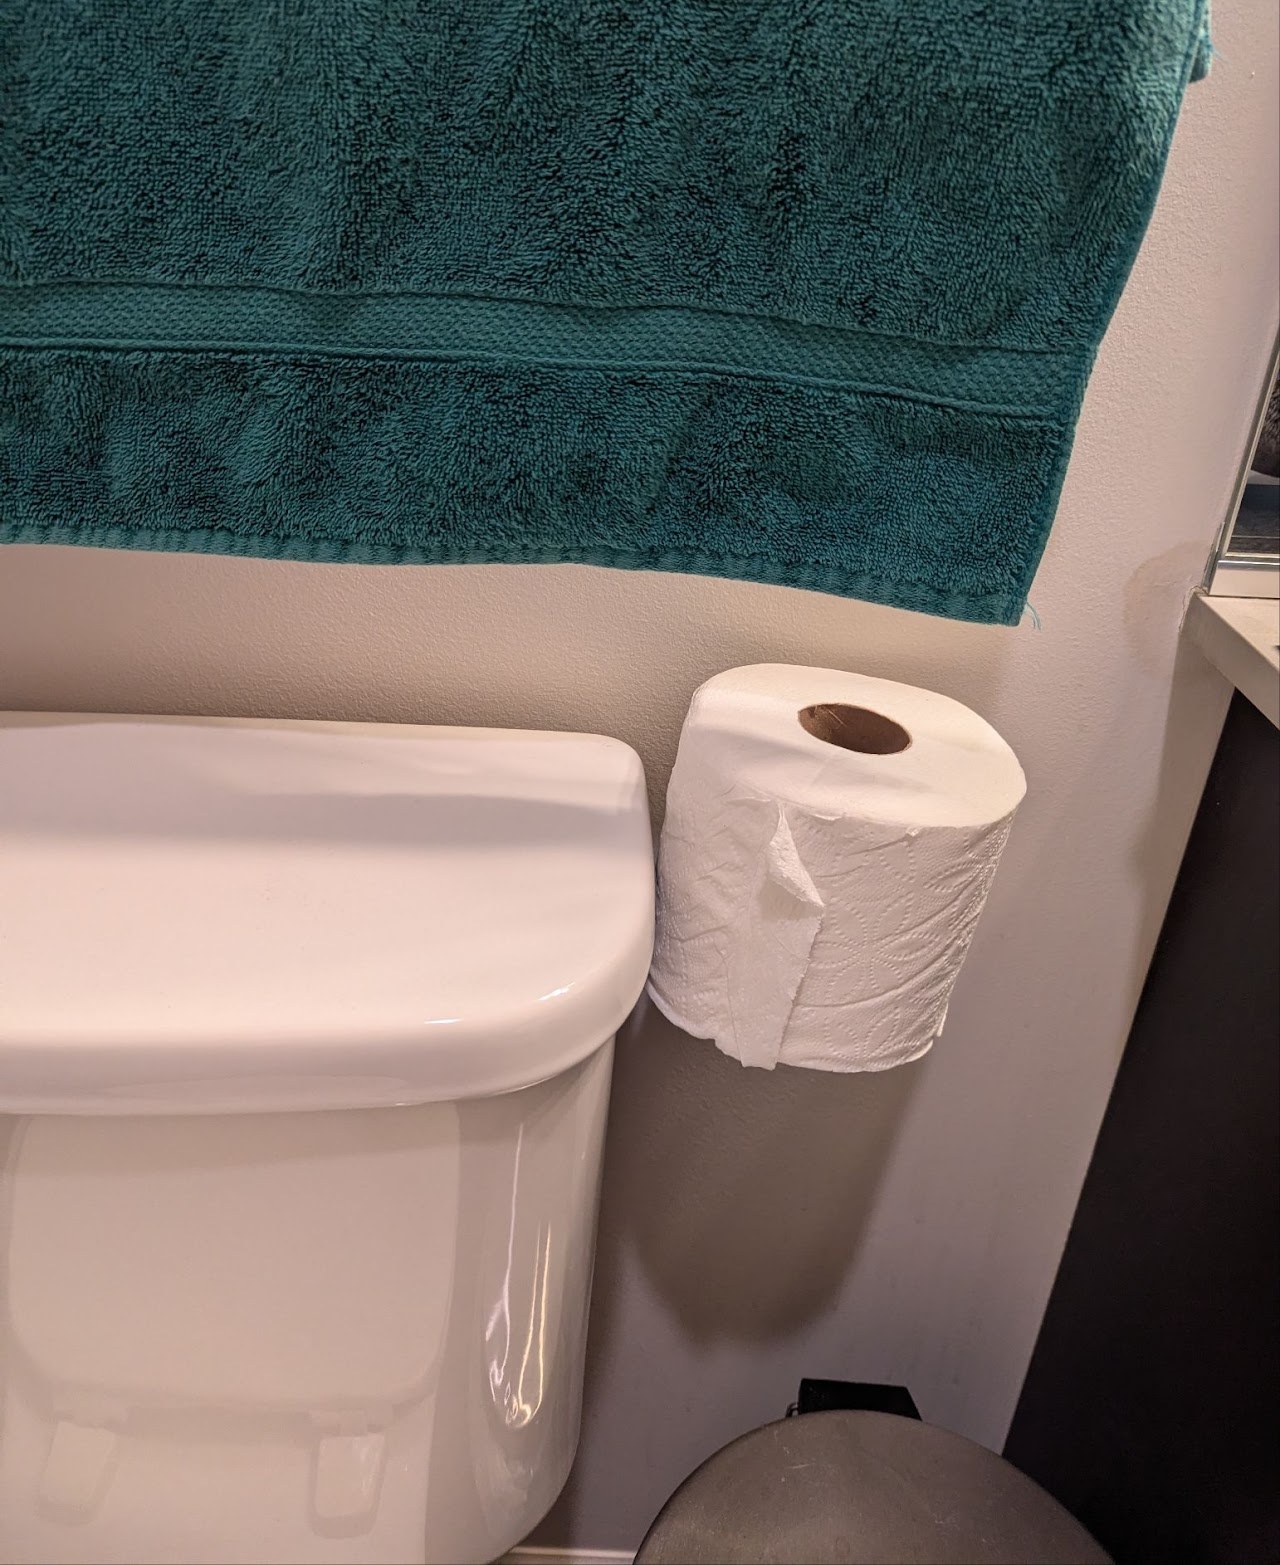
This project began as a small but recurring layout issue in my apartment bathroom. The towel rack mounted above the toilet sits low enough that hanging a towel prevents storing a spare roll of toilet paper on top of the tank. Since the towel rack couldn’t be moved, the problem became one of repositioning the spare roll without modifying the bathroom.
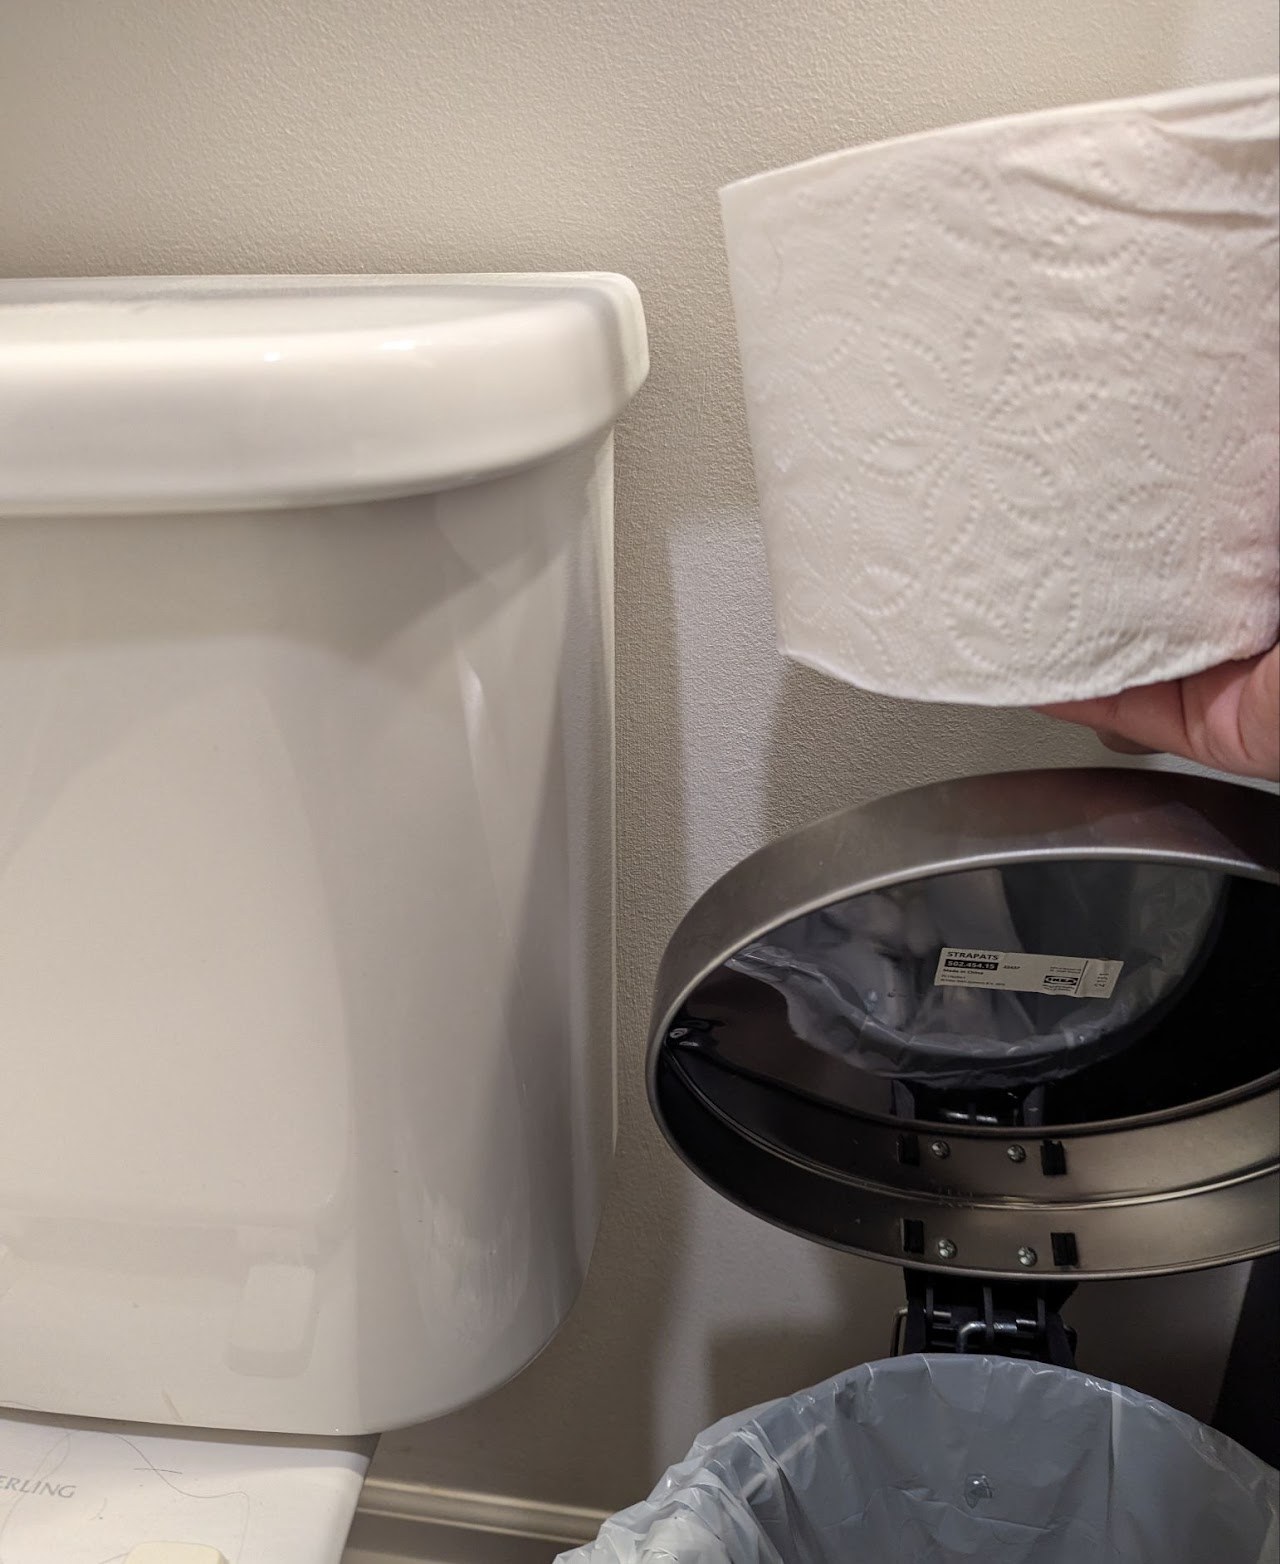
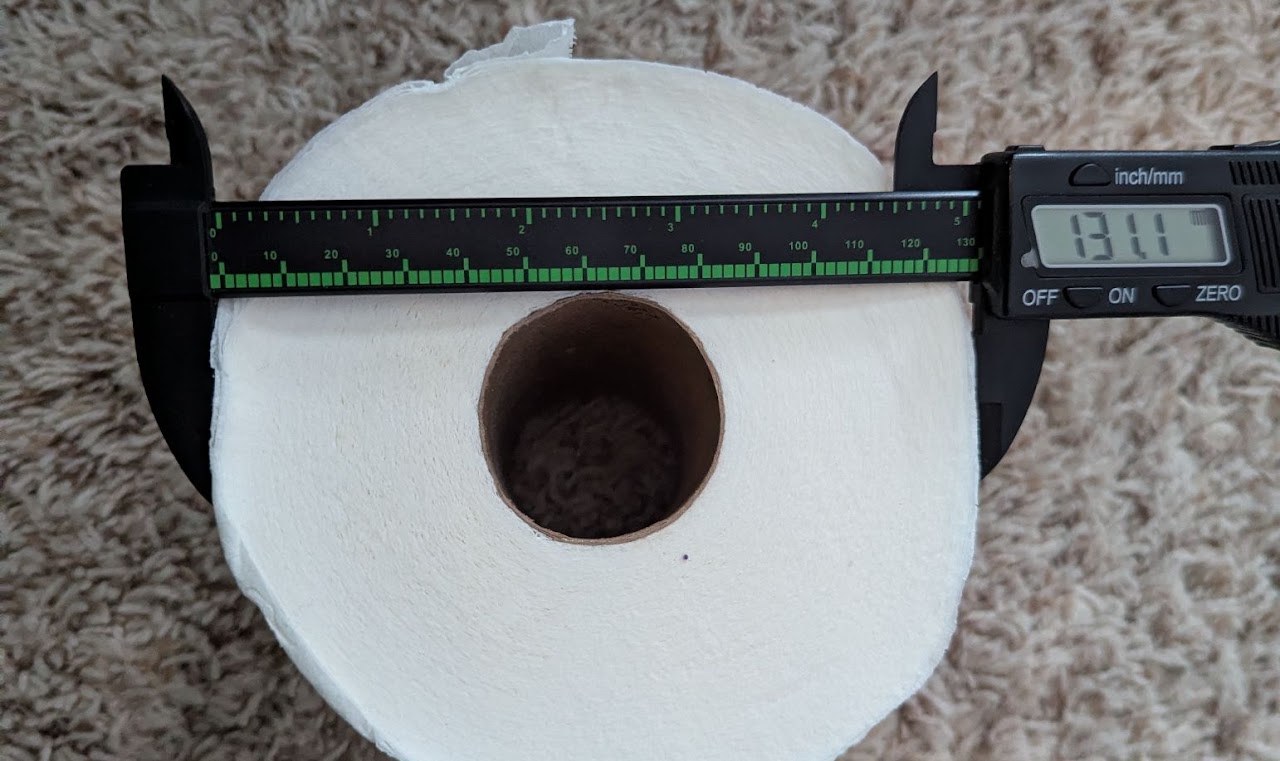
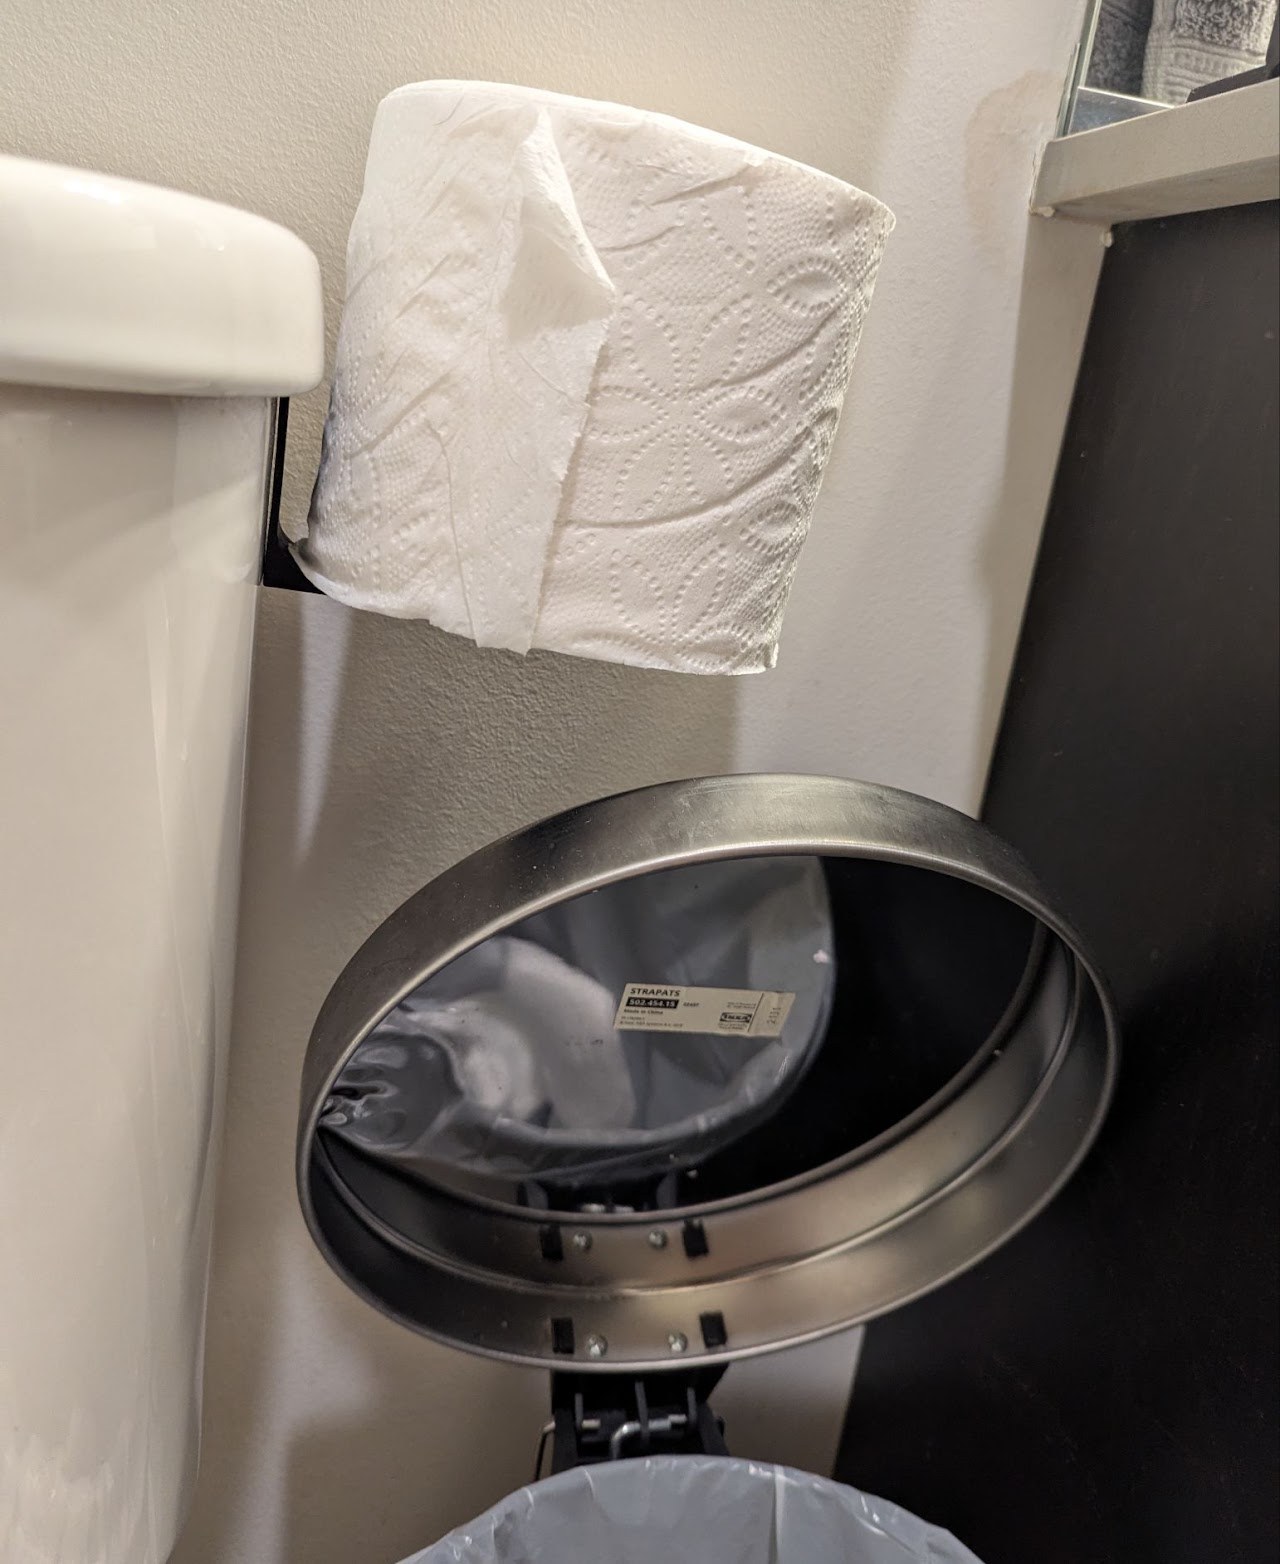
The goal was to design a compact, non-permanent holder that attached directly to the toilet tank and relocated the roll off to the side. Key constraints included maintaining clearance for the towel above, keeping the roll easily accessible, and avoiding interference with a nearby trash can whose lid opens upward. The solution also needed to be stable, visually unobtrusive, and compatible with standard toilet paper rolls.
I designed and 3D printed a side-mounted holder that securely attaches to the toilet tank and stores the roll horizontally. The final placement keeps the roll low and outboard, preserving towel clearance while maintaining full trash can functionality. The geometry was tuned to balance rigidity, clearance, and ease of installation, resulting in a simple, durable part that integrates cleanly into the existing space.
This project demonstrates my approach to practical, constraint-driven design: identifying real-world limitations, designing around fixed hardware, and rapidly prototyping a functional, low-impact solution.
Planning
Measuring
3D Design Timelapse
This design was completed in about 15 minutes using Fusion 360.
Designing Toilet Paper Holder Timelapse
Slicing Timelapse
A quick timelapse of the slicing process, comparing different print orientations.
Slicing Toilet Paper Holder Timelapse
3D Print Timelapse
This print took about 3 hours to complete (2.5 hours estimated, plus an extra 30 minutes for the timelapse).
This was printed with a 0.4mm hardened steel nozzle, using black Overture PLA, on a Bambu Lab A1.
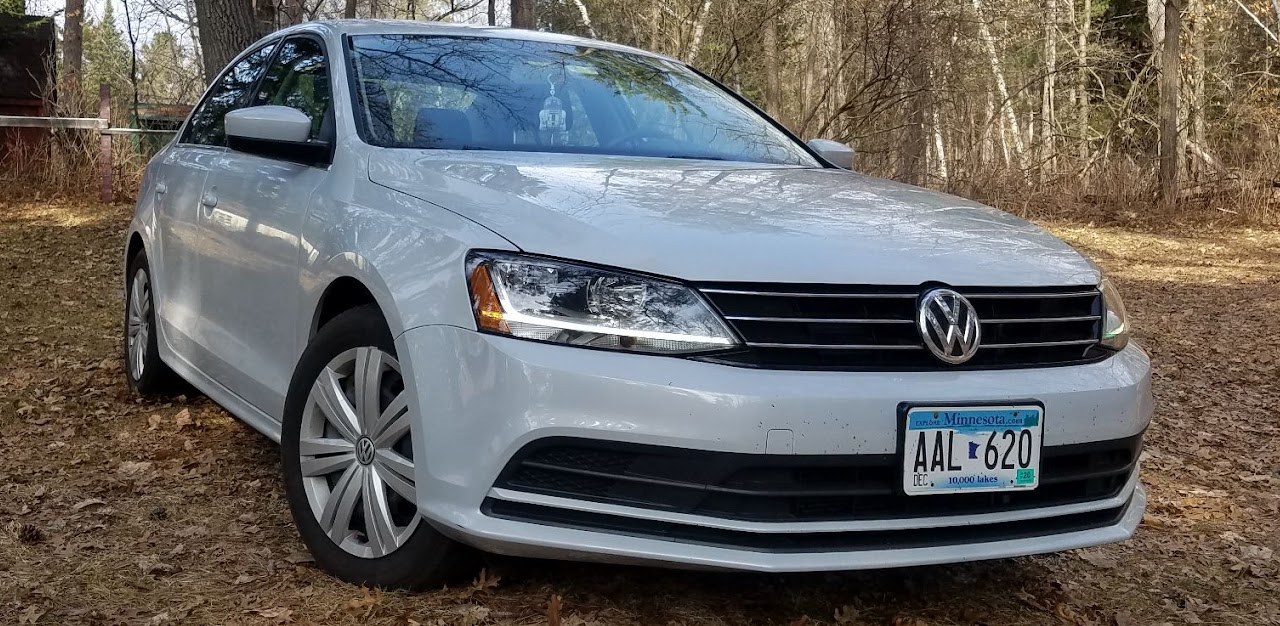
OEM headlight performance on the 2017 Volkswagen Jetta proved insufficient for safe nighttime driving on rural, unlit backroads. Limited long-range visibility increased the risk of delayed hazard detection, particularly for wildlife such as deer, prompting the need for additional forward lighting.
2017 VW Jetta before the addition of the off-road lights.
Design Goals
Improve long-range forward visibility to increase reaction time when driving on rural, unlit backroads.
Enhance visibility in adverse weather, particularly snow and low-contrast conditions.
Maintain full street legality across all U.S. states for normal on-road operation.
Enable independent operation of the auxiliary lights, allowing use when stationary (e.g., camping or assisting another driver) without relying on the vehicle’s primary lighting system.
Ensure intuitive, low-distraction interaction while driving.
Achieve an OEM-like interior appearance, with controls and indicators that integrate cleanly with the existing cabin design.
Provide clear driver feedback via a visible interior indication when auxiliary lights are active.
Design Constraints
No permanent modifications to the vehicle, including no drilling into the bumper, body panels, or interior trim.
Full reversibility, allowing the auxiliary lighting system to be completely removed and the vehicle returned to stock condition if desired.
Durable, weather-resistant components capable of withstanding rain, snow, road debris, and automated car washes.
Mounting height and placement must avoid reducing ground clearance or risking contact with road obstacles, given the Jetta’s already limited ride height.
Low electrical load, favoring LED or other low-wattage lighting to minimize battery drain and avoid overloading existing electrical systems.
Preserve OEM electrical behavior, ensuring the auxiliary system does not interfere with factory lighting, diagnostics, or vehicle operation.
Electrical safety and reliability, including proper fusing, grounding, and load management.
Serviceability, allowing individual components to be accessed or replaced without disassembling unrelated systems.
Noise and vibration resistance, ensuring stable operation under real-world driving conditions.
Solution Overview
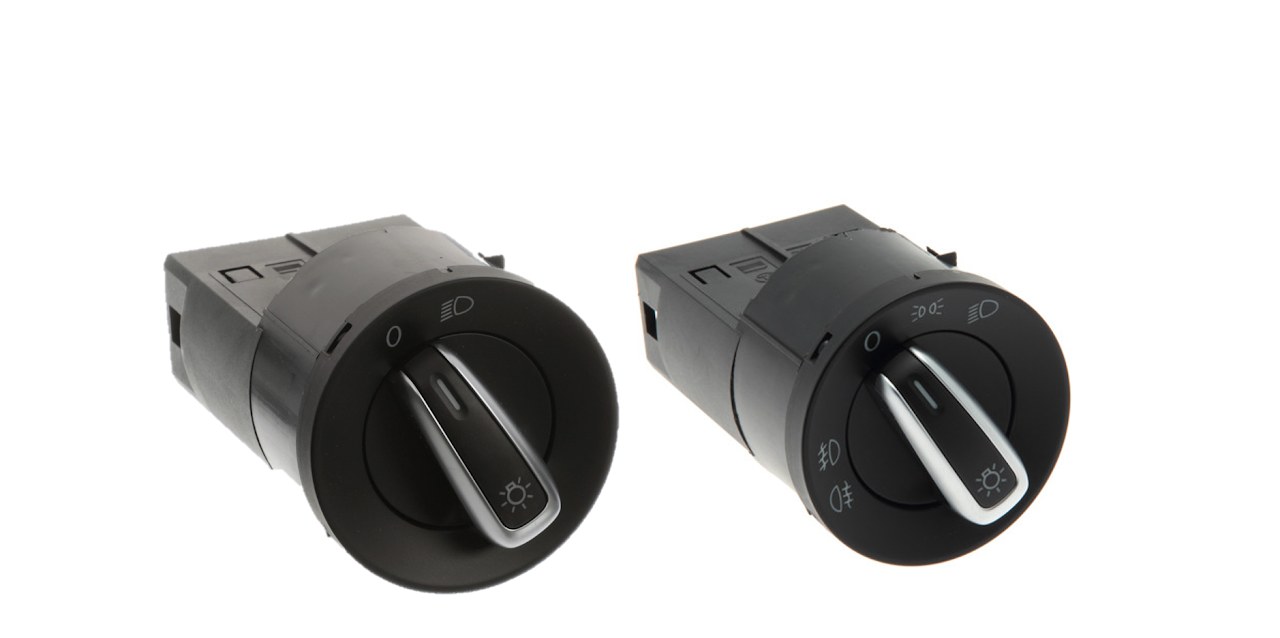
Original light switch (left) vs. higher-trim switch (right).
Interior. The 2017 Volkswagen Jetta is offered across multiple trim levels, with higher trims featuring a headlight switch that includes factory fog light controls. Although the base trim does not include fog lights, the interior wiring and switch form factor are compatible across trims. To maintain an OEM appearance and intuitive user interaction, a higher-trim headlight switch with fog light functionality was selected. The fog light switch signal was repurposed as a control input for the auxiliary lighting relay, allowing the off-road lights to be activated using a factory-style control without adding visible aftermarket switches to the dashboard.
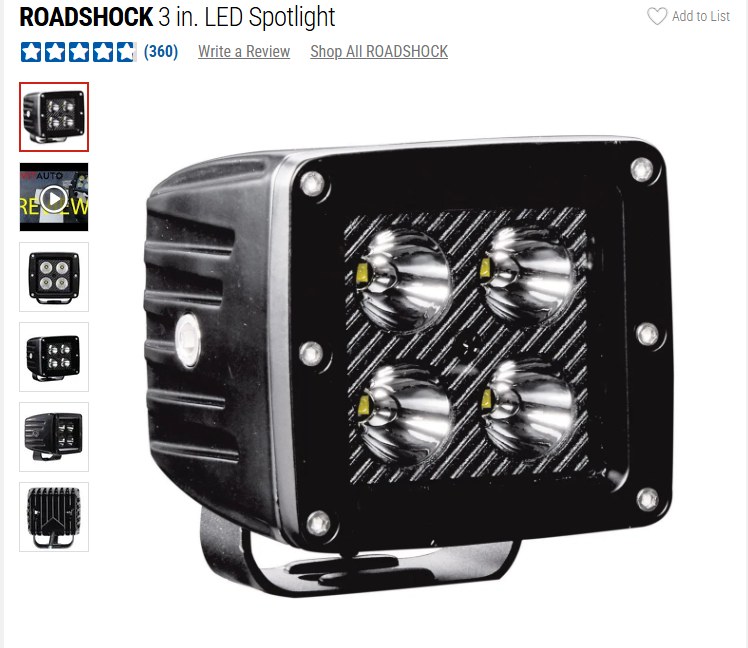
LED lights from Harbor Freight's website.
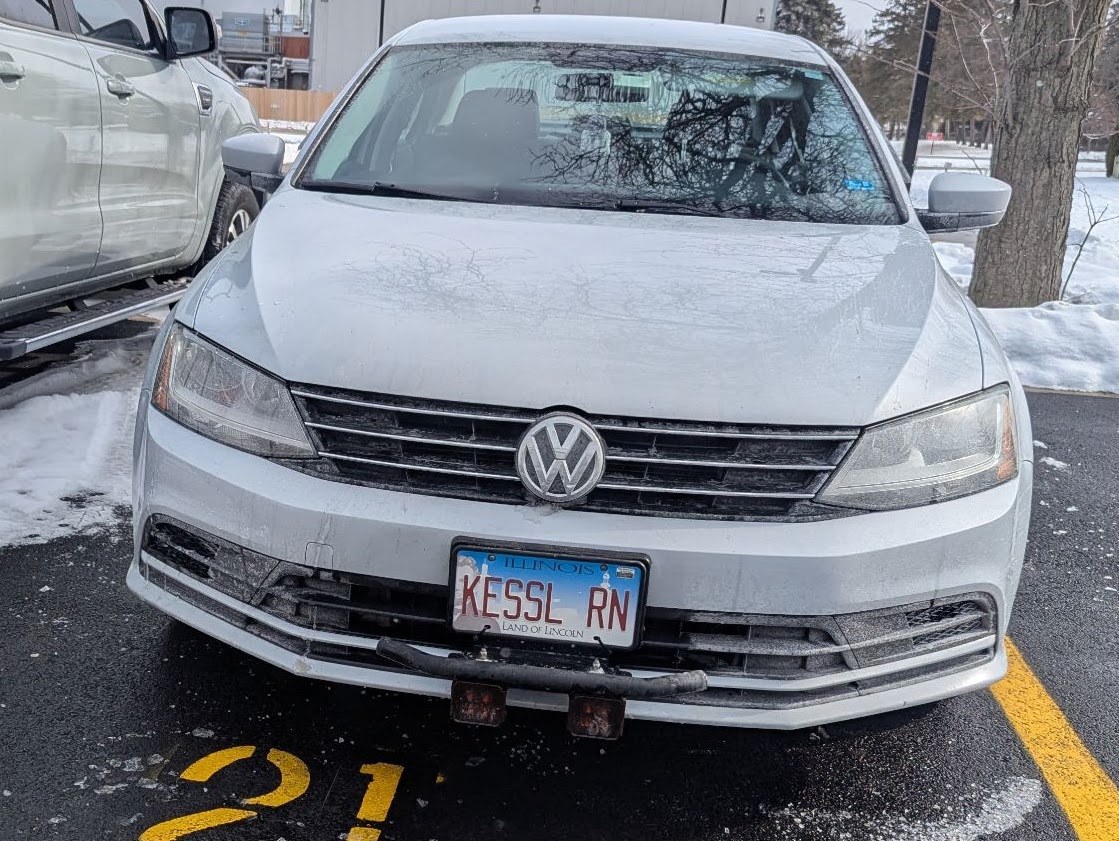
Exterior hardware. To avoid permanent modifications to the vehicle, the auxiliary lights were mounted using a license-plate-based bracket that attaches to the existing four front license plate fasteners. This approach enabled a secure mounting solution without drilling into the bumper or body panels. The lights were positioned below the front license plate to preserve plate visibility and maintain compliance with legal and safety considerations.
For illumination, 3-inch LED spot light pods from Harbor Freight were selected as a balance between cost, durability, and performance. Spot-pattern lights were chosen specifically to maximize down-road visibility and improve reaction time at higher speeds, rather than providing wide-angle flood lighting intended for low-speed or off-axis illumination.
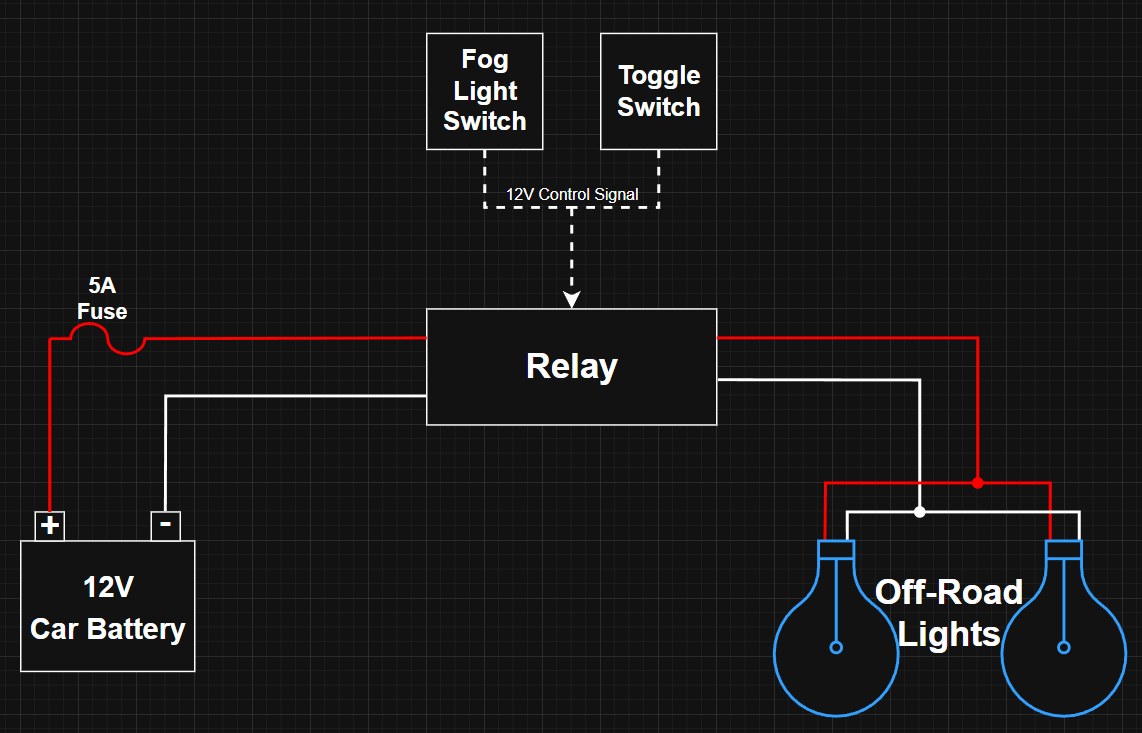
A simple block diagram of the electrical work in this project.
Electrical. The electrical system uses an off-road lighting kit with a fused relay connected directly to the 12V battery, isolating it from the factory circuits. Two control paths were implemented: OEM-style operation via the upgraded headlight switch (which requires the parking lights to be on to activate the fog light circuit), and independent operation via the kit’s toggle switch, mounted near the OBD-II port. This setup allows the lights to function either as integrated driving lights through the fog light switch or independently, minimizing battery draw by avoiding unnecessary activation of other OEM lighting.
Execution & Implementation
The project began with mounting the Harbor Freight 3-inch LED spot lights using a license plate-based bracket, which was originally designed to position the lights above the front license plate. During mock installation, it became clear that mounting them above the plate partially blocked the license plate, which could create a legal issue. To address this, the bracket was mounted below the license plate, maintaining full plate visibility while providing a secure attachment point for the lights.
Ground clearance and approach angle were evaluated prior to finalizing light placement. Because the Jetta sits relatively low, the lights were positioned to maximize forward visibility without reducing clearance or risking contact with road obstacles. Measurements and mock placement ensured that the lights would not interfere with normal driving over bumps, curbs, or steep inclines.
Routing the relay control wire through the vehicle’s firewall required careful planning. The wire was run alongside existing factory harnesses to ensure protection from chafing, heat, and moving parts, preserving electrical safety while isolating the auxiliary system from OEM circuits. Excess wire was carefully bundled and zip-tied between the radiator and bumper, keeping it clear of fans, belts, and other moving components. While this placement does leave the wires vulnerable in the event of a collision, the trade-off was acceptable, as cutting or shortening the wire further could have introduced additional potential failure points and reduced cable longevity.
Initial testing revealed that the stock LED pods produced a very cool, blue-toned light, which reduced visibility in rain, snow, fog, and dust. Orange lens covers were added to shift the beam to a warmer yellow-orange hue, improving contrast and making obstacles easier to detect in low-visibility conditions.
Finally, the interior installation of the upgraded fog light switch provided OEM-style control, while the toggle switch mounted near the OBD-II port enables independent operation. This dual-control setup allows the lights to function as integrated driving lights or independently, preserving battery life and ensuring functionality in both driving and stationary scenarios.
Validation
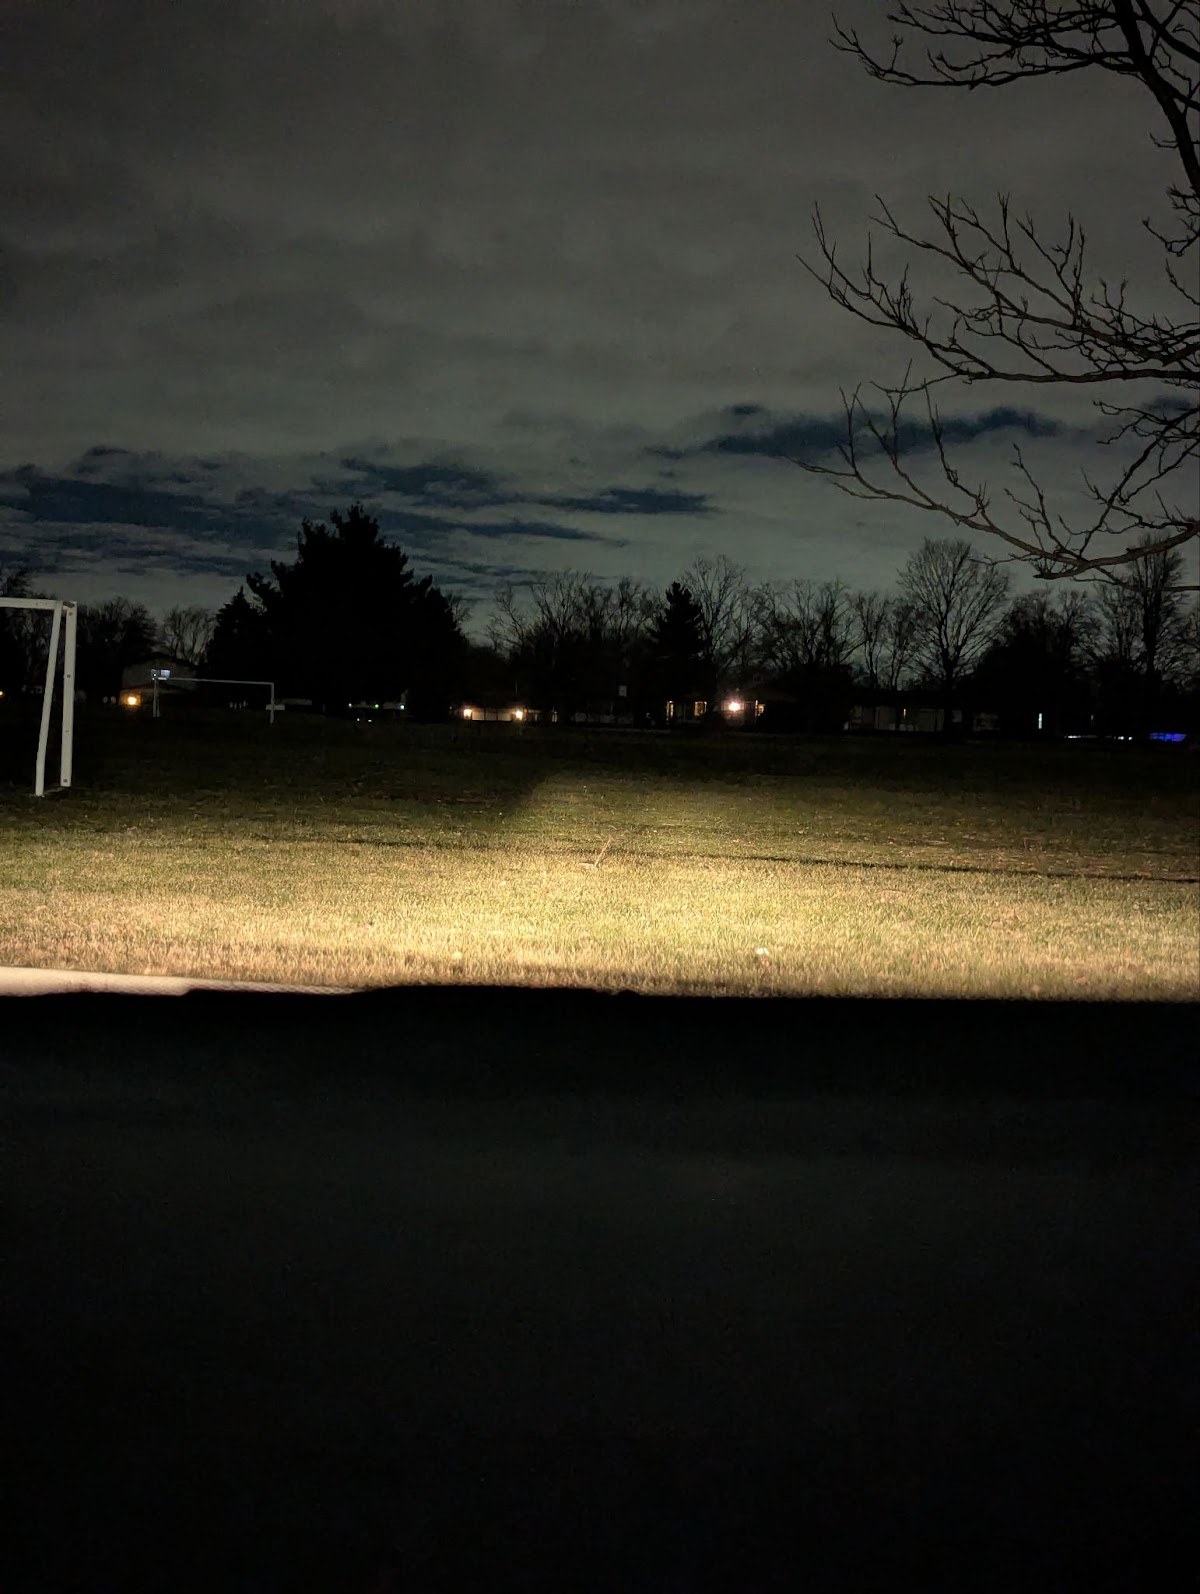
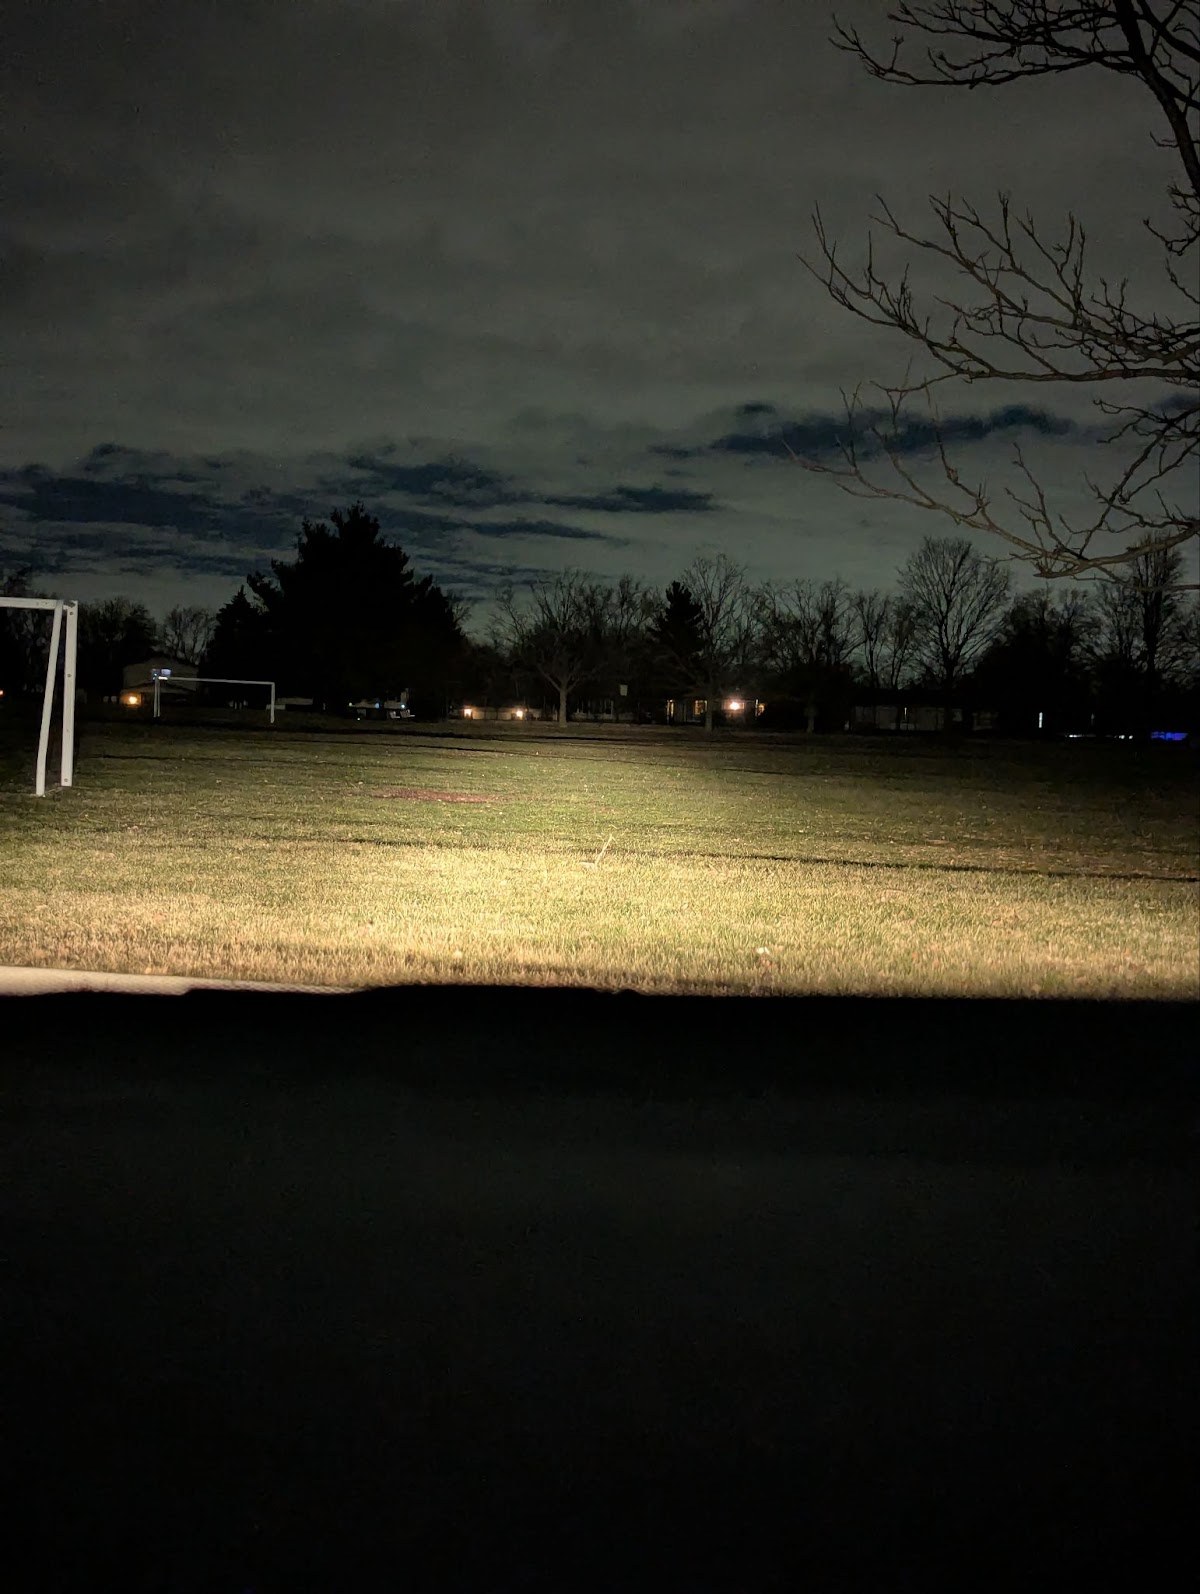
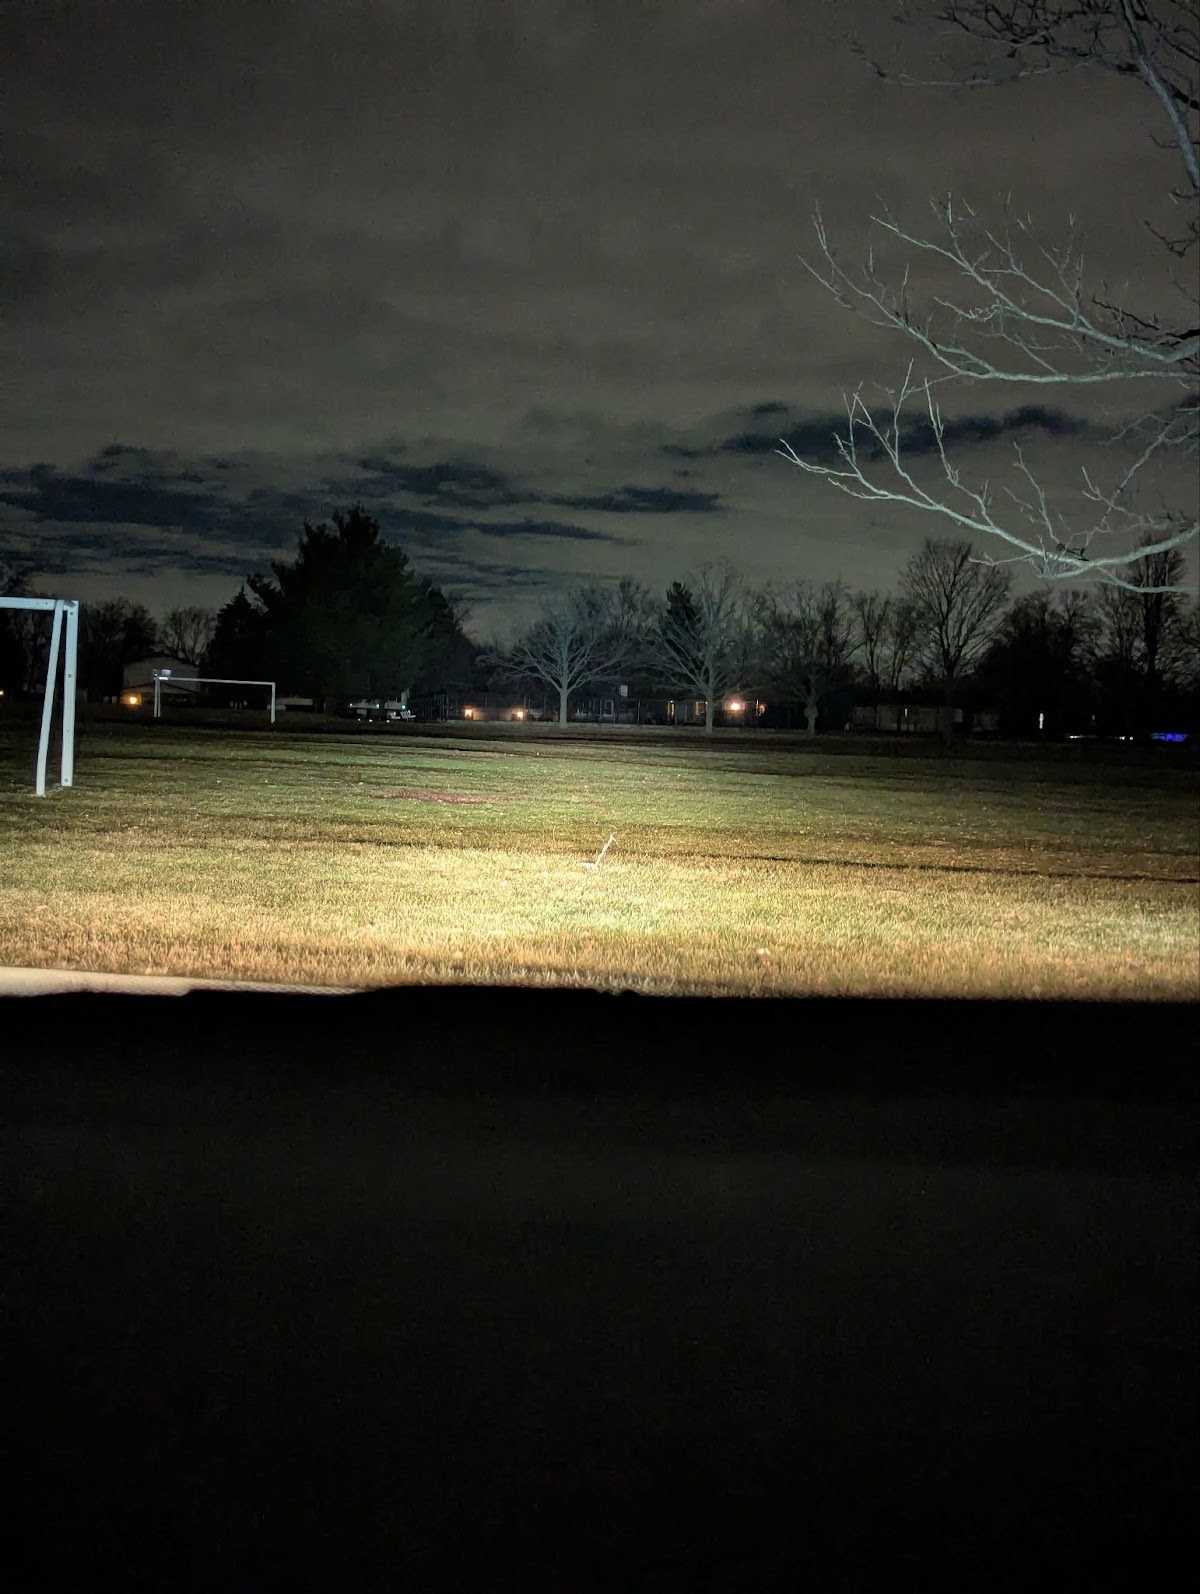
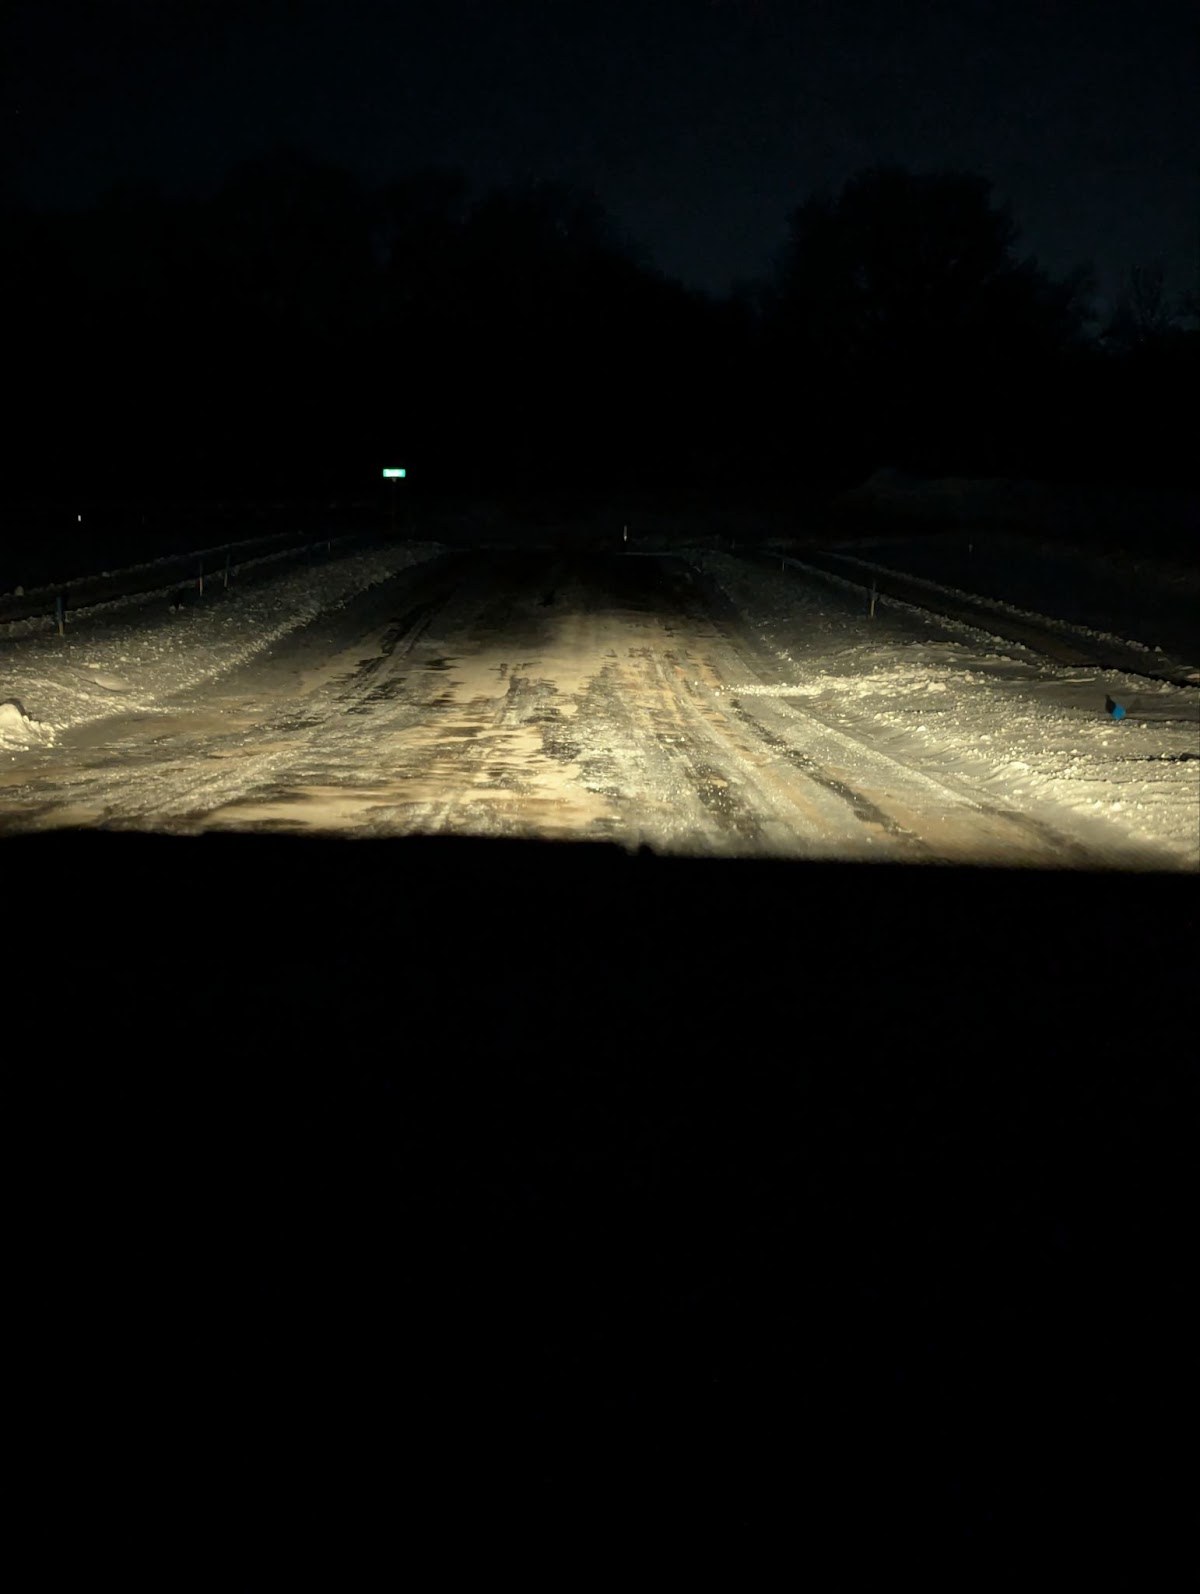
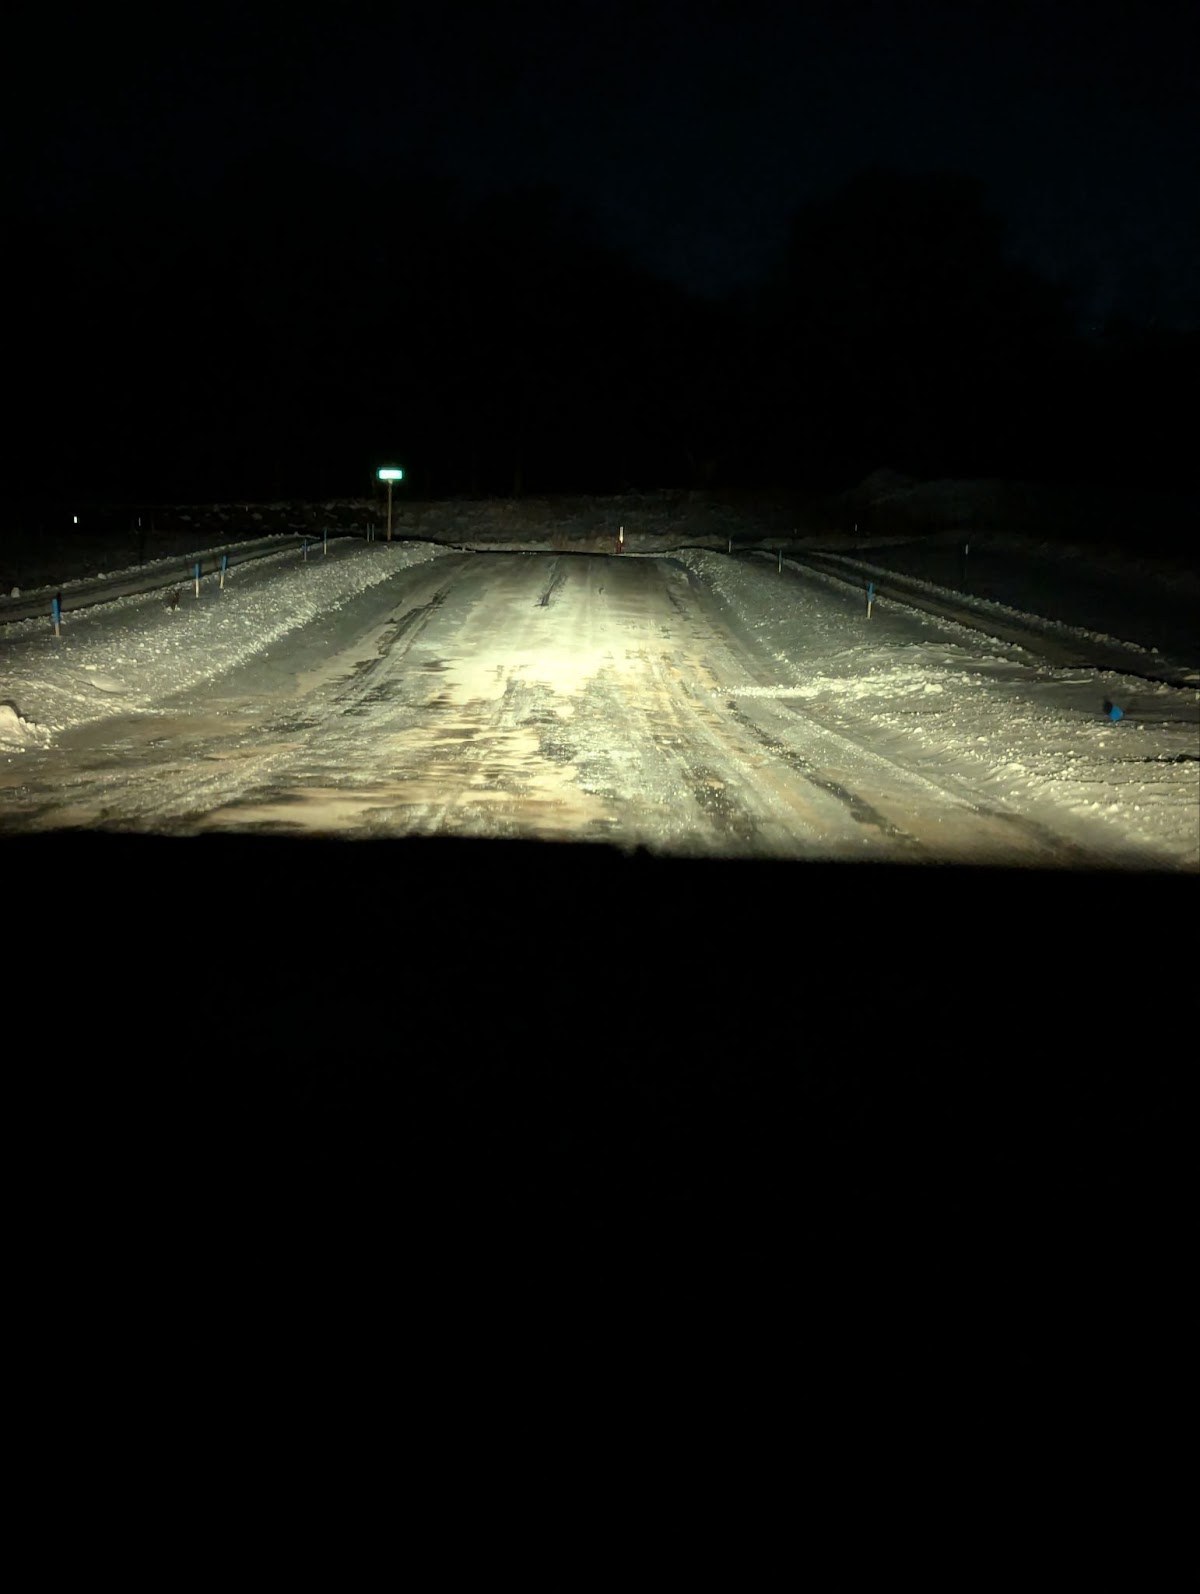
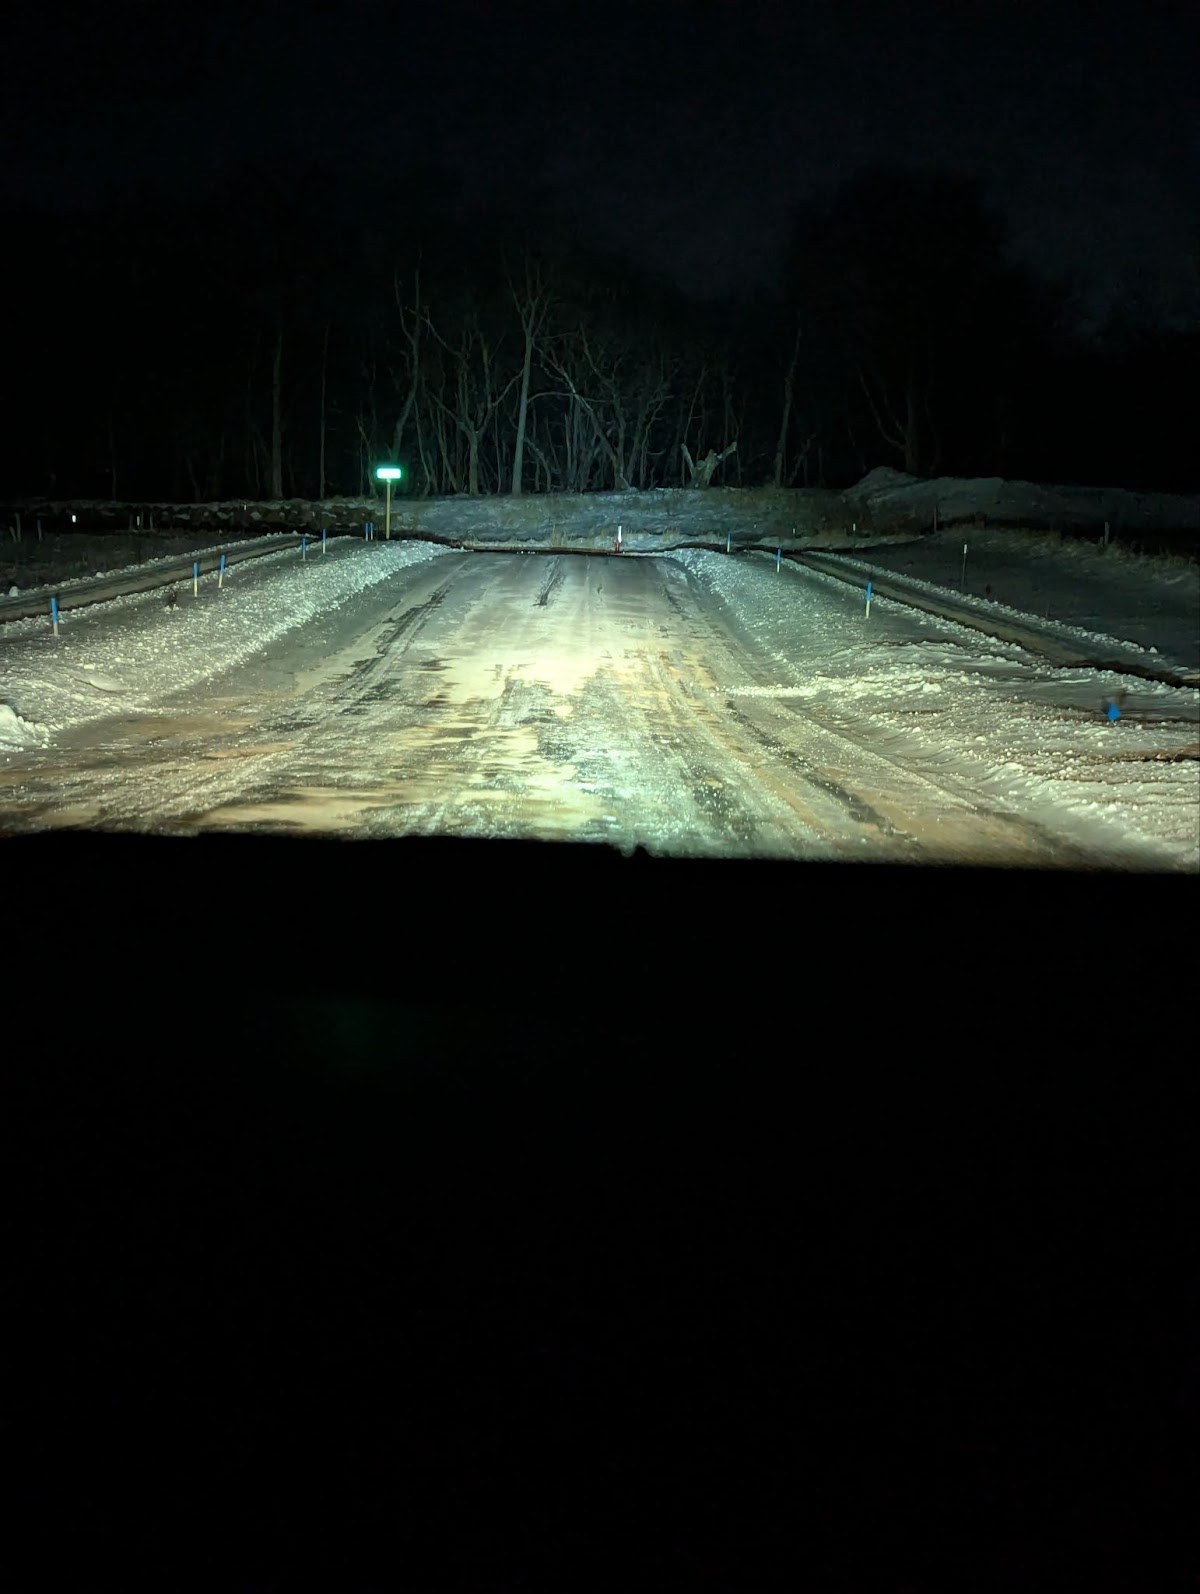
Testing was conducted in a low-light park (top three) and an unfinished housing development (bottom three) to safely evaluate beam pattern and visibility improvement without stopping on public roads. The orange lens covers were removed for this testing.
Low beamLow beam and high beamLow beam, high beam, and off-road lightsLow beamLow beam and high beamLow beam, high beam, and off-road lights
Results
The auxiliary lights have been in service for over 60,000 miles across nearly three years of real-world use (installed in October 2023), including multiple Minnesota winters. They have performed reliably through snow, heavy rain, hail, high winds, car washes, and minor incidental contact without failure or degradation. The lens covers provide both physical protection when the lights are not in use and ensure compliance with street-legal lighting requirements across all U.S. states.
Future Improvements
While the current system has proven reliable and effective, several enhancements could further improve functionality, usability, and flexibility. One potential improvement would be replacing the removable lens covers with dual-color or multi-color LED light pods, allowing color temperature to be adjusted electronically based on driving conditions rather than manually. This would enable quick adaptation between clear, snowy, or dusty environments.
Additional improvements could include integrating automatic control logic, such as disabling the auxiliary lights above a certain vehicle speed or when high beams are not active, to further enhance safety and compliance.
From an electrical perspective, adding current sensing or fault detection would allow the system to alert the driver to wiring or light failures in real time. Finally, a revised mounting solution that positions the lights slightly higher, while still preserving approach angle and legality, could further improve down-road illumination without compromising ground clearance.
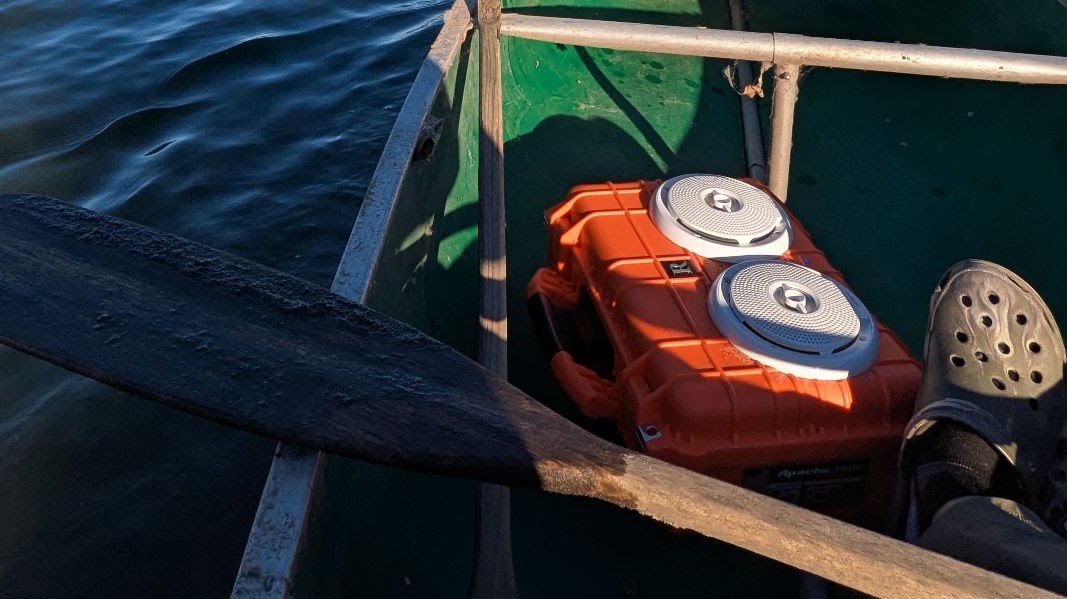
This project is a fully custom, battery-powered Bluetooth speaker designed for outdoor environments where durability, water resistance, and sound quality are equally important. Intended for use around lakes, campsites, and boats, the speaker was engineered to survive splashes, rain, and accidental immersion, while still delivering powerful, controllable audio and long runtime from a common power tool battery.
The final build integrates dual marine speakers, a high-power Bluetooth amplifier, physical media controls, and auxiliary power output, all housed in a rugged, waterproof enclosure designed to float if dropped into water.
Design Goals & Constraints
Key design requirements included:
Waterproofing: All components and enclosure penetrations needed to resist moisture and splashing.
Flotation: The speaker should remain buoyant if it falls into a lake or river (e.g. off a canoe).
High output audio: Sufficient power to drive large speakers in outdoor environments.
Battery ecosystem compatibility: Use of a DeWalt 20V Max battery for easy swapping and extended runtime.
Standalone usability: Physical controls for audio and media playback without relying on a phone.
Perceived build quality: The speaker should feel solid, intentional, and robust, not hollow or improvised.
Enclosure & Mechanical Design
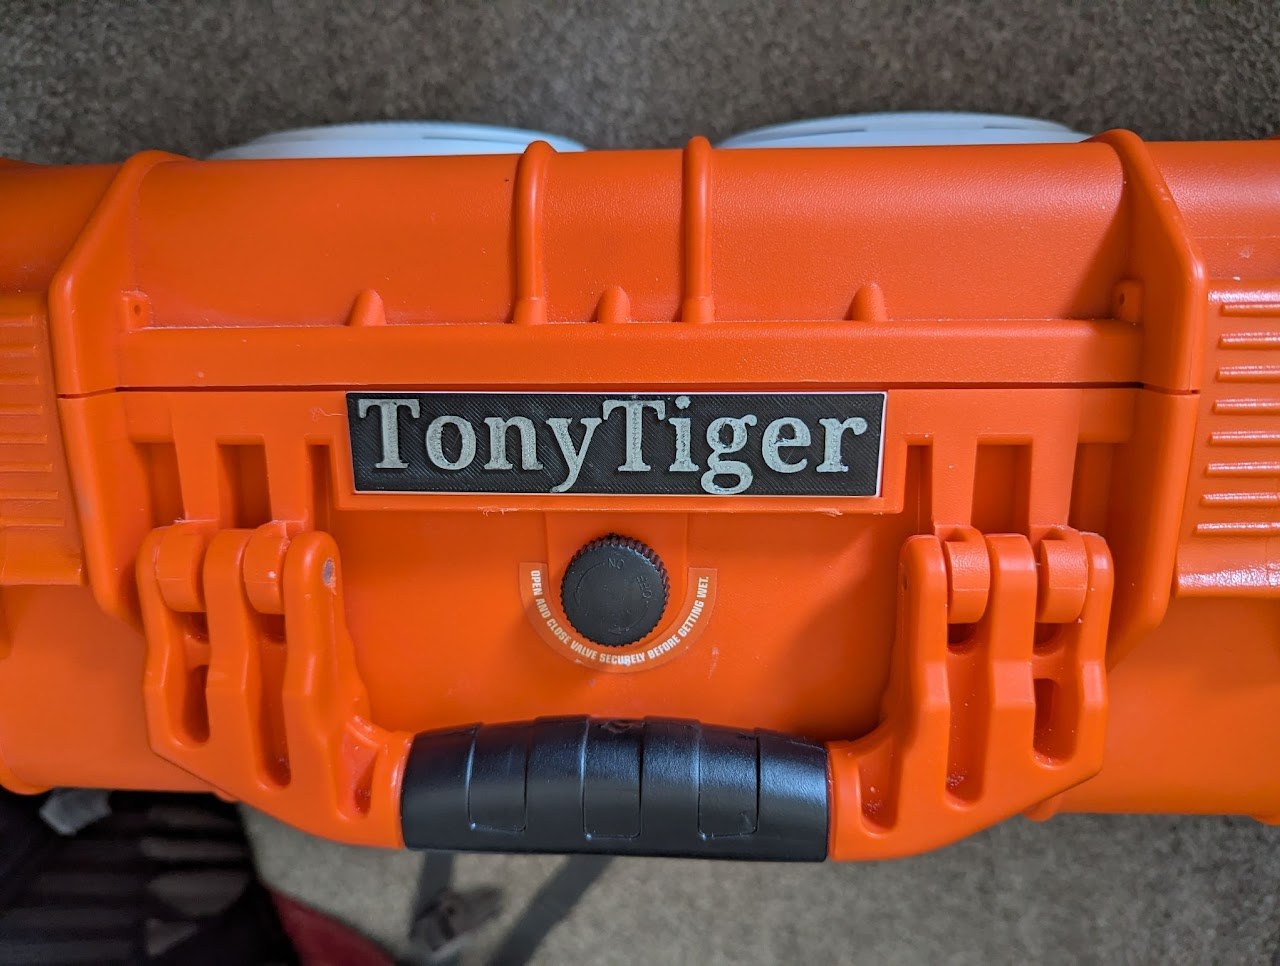
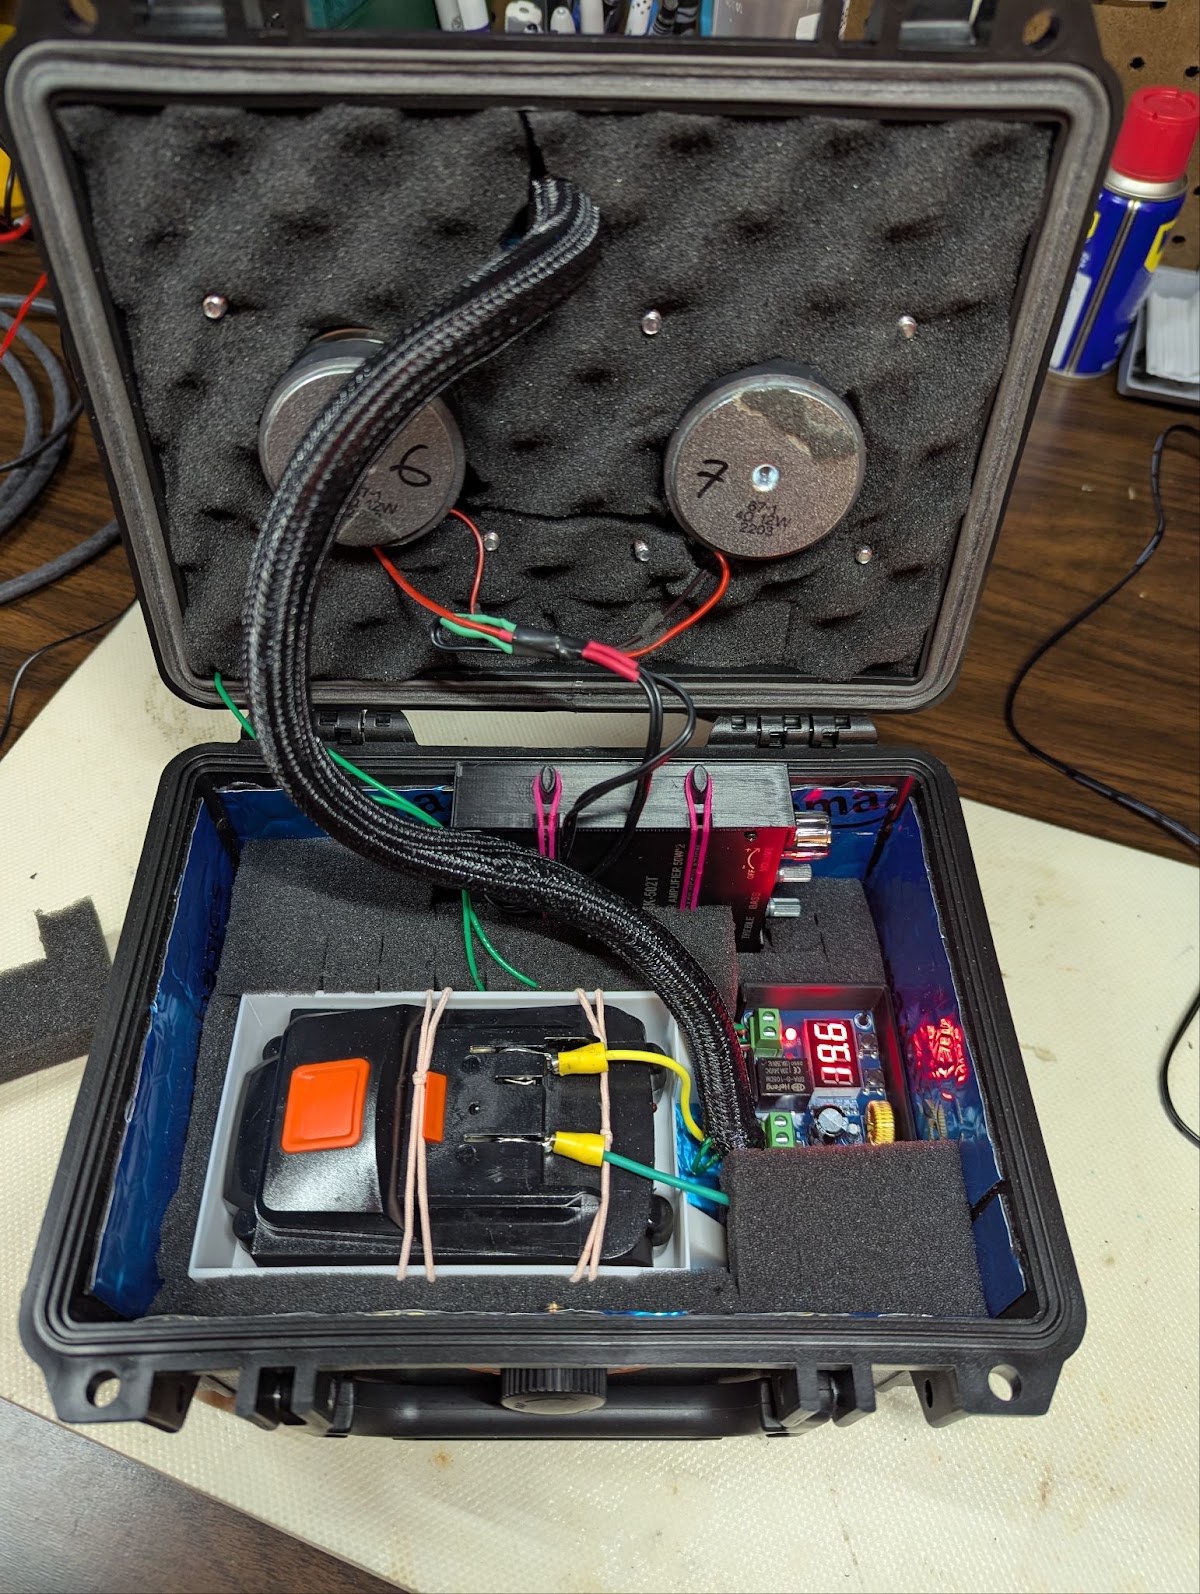
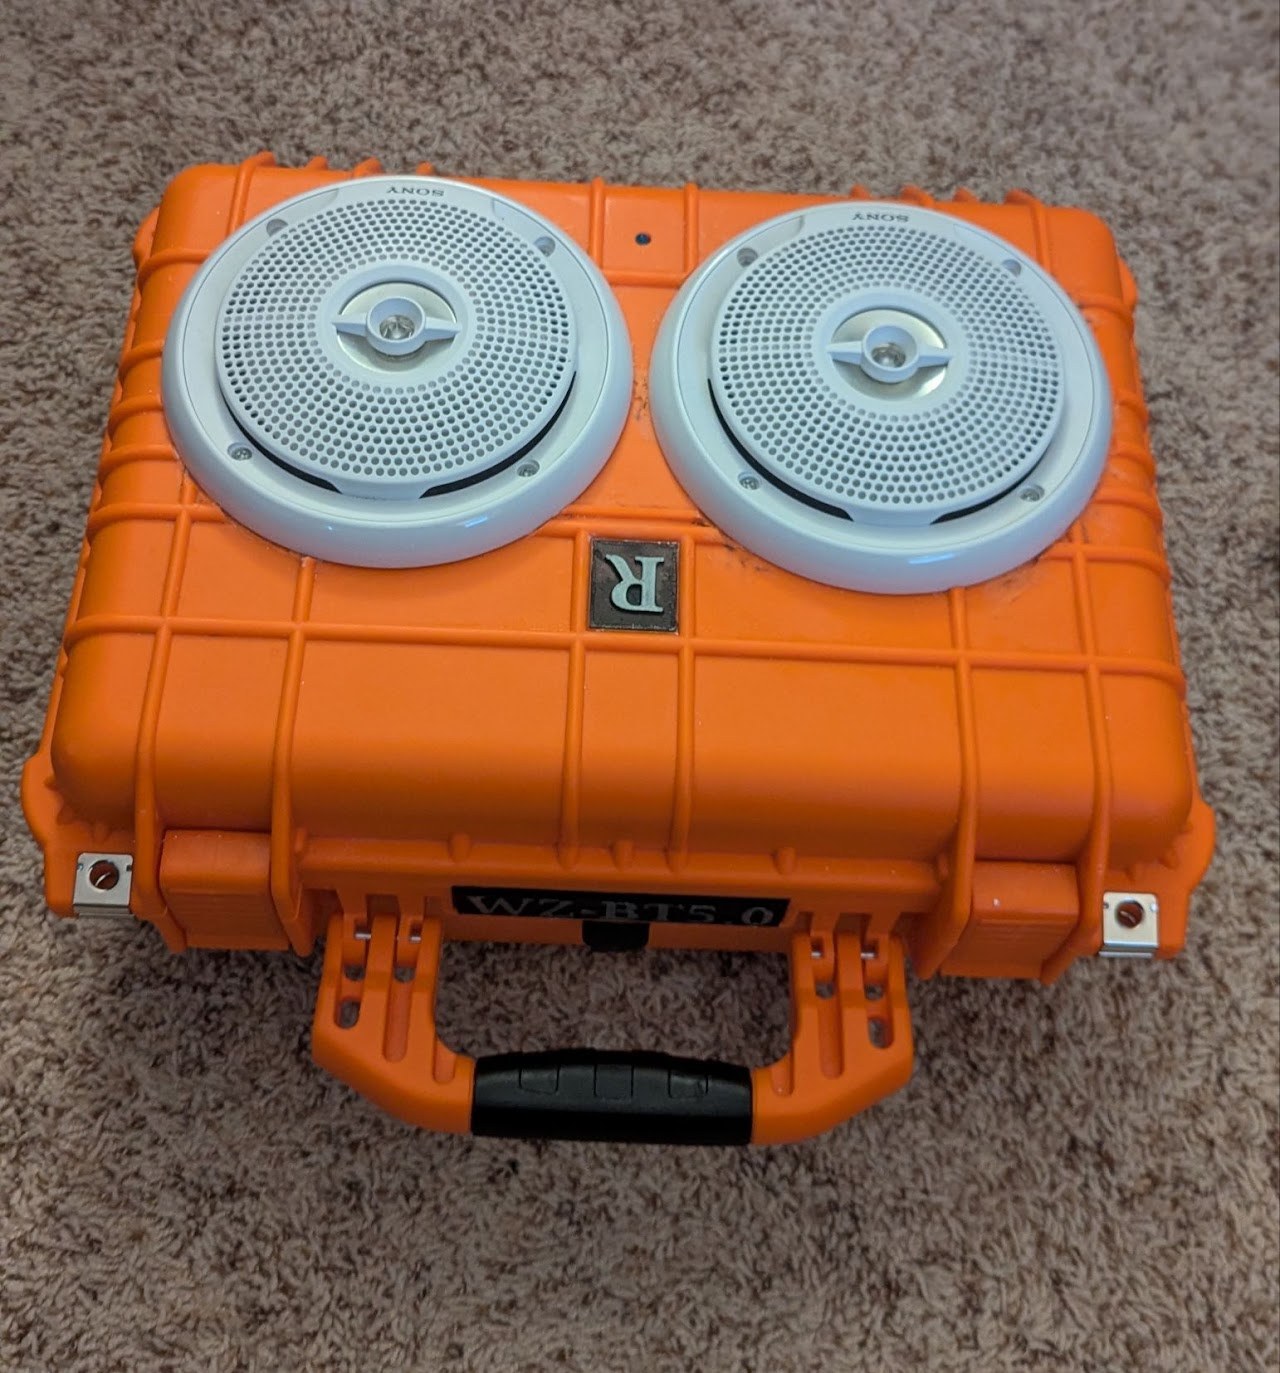
The system is housed in a Harbor Freight Apache 3800 case, selected for its rugged construction, integrated gasket seal, and cost-effective waterproof design. The case provides both impact resistance and environmental protection while offering enough internal volume for large speakers and electronics.
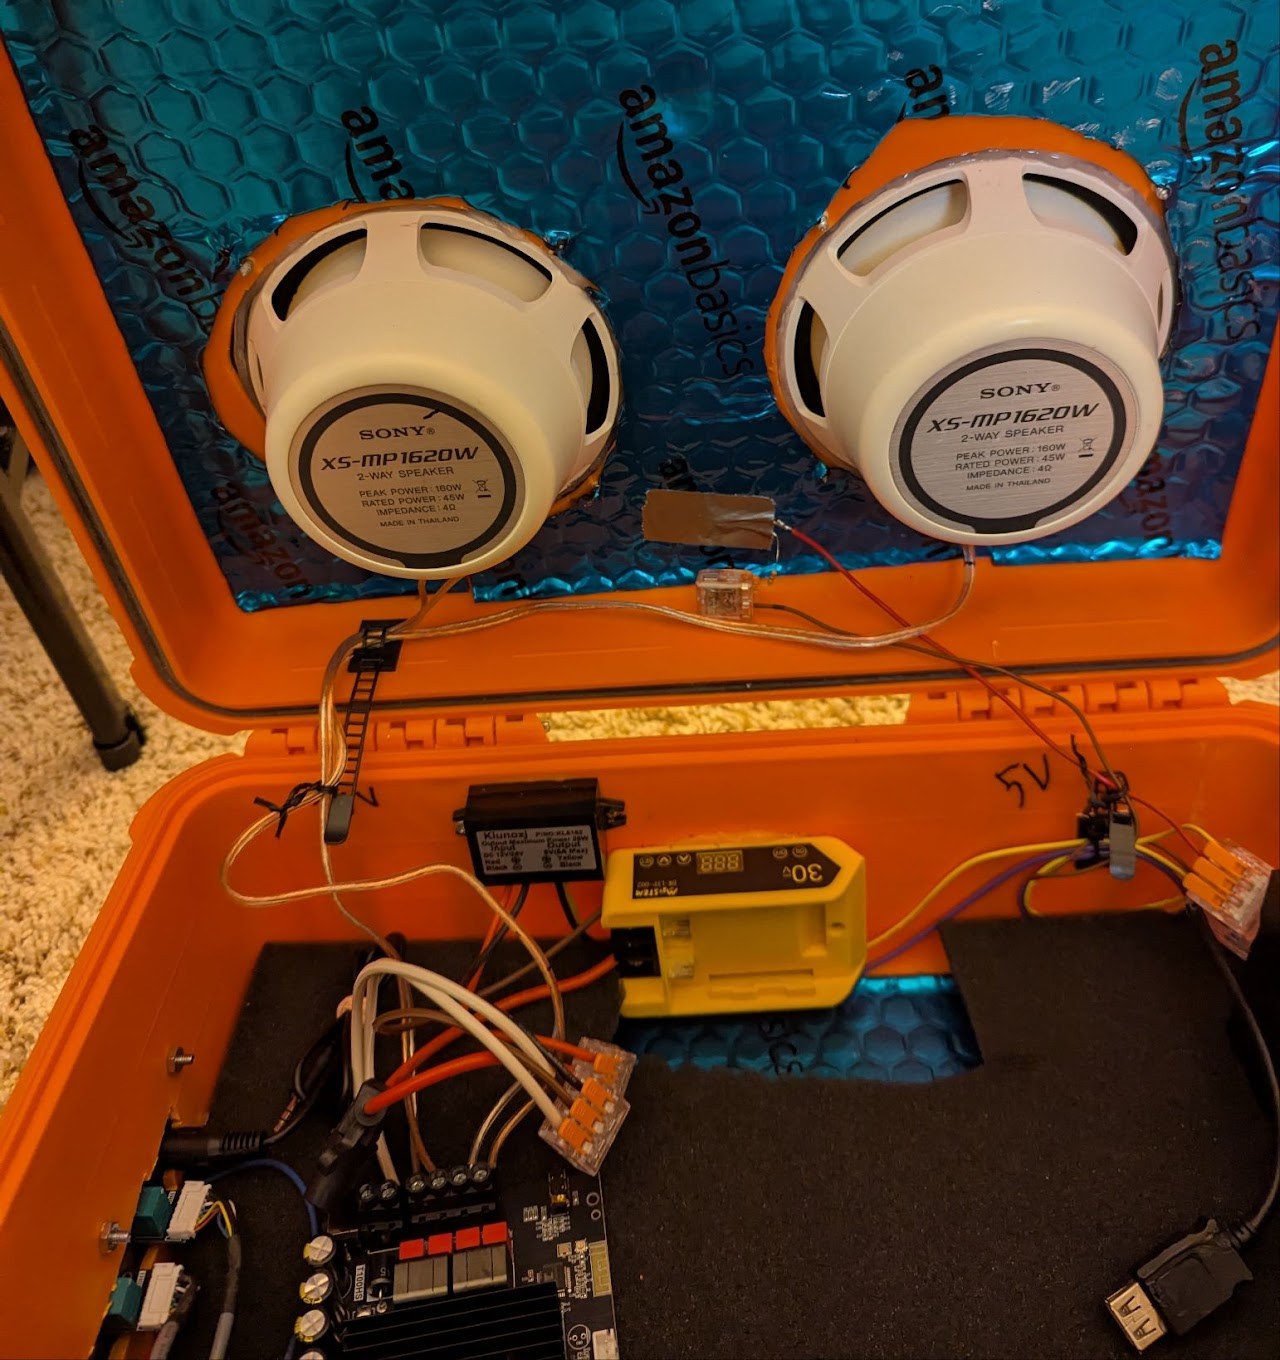
Two 6.5" marine-rated speakers were mounted directly into the case. Marine speakers were chosen specifically for their resistance to moisture, humidity, and corrosion, making them well-suited for outdoor and near-water use.
To improve both sound quality and perceived durability, adhesive-backed sound-deadening material was added to the interior of the enclosure. This serves multiple purposes:
Reduces unwanted vibrations and resonance inside the case
Improves acoustic response by minimizing hollow or “boxy” sound
Adds mass to the enclosure, making the entire assembly feel more substantial and rugged
All mechanical penetrations, including speaker mounts and control interfaces, were carefully sealed to preserve the case’s waterproof integrity.
Power Architecture
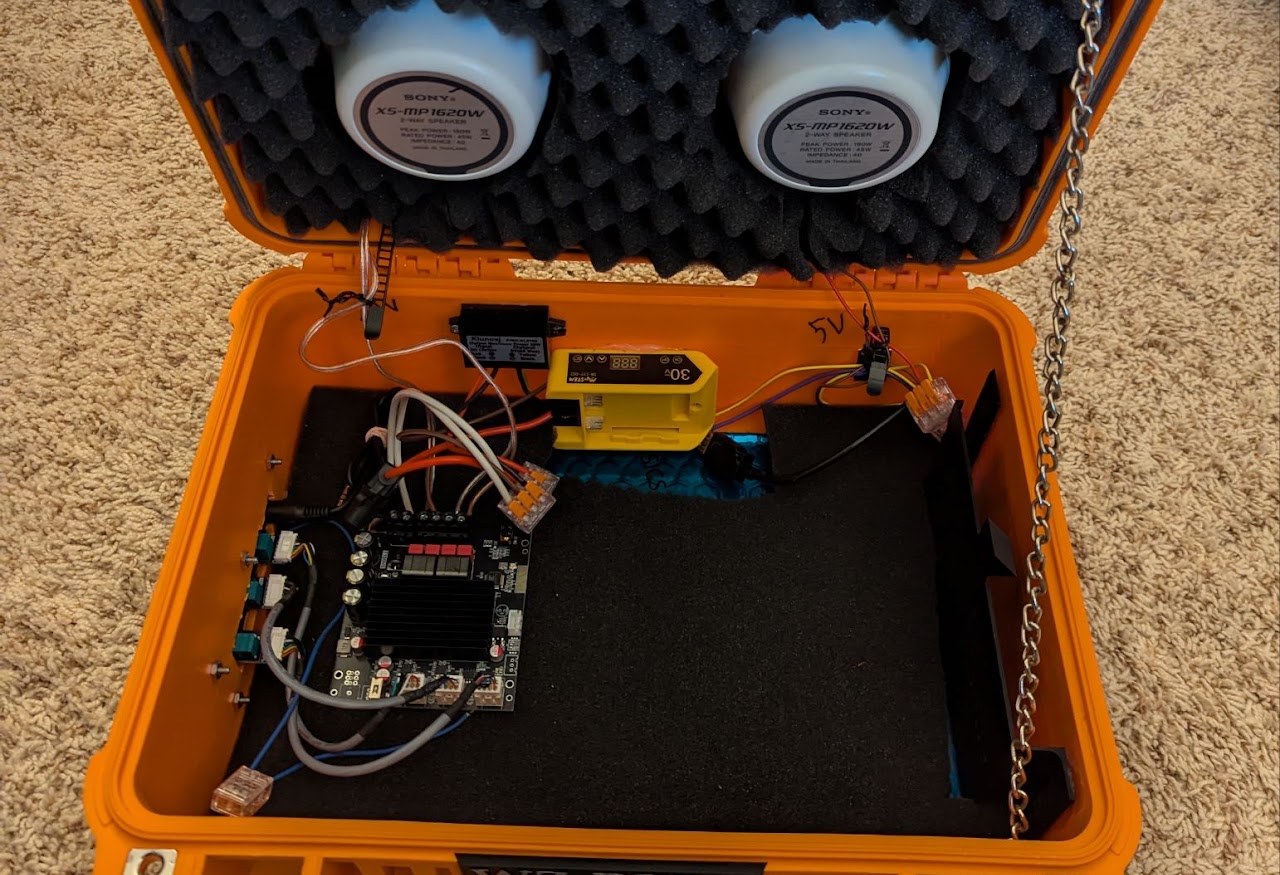
The speaker is powered directly from a DeWalt 20V Max (nominal voltage: 18V) battery using an internal battery adapter. This approach eliminates the need for a custom battery pack while providing long runtimes and easy battery replacement using commonly available tool batteries.
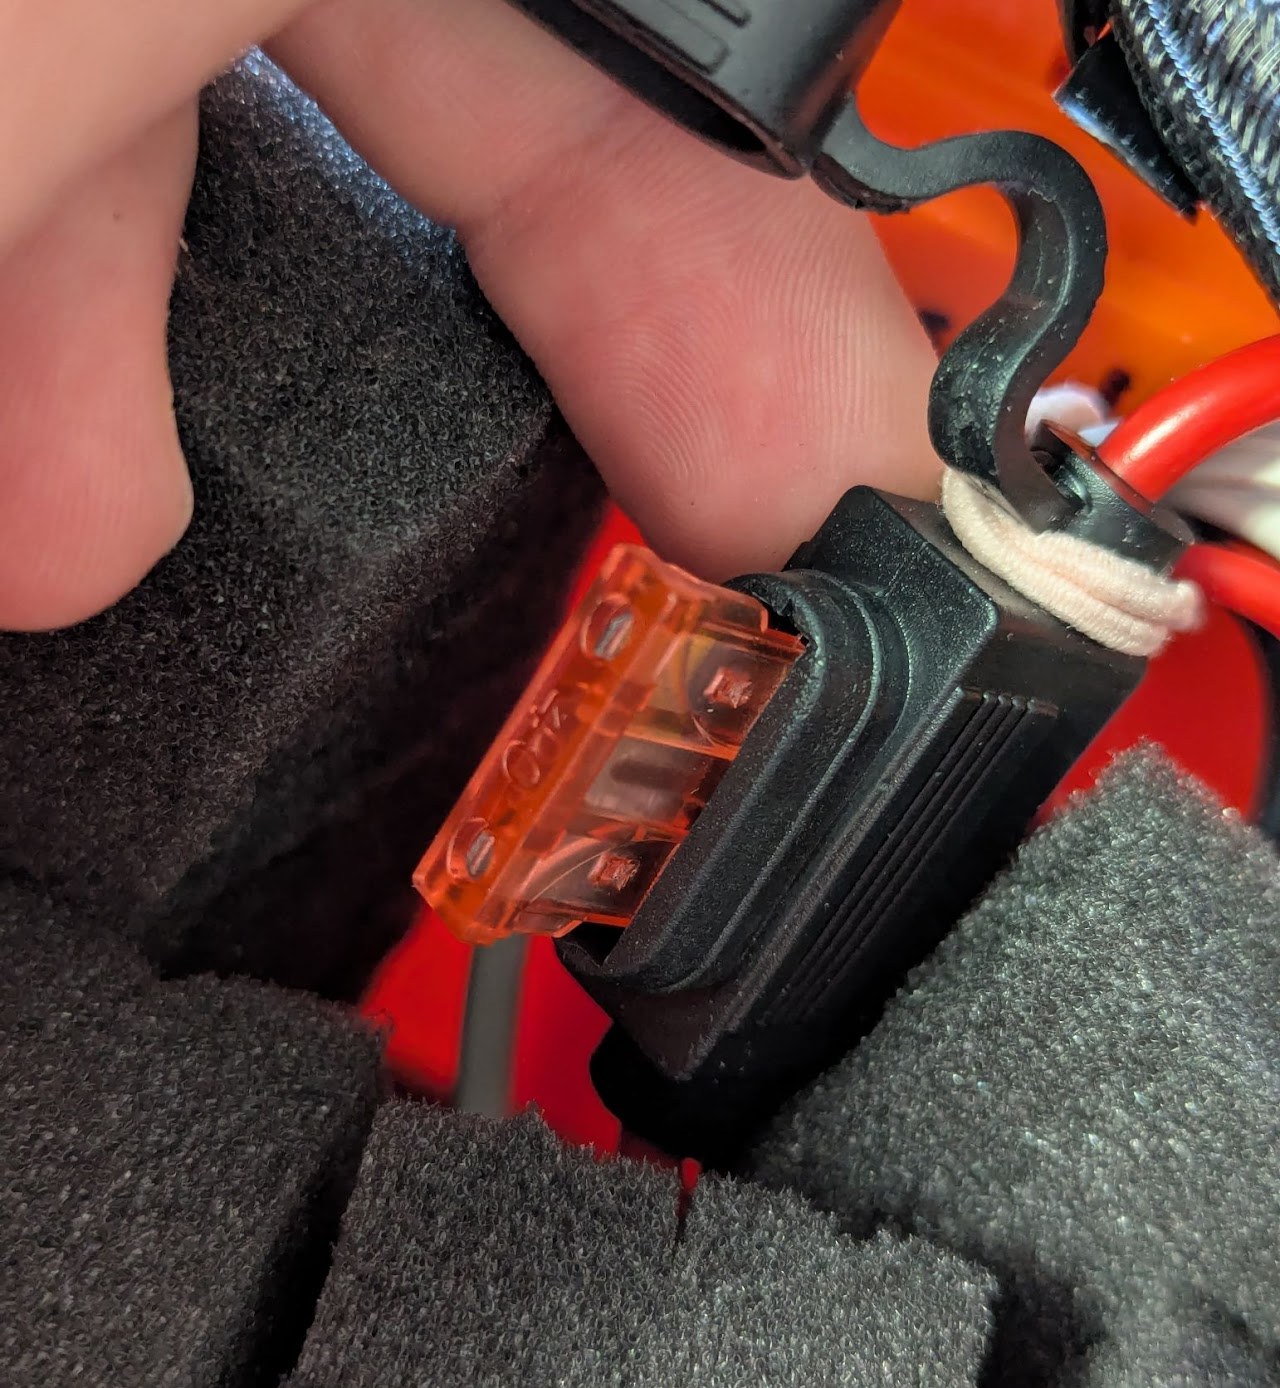
An in-line fuse protects the battery in the unlikely but possible event of a catastrophic short.
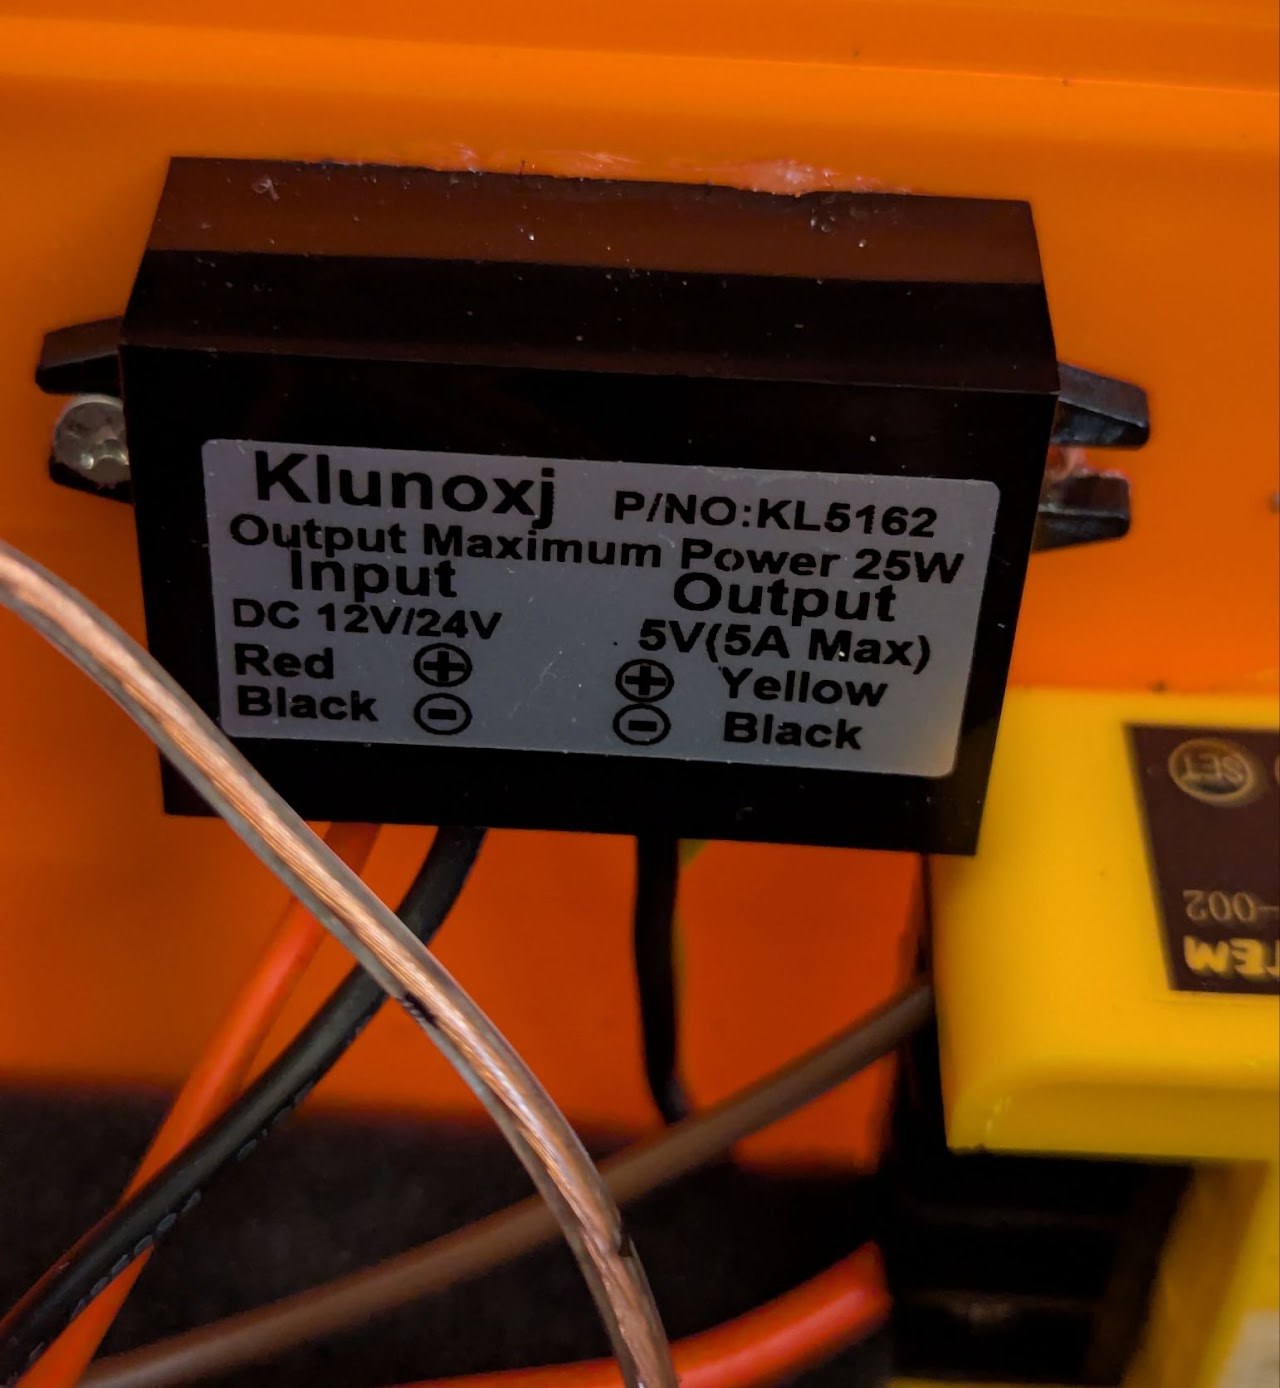
To support auxiliary electronics, a step-down (buck) voltage converter was added to reduce the 18V battery voltage to 5V. This 5V rail powers:
A USB output port, allowing the speaker to charge any 5V USB device
A 5V LED power indicator
Amplifier & Housing
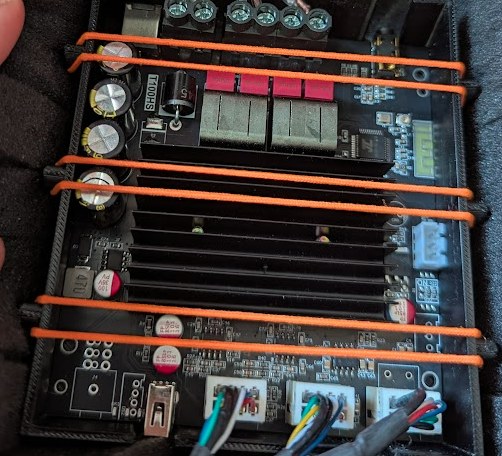
At the core of the system is a T100HS-W Bluetooth power amplifier board, featuring a TPA3221 Class-D amplifier chip capable of delivering 100W × 2 channels. This amplifier was chosen for its high output power, efficiency, and integrated Bluetooth 5 functionality, making it well-suited for a battery-powered, high-volume outdoor speaker.
Early testing used a fully enclosed 3D-printed amplifier housing, but it trapped too much of the heat the amplifier produced, causing the PLA to start deforming and the board temperature to climb past 65°C.
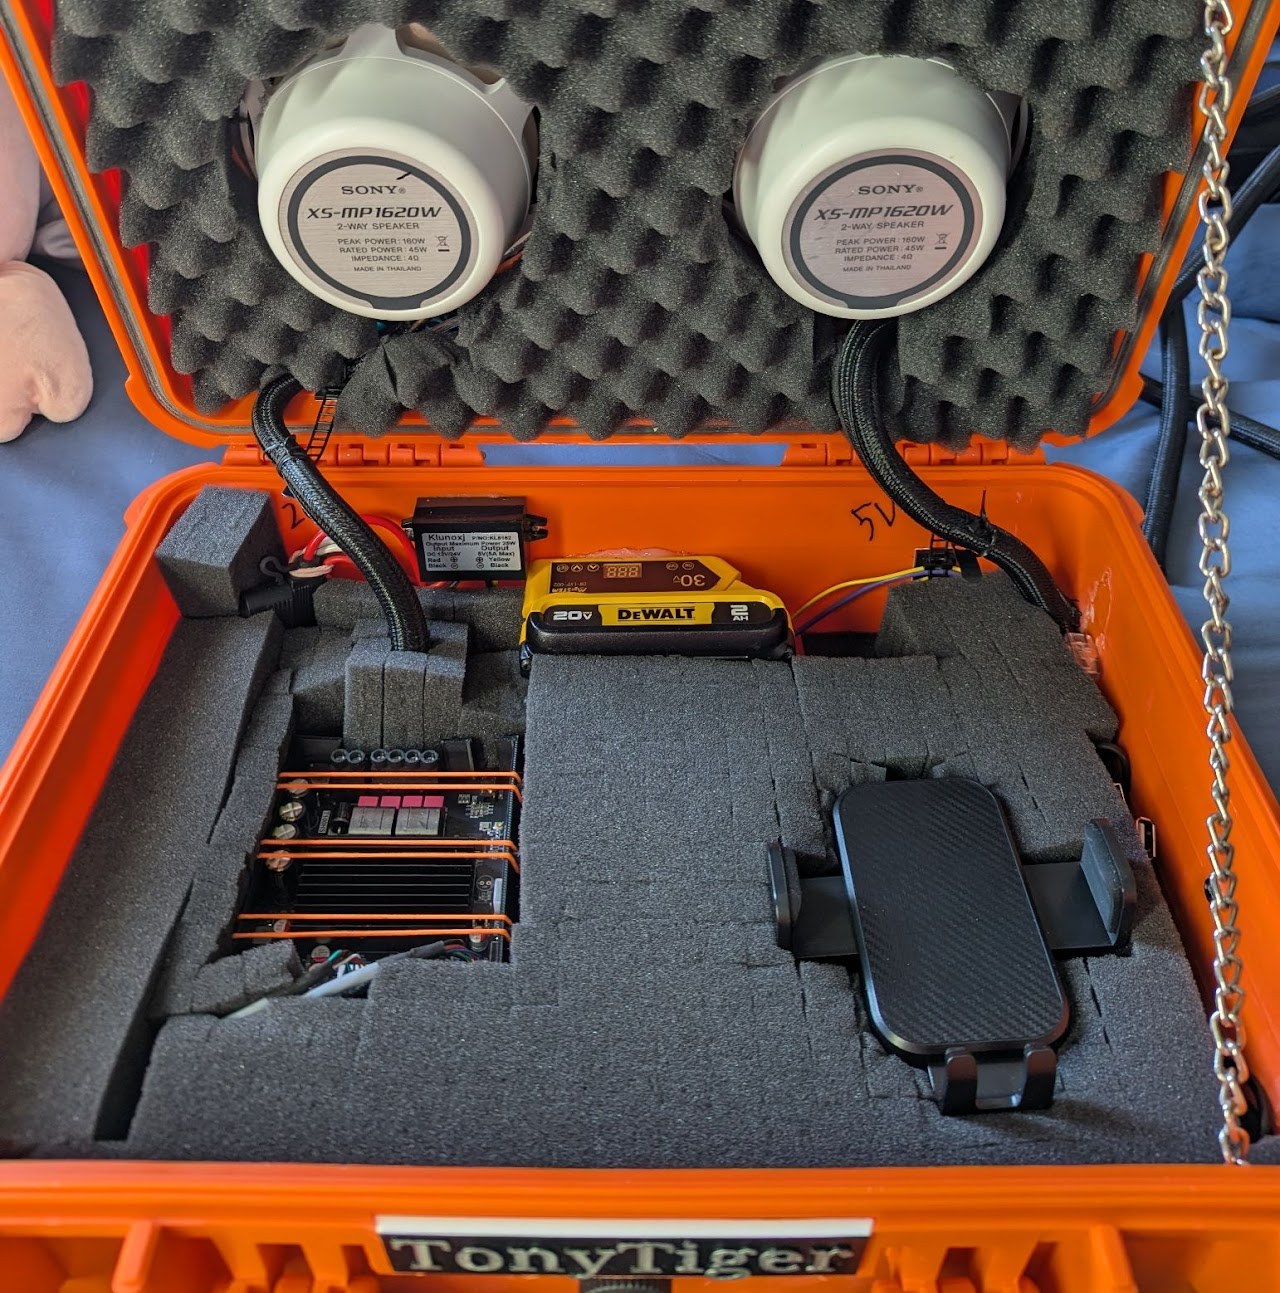
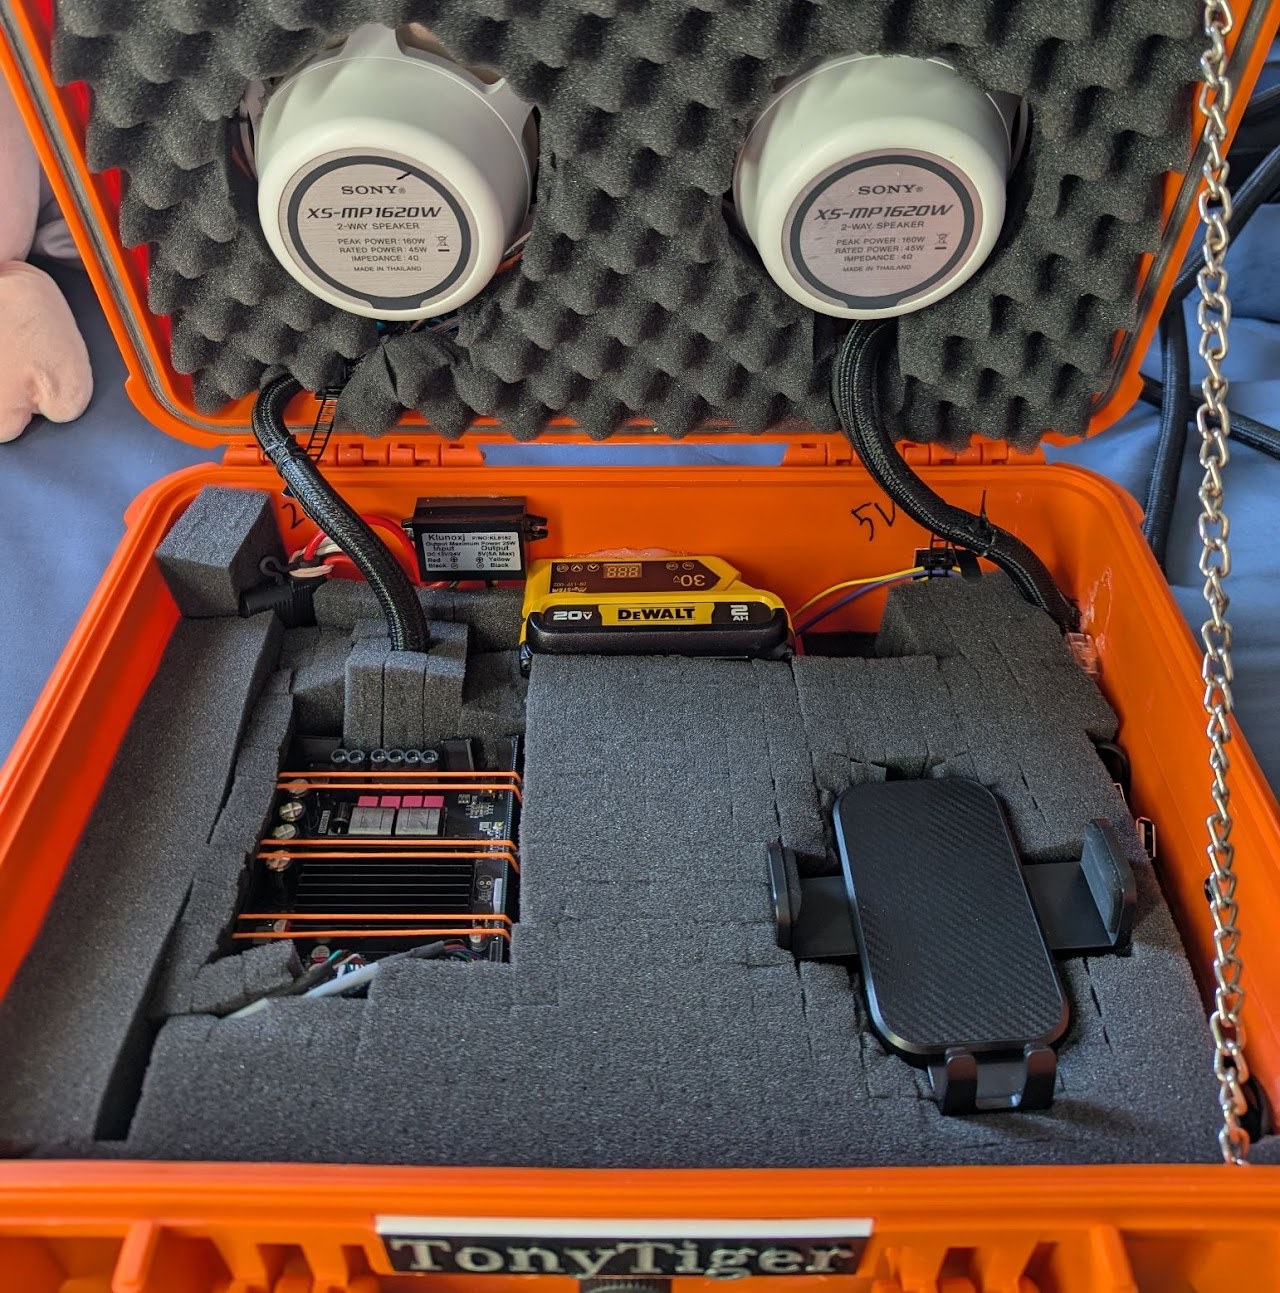
This amplifier is now housed in an open-top 3D printed housing. The 3D printed housing is glued onto the layer of foam below it, and also nested by the surrounding layer of foam. 3 elastic bands are used to hold the amplifier board in the housing. These bands were chosen to allow air circulation around the amplifier board's heatsink. The highest temperature on the amplifier board recorded during testing was 50°C. This reduced operating temperature will help extend the lifespan of the amplifier.
Controls & User Interface
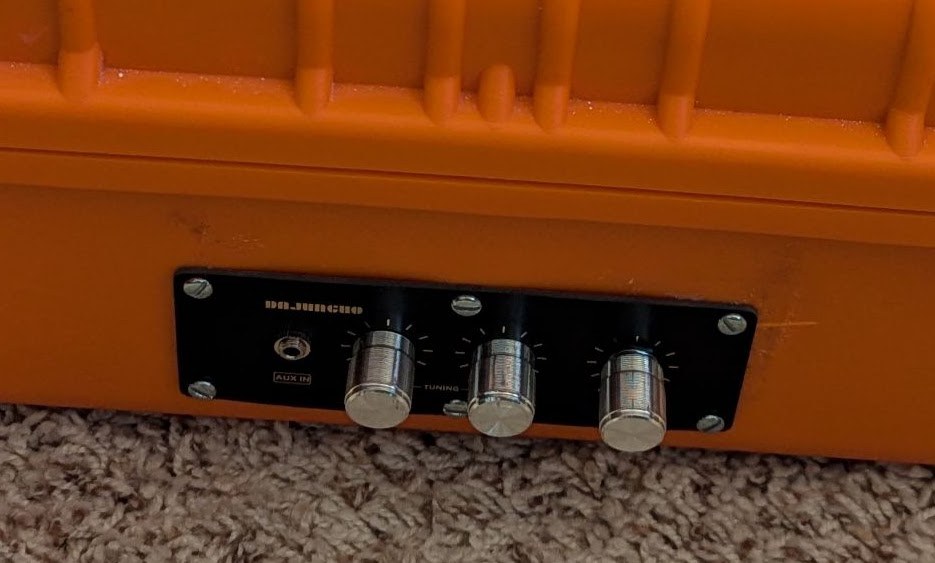
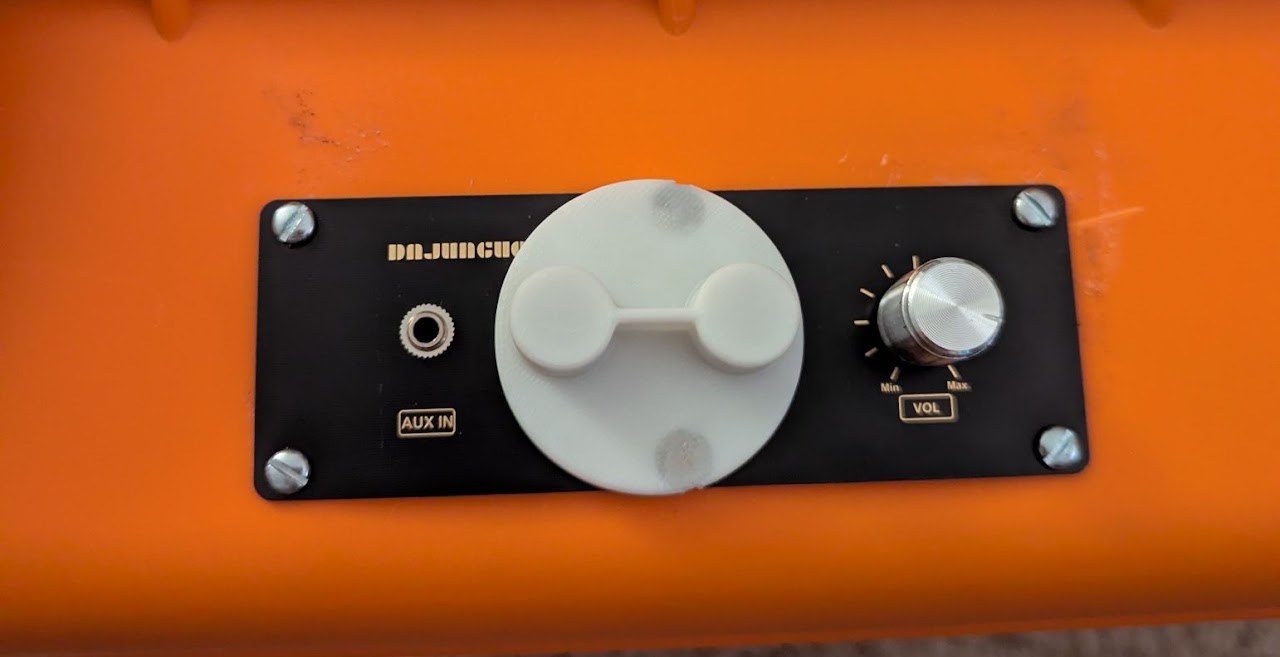
A dedicated external control panel (daughter board) was mounted to the outside of the enclosure, allowing full control without opening the case or relying on a connected device.
The control panel provides:
Volume adjustment
Bass and treble tuning
Media controls (play/pause, next track, previous track)
Amplifier controls (power on, power off, bluetooth pairing, input select)
In addition, the Bluetooth amplifier supports custom device naming, so the broadcast name can be changed from a generic identifier to something recognizable. This small but meaningful detail improves the experience, especially in environments with many nearby Bluetooth devices.
User testing revealed the potential for confusion around the three identical dials. To address this, a simple 3D-printed adapter that selectively covers the bass and treble adjustment knobs was designed, strongly prioritizing the primary control. The adapter attaches using two embedded magnets that interface with the screws securing the control panel to the housing. This approach provides a secure, stable connection during use while remaining easily removable when tonal adjustments are desired.
Integrated phone holder and mount
Integrated Phone Storage & Mount
To improve usability in outdoor environments, the speaker includes a dedicated internal storage area for a phone. With external media controls already available, this allows the phone to be protected while the speaker remains fully usable. Several approaches were explored to achieve a secure, adjustable solution.
Early custom 3D-printed holders accommodated multiple phone sizes but did not provide sufficient retention.
Final design uses a commercially available car phone holder for strong clamping and adjustability. This holder is connected to a 3D-printed 17 mm ball mount, which is glued to the base of the speaker. This combination enables the ideal location for the phone in the speaker.
The 5V USB port sits close to this mount, so a phone can charge while stored in the speaker. A USB-A to USB-C adapter is also stored inside to accommodate different charging cables.
The assembly has proven durable in use, withstanding several unintended drop events while continuing to hold the phone securely.
Waterproofing Strategy
Maintaining water resistance was a key design focus throughout the build. Beyond the case’s built-in gasket seal, silicone adhesive was used extensively at critical interfaces to ensure long-term waterproofing and vibration resistance.
Silicone adhesive was applied to:
Seal component interfaces and penetrations
Provide strain relief and vibration damping for internal electronics
This approach ensures that both mechanical and electrical connections remain protected even in wet or high-vibration conditions.
Flotation & Outdoor Use Considerations
Component placement and material choices were made with buoyancy in mind. By preserving internal air volume and carefully managing weight distribution, the speaker is able to float if accidentally dropped into water, rather than sinking and becoming unrecoverable.
These considerations make the speaker particularly well-suited for:
Canoeing and kayaking trips
Lakeside and beach use
Campsites and off-grid environments
Outcome & Takeaways
The completed speaker delivers loud, clear audio with strong low-end response, long battery life, and excellent durability in outdoor conditions. By combining off-the-shelf components with thoughtful mechanical, electrical, and environmental design, the project achieves a balance of performance, reliability, and usability.
This project highlights skills in:
Power electronics and voltage regulation
Audio system integration
Waterproof mechanical design
User-focused interface design
Designing for real-world environmental constraints
Overall, it represents an end-to-end DIY product build that prioritizes robustness, serviceability, and real-world usability, not just functionality on a workbench.
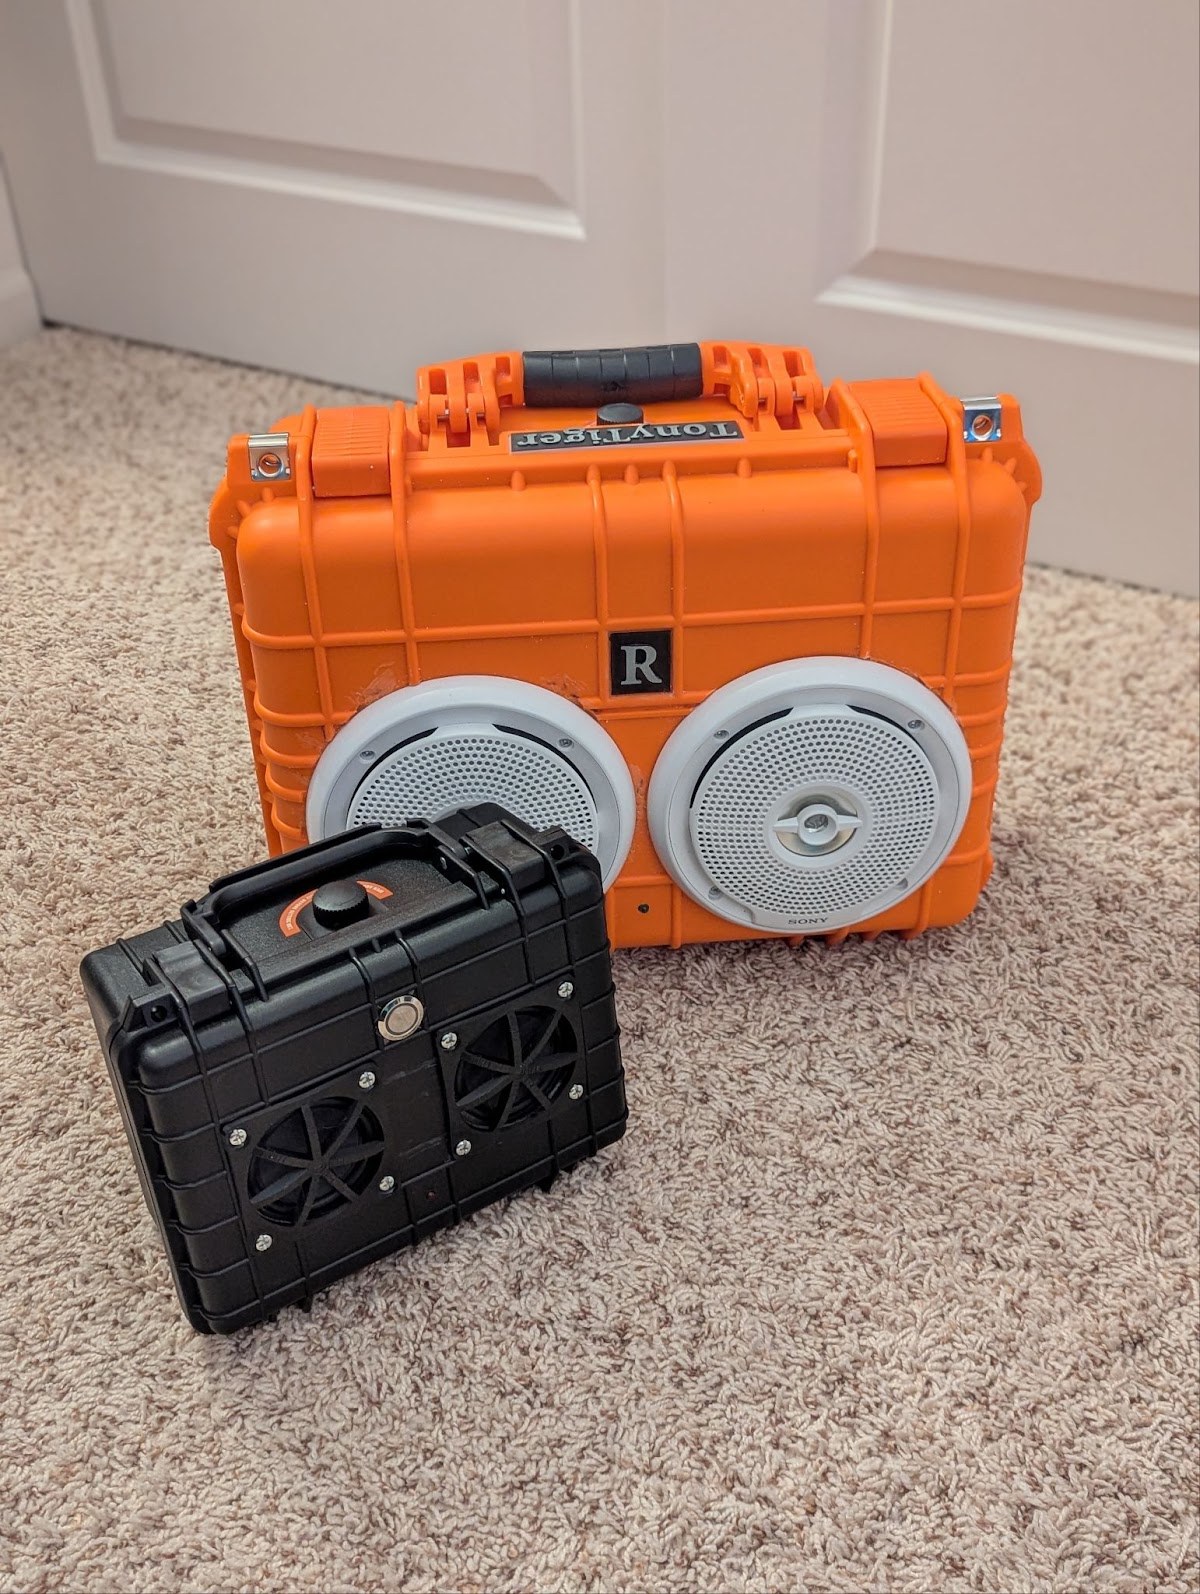
Compact Version
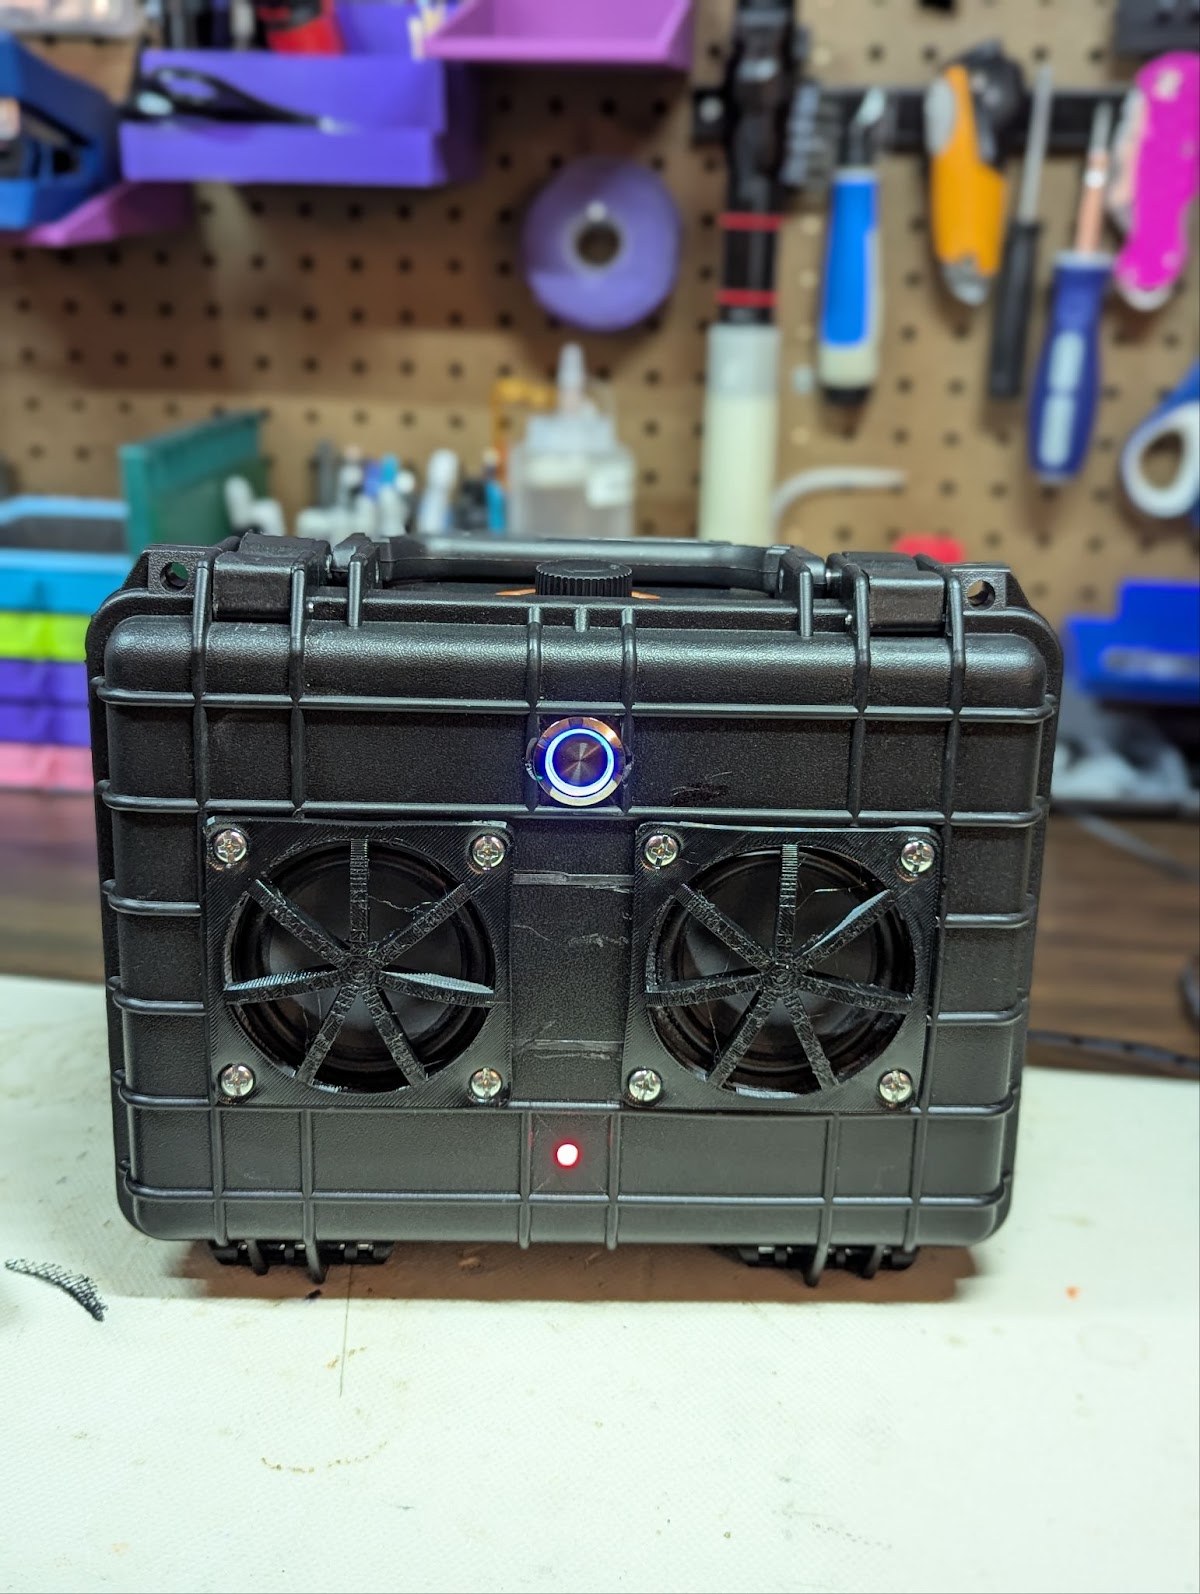
A second iteration of the speaker system was developed with the primary objective of reducing overall enclosure size while maintaining strong acoustic performance. This version was built around an Apache 1800 protective case, using the rugged, gasket-sealed housing as the primary enclosure structure. Leveraging an off-the-shelf case reduced custom fabrication requirements while providing durability, impact resistance, and inherent portability.
To achieve a smaller and cleaner external profile, the volume, bass, and treble controls were relocated inside the enclosure. While still fully adjustable, modifying these parameters requires opening the case, allowing the exterior to remain compact and sealed. Smaller drivers were selected to fit within the constrained internal geometry, and mounting structures were designed to ensure rigidity and minimize vibration within the plastic shell.
The speaker grilles were custom 3D-printed in TPU, providing a flexible and impact-resistant protective layer that resists cracking while remaining acoustically transparent. Despite the reduced scale and simplified interface, careful component selection and tuning enabled the system to retain strong clarity and output relative to its size, demonstrating effective management of mechanical, acoustic, and usability tradeoffs.
Future Version Considerations
While the current design meets the original goals, a future iteration would focus on expanding versatility and refinement rather than changing the core architecture.
One area for improvement is enclosure color options. The Apache 3800 case was limited to orange, black, and tan. Black raised concerns about heat absorption during extended sun exposure, while tan was less visually appealing for this application, leaving orange as the most practical choice. A V2 would explore alternative cases, coatings, or finishes that offer better thermal performance and greater visual customization.
Another opportunity is broader battery compatibility. The current system uses a DeWalt 20V Max battery, chosen for availability and performance. Future versions could support interchangeable battery adapters or a more modular power input design, allowing the speaker to work across multiple tool battery ecosystems or with a dedicated internal battery pack.
Finally, a V2 would ideally integrate an external LED work or scene light, controlled by a dedicated button. This addition would extend the speaker’s usefulness beyond audio, supporting campsite lighting, low-light task work, or general outdoor illumination, further positioning the device as a multi-purpose outdoor utility platform.
A quick guide for every version of the build (the Apache 3800, the compact Apache 1800, and variants). It is a rugged, water-resistant, battery-powered speaker. Treat it like the outdoor electronics it is and it will last for years.
Power it up
Drop a charged DeWalt 20V Max battery into the internal adapter and latch it in, or connect the power bank on that version.
Press the amp power button on the control panel, then pair over Bluetooth and look for the custom device name.
Volume, bass, and treble are on the outside panel on the full-size build. On the compact version they live inside the case.
The USB port is a 5V output for topping up a phone, not an input. A USB-A to USB-C adapter is stored inside.
Battery and charging
Do not charge and play at the same time. This matters most on the power-bank versions: let the bank charge fully, unplug the charger, then use the speaker.
On DeWalt versions, charge the pack on a genuine DeWalt charger with the pack removed from the speaker, and use only genuine DeWalt 20V Max packs.
Charge on a hard, non-flammable surface, never on carpet or fabric, and not unattended overnight.
Remove the battery or disconnect the power bank for transport and long-term storage.
Water and the seal
It shrugs off rain, splashes, and a brief dunk, and it floats. It is water-resistant, not a dive rig, so do not leave it submerged.
Never install the battery, power on, or use the USB port if there is any water or condensation inside. Open it, dry it completely, then reassemble.
Keep the gasket and case lip clean, with no sand or grit, so it can seal, and press every latch until it clicks.
Close the manual screw vent before any water use by turning it clockwise until snug. Open it to release pressure after a big temperature or altitude change, such as after a flight, then close it again before the speaker goes near water.
Heat
The amplifier makes heat by design. Do not block the internal amp housing or pack the case so full that air cannot move.
Avoid long stretches at high volume sealed in direct sun, and park it in the shade when you can.
If something seems off
Unusual heat, a smell, swelling, buzzing, or any water inside means stop: power off, remove the battery or disconnect the power bank, and let it dry and cool before using it again. When in doubt, open it up and look before powering back on.
This is a hand-built device, not a certified consumer product. A little common sense goes a long way.
Where people are visiting rohansagarwal.com from, live. First-party and cookie-free: no third-party analytics, no consent banner, nothing to block.
…
How it works: Cloudflare resolves each visitor's approximate location at the edge (server-side, no cookie) and forwards it to a small stats service running on Kamino, which counts unique visitors per coarse location. Only country and region are shown here, never a precise address, and no IP is ever stored. Counts are per unique visitor, so a place ticking up means a genuinely different person stopped by.